
Want to know the secret to taking a truly aesthetic picture? It all happens before you even touch your phone's camera button. The real magic is in the prep work: nailing down a vision with a clear color palette, choosing props that tell a story, and finding a location that lets your subject pop. This bit of planning is what separates a random snapshot from a compelling, professional-looking image.
The Foundation of an Aesthetic Picture

The road to a captivating photo starts long before you even think about pressing the shutter. This initial planning phase is what elevates an image from just another picture on your camera roll to something truly memorable, whether it's for your Instagram grid or a Shopify product page.
Think of it as creating a mini mood board for your shoot. This groundwork ensures every single element in your frame works together, saving you from a world of editing pain later on and leading to a much stronger final shot.
Define Your Color Palette
Color is everything when it comes to mood. Are you going for a bright, clean, and airy vibe? Or is dark and moody more your style? A cohesive palette is the fastest way to make your photo look intentional and polished.
Try to stick to two or three main colors to start. For a minimalist product shot, you might lean into whites, beiges, and a touch of soft gray. If you're shooting a vibrant lifestyle photo, you could play with terracotta, deep green, and a pop of mustard yellow.
Key Takeaway: Sticking to a limited color palette is the key to visual harmony. It instantly guides your choices for props and backgrounds, making sure everything feels like it belongs together.
Gather Storytelling Props
Props aren't just there to fill space; they add personality and give your photo a story. Instead of just grabbing random items from around the house, be deliberate. Choose props that help tell the story of your main subject.
- For a cozy home decor shot: Think about a soft, folded throw blanket, a steaming mug of coffee, and a book with a worn cover.
- For a sleek tech product: Consider a minimalist notebook, a stylish pen, and a small, modern desk plant to add a bit of life.
These little details are what make a scene feel authentic and draw the viewer in. You'll also want to keep the final destination of your photo in mind. For advice on getting the dimensions right, you can learn more about how to resize your image for different uses. The right props and the right size make all the difference.
Find the Perfect Location
Your background is just as important as the subject itself—sometimes even more so. A cluttered or distracting background will steal the spotlight from what really matters. Keep an eye out for clean, simple locations that vibe with your color palette.
Often, the simplest backdrops are the best. A blank wall, a clean wooden tabletop, or a simple linen sheet can work wonders. If you're shooting outside, look for a spot with even light and an uncluttered background, like a simple brick wall or an open field. This small shift in how you see locations will instantly level up your photos from simple snaps to truly aesthetic shots.
Getting the Light and Composition Just Right

With a solid concept in mind, it's time to get behind the camera. This is where we focus on the two pillars that make or break any photo: light and composition.
Nailing these two elements is what elevates a simple smartphone snap into something that looks intentional, professional, and truly aesthetic. The best part? You don't need a professional studio. Everything you need is probably within a few feet of you right now.
Let's walk through a few simple, powerful principles that will instantly level up your photos. From finding the perfect light to arranging your subject, these techniques are all about guiding the viewer's eye and creating a scene that feels balanced and compelling.
It All Starts With Light
Before you even think about camera settings, think about light. The most beautiful, flattering, and professional-looking light is almost always the free kind pouring through a nearby window. Natural light gives you soft, gentle shadows that create depth without the ugly, harsh look of a direct camera flash.
Set up your shot next to a window, but try to avoid direct, blazing sun. What you're really after is bright, indirect light. This is the kind of light that wraps beautifully around your product, minimizes harsh shadows, and gives everything a clean, high-end feel. Play around by moving your setup closer to or farther from the window to see how the light and shadows change.
My favorite trick: If the light still feels a bit too strong, just hang a plain white bedsheet over the window. It acts as a massive diffuser, scattering the light and making it incredibly soft. It’s a DIY softbox that works wonders.
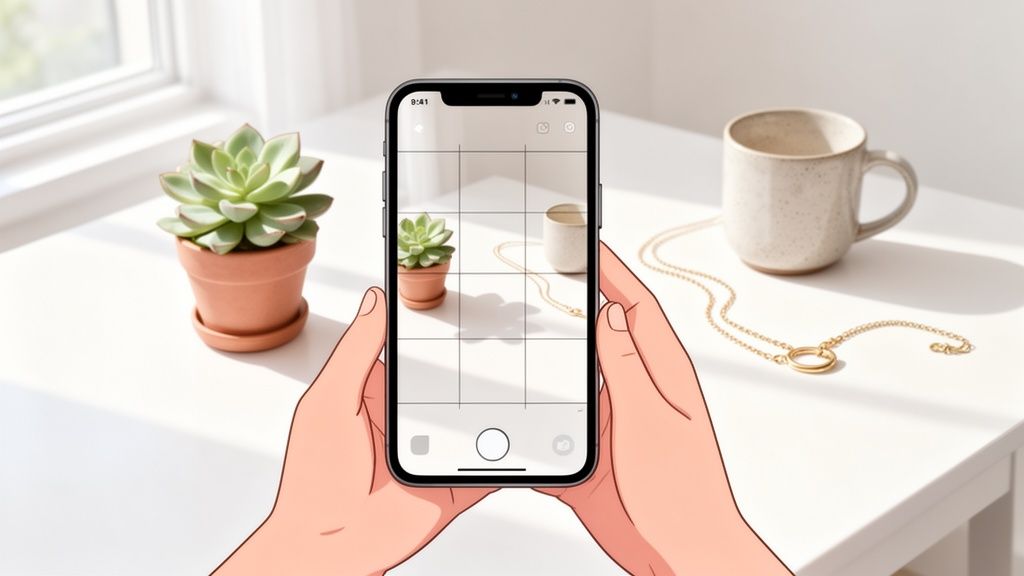
Turn On Your Camera Grid. Now.
This is the single most important setting on your phone for better photos. Seriously. Tucked away in your camera settings is a little feature that overlays a 3×3 grid on your screen. It’s the key to instantly applying classic composition rules.
Here’s how to find it:
- On iPhone: Pop over to Settings > Camera > and just toggle on "Grid."
- On Android: Open your Camera app, head into the settings, and look for "Grid lines" or a similar option.
Don't take another photo until you've turned this on. It’s a total game-changer for composing your shots with intention.
A Few Simple Rules for Better Composition
With the grid active, you can finally stop putting everything dead center. Think of these "rules" as reliable guides, not strict laws. They’re a fantastic starting point for creating photos that feel balanced and look far more interesting.
The Rule of Thirds
This is photography 101 for a reason. Your grid divides the screen into nine boxes. The whole idea is to place your subject not in the middle box, but along one of the lines or, even better, where two lines intersect.
Placing your product this way creates a much more dynamic and natural-feeling image. For instance, you could align the edge of a bottle with one of the vertical lines, or place the most important detail of your product right on an intersection point. It’s a simple shift that encourages the viewer's eye to move through the frame instead of just getting stuck in the middle.
The Power of Negative Space
Ever notice how the most aesthetic photos feel clean and uncluttered? That’s all thanks to the clever use of negative space—the empty, "breathing room" around your subject.
Don't be afraid to leave big chunks of your frame empty. This intentional emptiness actually makes your subject stand out even more, making it the undeniable hero of the shot. A single candle against a plain background is a perfect example; all that empty space focuses every bit of attention right where you want it.
Find the Leading Lines
Look around your scene for natural lines that you can use to point the viewer’s eye toward your subject. These leading lines are everywhere once you start looking for them: the edge of a table, the pattern on a rug, or even the curve of a prop.
When you position your subject at the end of a strong line, you create a visual pathway that pulls the viewer right into the image. It adds a sense of depth and flow that makes the entire photograph far more engaging.
Essential Smartphone Camera Shooting Techniques

Alright, you’ve planned your shot and sorted out your lighting. Now for the fun part: actually using that powerful camera in your pocket. Moving beyond the basic point-and-shoot method is what separates a quick snap from a deliberately crafted, aesthetic photo.
These techniques give you the control to tell your phone exactly what you want it to do, which is the key to turning a good idea into a fantastic image.
Nail Your Focus and Exposure
Ever take a photo where the background is tack-sharp but your product is slightly soft? Or worse, your beautiful white item is so bright it looks like a glowing blob? That's your phone's auto-mode making a guess, and it's often the wrong one.
This is where you need to take the wheel. On most phones, you can simply tap the screen to tell the camera where to focus. But here's the real game-changer: tap and hold on your subject.
You’ll usually see a yellow box and a little sun icon pop up. This means you’ve activated the AF/AE Lock (Auto-Focus/Auto-Exposure Lock). Your focus and brightness are now locked in, so they won't shift around even if you move the phone.
With the focus locked, you can now fine-tune the brightness by sliding your finger up or down. Sliding down makes the image darker—great for a moody vibe or saving details in highlights. Sliding up brightens the scene, which is perfect for lifting shadows.
Expert Tip: Try intentionally underexposing your shot just a hair. It's a classic trick that helps preserve detail in the brightest parts of your image. You can always bring the shadows back up in editing, but once a highlight is blown out, that detail is gone for good.
Master Your Camera Modes
Your phone's default camera mode is great for everyday snaps, but dedicated modes can unlock new creative possibilities. Knowing which one to use for a specific aesthetic shot can save you a ton of time.
This table breaks down some of the most useful modes you'll find on modern smartphones.
Key Smartphone Camera Modes for Aesthetic Shots
| Camera Mode | Best Used For | Key Benefit |
|---|---|---|
| Portrait Mode | Isolating a single product | Creates a beautiful, blurry background (bokeh) that makes your subject pop. |
| Pro/Manual Mode | Maximum editing flexibility | Lets you control everything—ISO, shutter speed, white balance—for ultimate control. |
| Macro Mode | Capturing tiny details | Gets you incredibly close to show off textures, materials, or craftsmanship. |
| Night Mode | Low-light situations | Uses longer exposures to capture bright, clear images without a flash. |
Familiarize yourself with these modes. A quick switch to Portrait or Macro can instantly elevate a simple shot into something that looks far more professional and intentional.
Experiment with Different Angles
Don't just stand there and shoot everything from eye level! The angle you choose has a massive impact on the story your photo tells. Get low, get high—move around and see what makes your subject look its best.
Here are a few essential angles to get you started:
The Top-Down (Flat Lay): A perennial favorite for a reason. Shooting directly from above is perfect for creating organized, graphic compositions. It’s a go-to for food, small accessories, and anything you want to arrange neatly.
The 45-Degree Angle: This is your workhorse. It’s the most natural perspective, showing the product clearly while also giving it a sense of depth and dimension. When in doubt, start here.
The Eye-Level (Straight-On) Angle: Shooting at the same height as your product gives it a sense of presence and importance. It works wonders for things like bottles, electronics, or anything you want to feel a bit "heroic."
Shoot in RAW or Pro Mode If You Can
If your phone has a "Pro" or "RAW" shooting mode, use it. Think of it as your secret weapon for incredible editing power.
When you take a standard photo (like a JPEG), your phone processes it for you, making permanent decisions about color, sharpness, and compression. A RAW file, however, is like a digital negative. It captures all the unprocessed data directly from the camera’s sensor.
This gives you vastly more information to work with when you edit. You have way more control over tweaking the white balance, recovering seemingly lost details in shadows and highlights, and really dialing in your aesthetic. It’s the best foundation you can give yourself for the final editing stage.
Editing Your Photos to Achieve the Aesthetic Vibe
Snapping the picture is just the beginning. The real magic—the part where you dial in that specific aesthetic you’ve been picturing—happens during the edit.
You don’t need to be chained to a desktop with complicated software to pull this off. Honestly, most of the heavy lifting can be done right on your phone. Your built-in Photos app is more powerful than you think, and free tools like VSCO or Lightroom Mobile are game-changers. The goal isn't to create an entirely new image, but to polish what you already have.
The Foundational Edits
Before you even think about slapping on a filter, you need to nail the basics. These four simple adjustments are responsible for about 90% of what makes an edited photo look truly professional. They’re the foundation for any aesthetic you're aiming for.
Brightness (Exposure): This is always your first stop. Is the photo a bit murky and dark, or is it slightly blown out? A tiny nudge on the brightness slider can instantly fix a shot that was just a little under or overexposed.
Contrast: This is all about the separation between your darks and lights. Cranking up the contrast makes your image pop with a dynamic, punchy feel. Pulling it back creates a softer, more muted, and almost dreamy look.
Saturation: This slider controls the intensity of every color in your frame. A little goes a very long way here. A slight boost can make your colors feel richer, but pushing it too far is the fastest way to make an image look cheap and unnatural.
Sharpening: A touch of sharpening adds crispness and definition. It’s fantastic for making the texture of a fabric, the grain in a piece of wood, or the surface of your product stand out. Just be gentle—too much creates a gritty, over-processed effect.
Consistency Is Your Secret Weapon
Once you land on a combination of edits that you absolutely love, you can save it as a preset. Think of a preset as your own custom filter. It applies the exact same set of adjustments to any photo with a single tap.
This is how you build a cohesive, instantly recognizable brand on Instagram or a polished storefront on Etsy. Using the same preset (or a small family of similar ones) ensures all your images share the same visual DNA, whether you're going for a bright and airy vibe, a dark and moody feel, or a clean and minimalist look.
For those looking to achieve a professional aesthetic with minimal effort, utilizing advanced tools for ShortGenius AI-powered photo editing can transform your images. These tools can automate much of the editing process, giving you a polished result in seconds.
Editing really is a skill that gets better with practice. For online sellers, a fantastic photo is non-negotiable, and getting the edit right is a huge part of that equation. If you want to dive deeper into how editing directly impacts sales, check out our guide on the best photo editor for your Shopify products. By mastering these simple in-phone edits, you gain complete creative control over the final look and feel of every picture you take.
Step 8: Use AI to Create Marketplace-Ready Product Photos
You’ve done the hard work. You planned your shoot, nailed the lighting, and captured a fantastic, aesthetic photo of your product. Now what?
For anyone selling on Amazon, Shopify, or another marketplace, this is where the real work often begins. That beautiful photo still needs to be transformed into a high-converting, professional image that meets strict platform guidelines.
Instead of getting bogged down in Photoshop or hiring an expensive editor, this is the moment to let AI take over. Smart tools have completely changed this final step, turning what used to be hours of tedious editing into a task that takes mere seconds. It's not just about saving time and money, either. It’s about creating that polished, consistent look that builds customer trust and actually drives sales.
The Modern AI-Powered Workflow
Forget wrestling with background removal tools or trying to get your lighting just right in post-production. With an AI tool like our https://prodshot.net/ai-product-photo-generator, the process is ridiculously simple. You just upload your best smartphone picture, and the technology does the heavy lifting.
In literally seconds, the AI can:
- Perfectly remove the original background, getting rid of any distracting elements without leaving those awkward, fuzzy edges.
- Place your product on a pure white background, a non-negotiable for major platforms like Amazon.
- Generate realistic shadows and reflections, which makes the product feel grounded and tangible, not like it’s just floating in space.
- Automatically correct the lighting and color balance, ensuring your product looks true-to-life and absolutely pops off the screen.
This automated process gives you a gallery of flawless, uniform images—the kind that makes an online store look trustworthy and seriously appealing. For those wanting to get even more creative, an AI Image Generator can be a great way to create entirely new lifestyle scenes or variations from a single product shot.
Why Great AI-Generated Images Sell More
The connection between professional photos and e-commerce success is undeniable. High-resolution images don't just look nice; they have a massive impact on your store's performance.
Consider this: high-res photos have a 40% greater chance of being shared on social media. More importantly, nearly 9 out of 10 online shoppers say that image quality is the single most important factor when deciding to make a purchase. The data doesn't lie—pages with high-resolution shots see conversion rates that are a staggering 94% higher than those with low-quality ones.

While the basic steps of editing—adjusting brightness, cropping, and adding filters—are still fundamental, AI tools like ProdShot now handle all of it instantly. The result is a perfect, marketplace-compliant image without you having to touch a single slider.
Key Takeaway: For sellers on Shopify or Amazon, this is a game-changer. You can take a quick picture of your product—whether it’s a piece of jewelry, a candle, or a bottle of sauce—and let an AI tool do the complicated editing. You get a professional-grade image that meets all the rules and turns casual browsers into confident buyers.
This workflow is the final piece of the puzzle. It closes the gap between taking a great photo and creating a powerful sales asset, empowering you to build a stunning and effective online store, one perfect picture at a time.
Common Questions About Aesthetic Smartphone Photography
If you're just starting out with smartphone photography, you've probably got a few questions bouncing around your head. Do you really need a fancy DSLR? How do you even begin to find a unique style when it feels like everyone with a phone is already a photographer?
Let's cut through the noise and tackle some of the most common hurdles. My goal is to give you the confidence to stop wondering and start creating beautiful images today.
A big one I hear all the time is whether a smartphone is "good enough" for high-quality, aesthetic pictures. Let me be clear: absolutely. Today's smartphone cameras are incredibly powerful. Mastering the fundamentals—light, composition, and a little bit of editing—will always matter more than the price tag on your gear.
Another major roadblock is finding your own visual style. It's easy to get lost scrolling through endless feeds and feel like it's all been done before. The secret is to stop scrolling and start shooting. Just experiment. Try a bright, airy setup one day, then switch to something dark and moody the next. Your personal style will naturally emerge from what you truly enjoy creating.
Can I Sell Products with Smartphone Photos?
Without a doubt. In fact, for most small businesses and marketplace sellers, a smartphone isn't just an option; it's the most practical tool you have. The real challenge isn't taking the photo, but turning it into a professional, conversion-ready image that makes customers click "buy."
This is where a little bit of tech makes a huge difference. AI is completely changing the game for product photography, and for good reason—a staggering 75% of shoppers rely on photos to make their buying decisions.
Great images get results. We're talking about a potential for 94% higher conversions. For fashion brands specifically, AI on-model photos have been shown to boost conversions by as much as 60%. You can dig deeper into how AI is reshaping e-commerce visuals by exploring these insights on AI product photography statistics.
The goal is to bridge the gap between a great smartphone shot and a professional marketplace image. When your pictures perfectly match the product, you build trust and see fewer returns. A mismatch between the photo and the actual item is behind roughly 22% of all returns.
What Is the Easiest Way to Edit?
If you're a beginner, keep it simple. The easiest way to start is with your phone’s built-in photo editor or a free, intuitive app like VSCO or Lightroom Mobile.
Focus on getting comfortable with the basics: brightness, contrast, saturation, and sharpness. Once you dial in a look you love, save those adjustments as a preset.
Using presets is the insider's trick to maintaining a consistent aesthetic across all your photos. It’s what gives an Instagram feed or a product gallery that cohesive, polished feel. By mastering these simple tools, you can learn how to take an aesthetic picture that represents your vision without getting bogged down by complicated software.
Ready to turn your simple smartphone photos into professional, marketplace-ready images in seconds? Try ProdShot today and see how our AI can automatically remove backgrounds, perfect lighting, and generate stunning visuals that sell. Elevate your product photography with a free trial at https://prodshot.net.