
Great product photos are about more than just snapping a picture. It’s about using light, composition, and styling to craft an image that builds trust and, ultimately, drives sales. You can do this with just your smartphone. It's the art of making a customer feel like they can almost reach through their screen and touch your product, turning casual browsers into confident buyers.
Why Great Product Photos Are Your Best Salesperson
Ever noticed how some online stores just feel more trustworthy and professional, while others look a bit sketchy? That difference, more often than not, boils down to the quality of their product photos. In the world of e-commerce, your images aren’t just decoration—they’re your silent, 24/7 sales team.
When a customer can't physically pick up an item, your photos have to do all the heavy lifting. They're what bridge the gap between the digital and physical worlds, answering critical questions about quality, texture, size, and color that a product description simply can't.
The True Impact on Sales and Trust
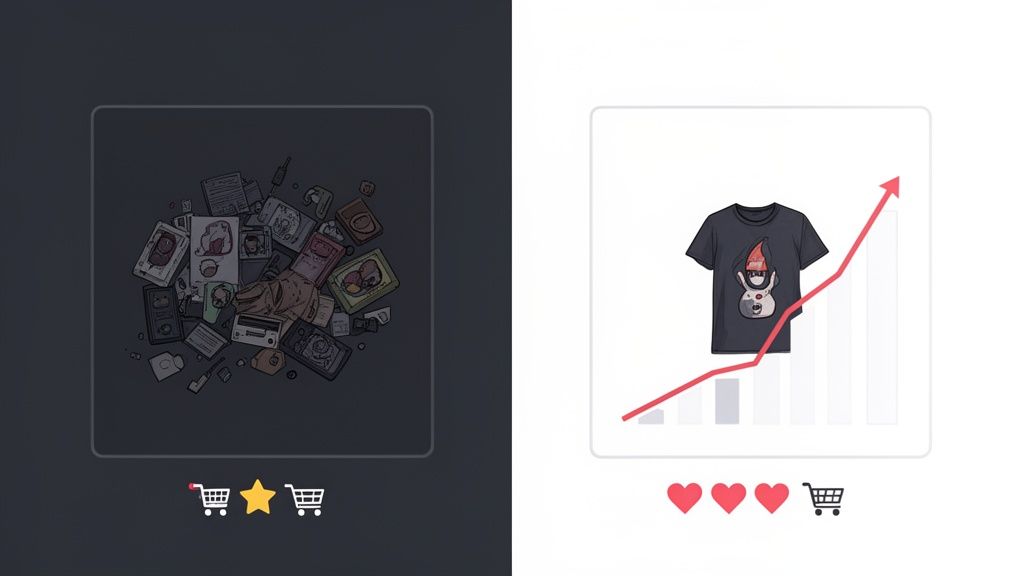
Think about how you shop online. A blurry, poorly lit photo of a handmade necklace instantly makes you hesitate. But a bright, crisp shot that highlights the intricate details of the clasp and the texture of the metal? That builds confidence and makes the item feel premium. For any entrepreneur trying to grow your online business, mastering this visual language is absolutely fundamental.
This isn't just a hunch; shopper behavior backs it up. Research shows a staggering 67% of online buyers consider image quality the single most important factor in their purchasing decision—more than product info, more than reviews. Good images can boost conversion rates by as much as 30%, while bad ones are a fast track to high bounce rates and abandoned carts.
Your product photos are the most direct way to communicate your brand’s value. They tell a story of quality and professionalism before a customer ever reads a single word of your product description.
You Don't Need an Expensive Studio
Here's the best part: you don't need to sink thousands into a professional studio to get amazing results. By understanding a few core principles of lighting, composition, and styling, that smartphone in your pocket becomes a powerful tool for creating images that sell. A quick look at the cost of professional product photography will show you just how valuable developing these DIY skills can be.
This guide will walk you through the essential techniques to turn a simple home setup into a conversion-driving machine.
You’d be surprised how much of a "perfect" product shot has nothing to do with the camera. The real magic happens long before you even think about hitting the shutter button. It's all in the prep work.
Think about it: a single fingerprint, a stray thread, or a speck of dust can instantly make a great product look cheap. These tiny flaws, barely noticeable in person, become glaring distractions on a high-resolution screen. Getting this stage right is non-negotiable if you want photos that actually sell.
Making Your Product Flawless
Your goal is to present the absolute best version of your product. This isn't just a quick wipe-down; it's a detailed inspection under a bright light, looking at every nook and cranny from the angle the camera will see it.
Different products need different kinds of love. You wouldn't clean a delicate necklace the same way you'd prep a pair of hiking boots, right? It's all about the details.
- Electronics & Glossy Items: A good microfiber cloth is your best friend here. It'll get rid of fingerprints and dust without leaving behind any annoying lint. For tight spots like ports or keyboard crevices, a quick blast from a can of compressed air works wonders.
- Apparel & Fabrics: Ditch the iron. A steamer is what you need to get rid of wrinkles and creases, giving the garment a smooth, professional look. Always finish with a lint roller to catch any stray fibers or hairs.
- Jewelry & Reflective Pieces: The moment you touch a polished piece of jewelry, you leave a fingerprint. Put on a pair of simple cotton gloves before handling. Use a dedicated jewelry polishing cloth to make metals gleam and stones sparkle.
The camera captures reality. If your product is dusty, wrinkled, or smudged, your photos will be too. Spending an extra five minutes cleaning now can save you an hour of painful editing later.
This deep-cleaning process does more than just make your product look good—it sends a message of quality and care to your customers. It's the first step in building the visual trust you need to make a sale.
Using Props to Tell a Story
Once your product is looking pristine, it’s time to set the scene. This is where you go from just showing what the product is to showing what it feels like to own it. Styling adds context, creates a mood, and helps your customer imagine it in their own life.
Effective styling isn't about spending a ton of money on fancy props. It's about making thoughtful choices that support the story you're trying to tell.
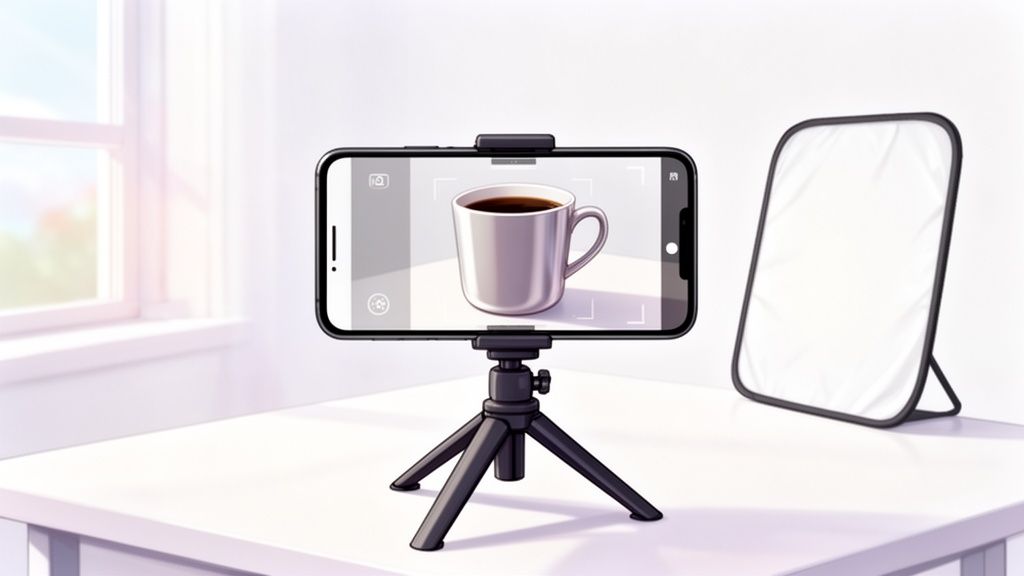
Take a simple ceramic coffee mug. You could shoot it on a plain white background—that’s your standard, clean e-commerce shot. But what if you placed it next to a small bag of artisan coffee beans, a couple of cookies on a napkin, and a book? Suddenly, it’s not just a mug; it’s a key part of a relaxing morning ritual. See the difference?
Simple Props, Big Impact
The best props are the ones that feel like they belong and don't steal the show. Your product must always be the hero of the shot.
Here are a few ideas to get you started:
- Skincare: Think fresh. A bit of greenery, a clean marble tile, or even a few artful water droplets can communicate natural ingredients and hydration.
- Handmade Goods: Bring in the raw materials. A piece of raw leather for a wallet or spools of colorful thread for a sewn item instantly adds authenticity.
- Food & Drink: Show the ingredients! A jar of gourmet jam looks ten times more delicious when it’s next to fresh berries and a slice of toast.
Getting your product clean and thoughtfully styled is the bedrock of a great photo. This is the invisible work that makes everything else—your lighting, your composition, your editing—truly shine.
Mastering Light and Backgrounds Without a Studio
Alright, you’ve got your products prepped and looking sharp. Now comes the part that truly separates amateur shots from professional ones: light and background. You really don't need a fancy studio or expensive gear for this. In fact, the best light source you have is completely free.
Great lighting does more than just make your product visible. It carves out its shape, shows off its texture, and creates a vibe that makes people want to buy it. Bad lighting? It's a guaranteed conversion killer.
How to Use Natural Light Like a Pro
The secret weapon for incredible DIY product photos is the sun, but you have to know how to use it. You're looking for soft, diffused natural light—not that harsh, direct sunlight that creates ugly, dark shadows and blows out all the important details on your product.
Think of it this way: direct sun is like a harsh spotlight. Diffused light, on the other hand, is like a professional softbox, wrapping your product in gentle, even light that makes everything look amazing.
To find this perfect light, just set up next to a large window. The key is to make sure the sun isn't shining directly through it. I find the best times are usually mid-morning or late afternoon when the light is softer and less intense.
Your Simple Two-Part Lighting Setup
Once you've found your window, you only need two cheap tools to get complete control over the light.
- Your Main Light Source: Position your product so the window light hits it from the side, at roughly a 45-degree angle. This technique is called side-lighting, and it’s what creates those subtle shadows that give your product depth and make it pop right out of the screen.
- A Reflector: Look at the side of your product opposite the window. See those shadows? To soften them up, you need a reflector. You don't need to buy anything special—a simple piece of white foam board or even a sheet of poster board from a craft store works perfectly. Just prop it up to bounce light back into the shadows.
Here's a pro tip: Move the foam board closer to your product to make the shadows brighter, or pull it away to make them darker. This one simple adjustment gives you an incredible amount of control over the final look.
Choosing the Right Background
The background is the stage for your product. For most online stores, the goal is to get rid of every possible distraction, which is why a clean, simple background is the gold standard. This is non-negotiable for marketplaces like Amazon, which have strict rules about using pure white backgrounds for main images.
A simple background makes your product the hero and gives your entire store a consistent, trustworthy feel.
Luckily, this is an easy and cheap problem to solve. A big sheet of white poster board often does the trick. But if you want that truly seamless, "floating" look, you'll want to create a "sweep."
Here’s how you do it:
- Push a table up against a wall.
- Tape one end of a large roll of paper or a flexible poster board to the wall, well above the table.
- Let the paper curve down naturally onto the table. This creates a smooth background with no hard lines or corners.
- Place your product right in the middle of the curved part on the table.
This little setup is how you get that professional, floating-in-a-white-void look without ever stepping into a studio. Getting this right is more important than ever. The e-commerce product photography market is expected to jump from $129 million in 2021 to $275 million by 2028. A huge reason for this growth is that nearly 67% of shoppers will bounce from a site just because the images are bad. You can explore more photography statistics that show just how much good visuals impact sales.
This visual guide shows the simple prep process I follow: clean, steam, and style.
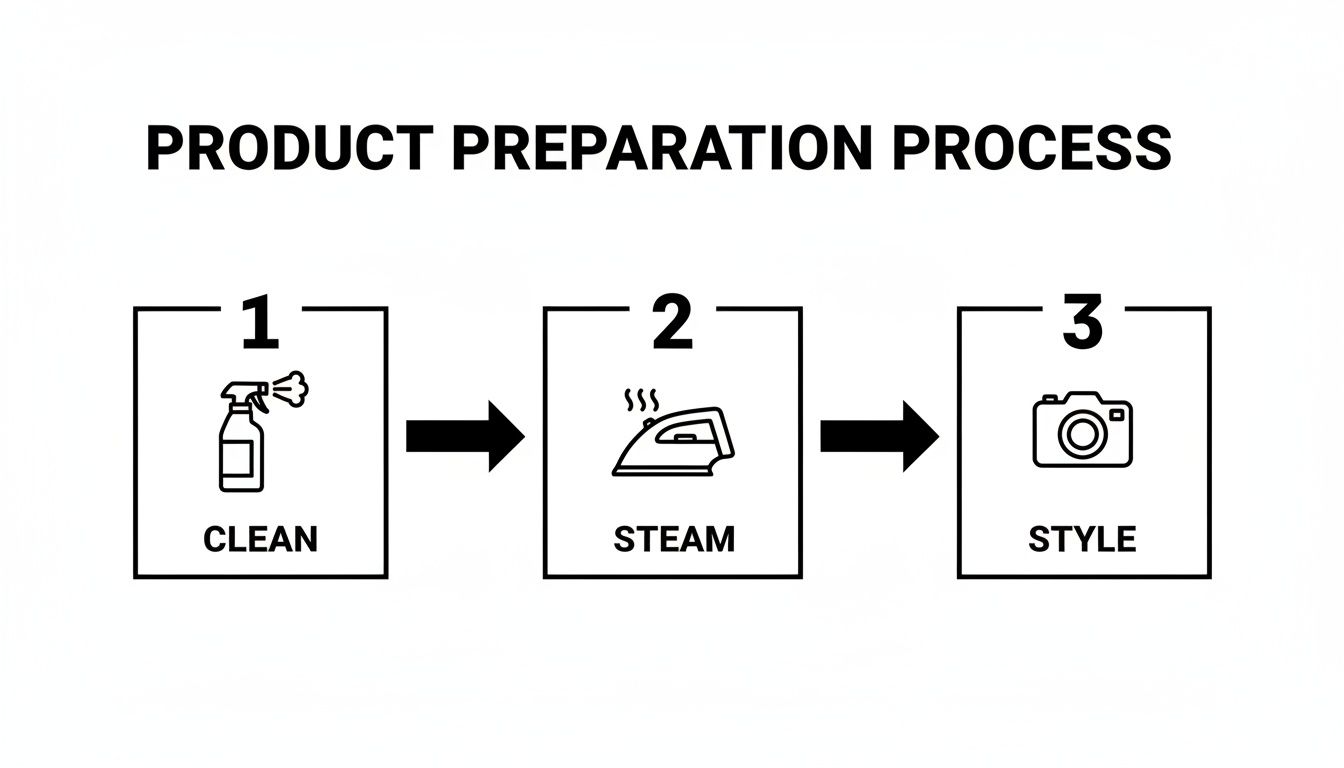
Following these three steps ensures every item is perfect before the camera even comes out.
Getting to Know Your Smartphone's Pro Camera Features
Your smartphone's camera is a beast, but just leaving it on "auto" is like driving a sports car in first gear. You're missing out on all the power. If you really want to take product photos that sell, you have to get comfortable with the manual controls. This is where you graduate from taking simple snapshots to crafting professional, high-converting images.
Believe it or not, most modern smartphones—whether you’re an iPhone or Android user—give you the kind of manual control that used to be exclusive to bulky DSLR cameras. By tweaking just a few key settings, you can go from "good enough" to "wow." Let's walk through exactly what you need to adjust.
Nailing Brightness with Exposure Control
The single most important setting you can master is exposure. In simple terms, it's just how bright or dark your photo is. Your phone's automatic mode is pretty clever, but it often plays it safe, leaving your product looking a little dim or, even worse, completely blown out.
Taking control is easier than you think. In most camera apps, all you have to do is tap on your product on the screen. You'll probably see a little sun icon pop up next to the focus square. Just slide your finger up or down to manually brighten or darken the shot.
You're aiming for a look that's vibrant and true-to-life. Pay close attention to any white areas in the shot. For e-commerce, a slightly overexposed photo often looks cleaner and more professional, especially if you're trying to achieve that classic white background look.
A common mistake I see is people underexposing their photos because they're afraid of losing detail in the highlights, telling themselves they'll just "fix it in post." It's almost always better to get the brightness right in the camera. Trying to rescue a dark, noisy photo in an editor will kill your image quality way faster than toning down a shot that's a touch too bright.
Locking in Sharpness with Focus Lock
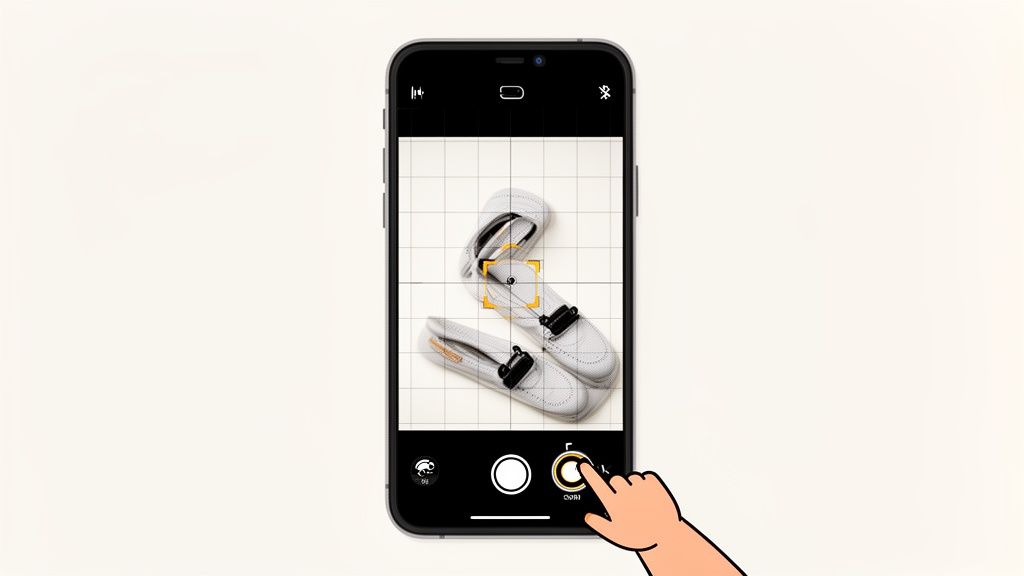
Ever taken what you thought was the perfect photo, only to realize your camera focused on the background instead of your actual product? It's a frustratingly common problem. The fix is a feature called AE/AF Lock, which stands for Auto-Exposure/Auto-Focus Lock.
This handy tool lets you lock in both the brightness and the focal point. Once locked, they won't shift, even if you move the phone slightly or the lighting changes. To use it, just tap and hold on your product for a second or two. A yellow "AE/AF LOCK" box will usually appear, letting you know the settings are frozen in place.
This is a complete game-changer for a few reasons:
- Guaranteed Sharpness: It ensures your product is perfectly in focus, right where you want it.
- Total Consistency: It's a lifesaver when shooting multiple angles of the same product, as it keeps the brightness and focus uniform across all the shots.
- Creative Freedom: You can lock focus on a specific detail to draw the customer's eye—think the clasp on a necklace or the logo on a pair of sneakers.
Getting these basic settings right is especially critical if you're selling on a competitive platform. For more platform-specific advice, we have a whole guide on how to improve product photos for an eBay seller.
Why You Must Never, Ever Use Digital Zoom
Here's a piece of advice that will instantly improve your photo quality: never use digital zoom. Seriously. When you pinch the screen to zoom in, you aren't actually using a lens to get closer. All your phone is doing is cropping the image and blowing up the pixels, which absolutely destroys the quality.
The result is a grainy, blurry mess that looks completely unprofessional. If you need a tighter shot, just physically move your phone closer to the product. It’s a simple move that makes sure you capture every bit of detail and quality your camera sensor is capable of.
Using Composition to Create Eye-Catching Shots
Finally, how you frame your product is just as important as any technical setting. Good composition guides your customer's eye and makes the photo feel balanced and interesting. One of the easiest and most powerful principles to learn is the rule of thirds.
Just imagine your screen has a tic-tac-toe grid over it. The rule of thirds suggests you should place your product not in the dead center, but along one of the lines or at one of the four points where the lines intersect. This simple shift creates a more dynamic and visually pleasing photo. Head into your camera settings and turn on the grid overlay; it makes following this rule a breeze.
For example, if you're shooting a pair of boots from a 45-degree angle, try placing them so they run along the bottom horizontal line. Or, for a flat lay of a shirt, position a unique detail like a button or brand tag right on one of the intersection points. These small compositional adjustments make a world of difference.
Editing Your Photos From Raw to Ready-To-Sell
Taking a great photo is a fantastic start, but it's only half the job. The real magic—the part that turns a decent shot into a "must-buy" image—happens during the edit. This is where you add that final layer of polish, ensuring your products look irresistible and meet all the technical rules of online marketplaces.
The good news? You don't need a degree in Photoshop or a clunky desktop computer. The editing tools already built into your smartphone are incredibly powerful and more than capable of handling the crucial tweaks that make all the difference.
Quick Edits Right on Your Smartphone
Before you even think about uploading, every single photo should get a quick once-over. The goal isn't to fundamentally change the image, but to refine it. You're just tidying things up to make sure your product is the undisputed star of the show.
I always start with these three basic edits:
- Crop & Straighten: Take a hard look at the frame. Is the horizon line perfectly level? Is the product centered in a way that just feels right? Use the crop tool to trim away any dead space and fix any crooked lines. A slightly tilted photo is a tiny detail that can scream "amateur."
- Brightness & Contrast: Even with what seems like perfect lighting, your camera doesn't see the world exactly like your eyes do. A quick bump in brightness (or exposure) can make your whites look clean and crisp. A little bit of contrast then makes the colors pop, preventing the shot from looking flat or washed out.
- Color Correction: Phones can sometimes get the color temperature wrong, casting a subtle blue or yellow tint over everything. Find the "white balance" or "temperature" slider and adjust it until the colors look true to life. This is non-negotiable for avoiding customer complaints and returns over color discrepancies.
The best edits are the ones you don't even notice. You're aiming to enhance reality, not create a fantasy. The product in the photo needs to be an accurate—yet idealized—version of what shows up at your customer's door.
The Rise of AI-Powered Editing Tools
While manual edits offer total control, they can eat up your time, especially if you have a whole catalog of products to get through. This is where AI editing tools have become an absolute game-changer for online sellers by automating the most mind-numbing tasks.
Tools like ProdShot can take a simple photo snapped on your kitchen table and instantly churn out a professional, marketplace-ready image. With just a click, an AI can:
- Remove the Background: It intelligently cuts out your product and places it on a perfect white or transparent background, instantly meeting the strict requirements of sites like Amazon or Shopify.
- Correct Lighting & Shadows: The AI analyzes the image, brightens up any dull areas, and even adds realistic shadows to give the product a sense of depth and keep it from looking like it's floating in space.
- Enhance Colors: It automatically adjusts the color balance and saturation to make your product look rich, vibrant, and appealing.
Using an AI photo editor can slash your post-production time from hours down to minutes, all while giving your entire product line a consistent, professional look. If you’re running a store, looking into a specialized Shopify photo editor can make this process even smoother.
Getting Your Images Ready for E-Commerce Platforms
The final, critical step is saving your edited photos in the right format and size. This isn't just a technical detail; it directly impacts your site's performance and customer experience. Huge images slow down your website, and research shows that 53% of mobile users will bounce if a page takes more than three seconds to load.
Here’s a simple guide to file formats:
- JPEG (or JPG): This should be your default for almost all product photos. JPEGs provide the best balance of image quality and small file size, which is exactly what you need for fast-loading web pages.
- PNG: Only use PNG when you need a transparent background. For example, if you want to place your product over a colored banner or pattern on your website, PNG is the way to go. Just be aware that the file sizes will be larger.
Beyond your own website, it's smart to know the best practices for other channels. This includes optimizing for Instagram, where the right dimensions can make or break how your product appears in the feed.
When it comes to image size, a solid rule of thumb is to aim for a width between 1,500 and 2,500 pixels on the longest side. This resolution is high enough to look sharp and allow for a zoom feature, but not so big that it will grind your page-load speed to a halt. Always double-check the specific image guidelines for the platforms you're selling on, as they can have their own unique requirements.
Your Product Photography Pre-Flight Checklist
To pull all this advice together, I’ve created a quick, printable guide for your next shoot. Treat this like a pilot's pre-flight checklist—it's designed to make sure you hit every critical step and walk away with photos that sell.
A consistent workflow is your secret weapon for getting professional, repeatable results every single time. Here's how to break down any shoot into three manageable phases.
Pre-Shoot Prep: Setting the Stage
This is where the magic really begins. Getting this part right saves you from headaches and reshoots later. Trust me, a little prep goes a long, long way.
- Clean Your Product: Is the item absolutely spotless? Hunt down every last speck of dust, fingerprint, or stray thread. A microfiber cloth is your best friend for glossy items, and a quick blast from a steamer works wonders on fabrics.
- Plan Your Styling: Have you gathered props that tell a story and complement your product instead of competing with it? Lay out everything you need, including any stands, clamps, or little risers that help you get the perfect position.
- Dial in Your Lighting & Background: Is your main light source (like that big, beautiful window) giving you soft, even light? Get your reflector (a simple piece of white foam board) and your seamless background ready to go.
The Shoot: Capture the Perfect Shot
With your prep work done, you can now focus completely on what matters most: taking incredible photos.
- Lock in Your Camera Settings: Before you snap, tap and hold on your product to lock the focus and exposure (look for the AE/AF Lock indicator). Don't forget to turn on your gridlines for better composition, and whatever you do, avoid digital zoom!
- Work Your Angles: Don't just take one shot. Get a whole variety! You'll want a main "hero" shot, a few side views, a classic 45-degree angle, some tight close-ups on key details, and at least one lifestyle shot showing the product in use.
- Shoot More Than You Need: This is a pro tip I live by. Always take more photos than you think you need. Having extra options in the editing phase is a lifesaver.
Post-Production: The Final Polish
This is where you turn a good photo into a "must-buy" photo. A little editing makes all the difference.
The whole point of editing is to create an idealized—but still accurate—version of your product. Your final image should build trust, not set unrealistic expectations.
- Start with the Basics: The first step for every image is to crop and straighten. From there, tweak the brightness, bump up the contrast, and correct the white balance to make sure your colors pop and your whites look pure white.
- Export for E-Commerce: Save your finished images as JPEGs, which give you the best mix of quality and file size. A good rule of thumb is to export them at a width of around 2000 pixels, which is perfect for most online marketplaces.
Got Questions? Let's Talk Product Photos
When you're first starting out with product photography, you're bound to have some questions. Everyone does. Getting these sorted early on is the fastest way to build your confidence and start seeing better results. Let's tackle some of the most common things people ask me.
Is a Tripod Really Necessary for My Phone?
I get this one all the time. Can you take photos without one? Sure. But a small, inexpensive tripod for your smartphone is probably the single best piece of gear you can buy. It kills camera shake completely, which means your images will be tack-sharp. This is a game-changer, especially when you're shooting indoors and relying on window light.
But here’s the real secret: a tripod is your key to consistency. It locks in your angle and composition. This allows you to swap out different products and shoot them all from the exact same perspective, giving your entire shop that polished, professional vibe everyone's after.
A tripod isn't just for "pro" photographers. Think of it as your extra set of hands. It holds the camera steady so you can focus on adjusting your product, moving a reflector, and making sure every shot in a series is perfectly aligned.
So, How Many Photos Does One Product Need?
You want to hit that sweet spot between informative and overwhelming. My rule of thumb is 5-8 photos for each product listing.
This gives you enough room to show off everything a customer wants to see. A good set usually includes:
- A crisp "hero" shot on a clean, simple background.
- Shots from a few different angles—front, back, side, and a 45-degree view.
- A detailed close-up that shows off the texture, materials, or quality craftsmanship.
- At least one "in-context" or lifestyle photo to show the product in a real-world setting.
When you offer this kind of visual variety, you're answering a buyer's questions before they even have to ask. It builds trust and makes it that much easier for them to hit the "buy" button.
What's the Single Biggest Mistake Newbies Make?
Hands down, it's bad lighting. It's the one thing that can sink an otherwise great product shot. The biggest offenders are using the harsh on-camera flash, shooting in direct, midday sun, or mixing different kinds of light sources (like a warm lamp and cool window light). All of these create weird color casts and ugly, distracting shadows.
The fix is surprisingly simple: use one big source of soft, diffused light. A window on an overcast day is your best friend. Then, grab a piece of white foam board to use as a reflector and gently bounce that light back into any shadows. That’s it.
Tired of spending hours editing? ProdShot is an AI tool I've been impressed with that takes your smartphone photos and makes them marketplace-ready in just a few seconds. It cleans up backgrounds, fixes lighting, and generates professional-looking images designed to sell. Check out what it can do at https://prodshot.net.