
To take product photos that actually sell, you need to nail three things: your setup (lighting and background), your composition (angles and storytelling), and your editing (the final polish). Get this trio right, and your images won't just look clear—they'll be compelling enough to turn a casual browser into a confident buyer.
Why Great Product Photos Are Your Silent Salesperson
Before we get into the how, let’s talk about the why. In ecommerce, your product photos do all the heavy lifting. They're the first, and often only, handshake you get with a potential customer. Think of them as your 24/7 silent salesperson.
Crisp, professional-looking images aren't just window dressing; they're your direct line to building trust and driving sales. A good photo answers questions a product description can’t. It shows the true texture of a fabric or the exact shade of a lipstick.
This visual confirmation is what gets people over the hump of purchase hesitation. It also helps lower your return rates by setting accurate expectations right from the get-go.
The Real Impact on Your Bottom Line
It’s easy to see how photo quality and sales are connected, and the data backs it up. Research consistently shows that 75% of online shoppers rely heavily on product photos when deciding to buy. Investing in better visuals isn't an expense; it's a direct path to higher conversion rates.
This visual-first approach is fundamental, no matter where you sell. If you're running your own store, for instance, mastering https://prodshot.net/professional-shopify-product-photography is a non-negotiable skill for anyone serious about competing.
A key takeaway: A blurry, poorly lit photo suggests a lack of care and professionalism. Customers will project that feeling onto your product and brand. A sharp, well-composed image, on the other hand, builds the confidence they need to click "Add to Cart."
A quick look at the data shows just how much photo quality can move the needle.
The Impact of Photo Quality on Your Business
| Key Business Metric | Impact of High-Quality Photos |
|---|---|
| Conversion Rate | Increases by showing the product clearly and attractively. |
| Customer Trust | Builds confidence in your brand and product quality. |
| Return Rate | Decreases by setting accurate product expectations. |
| Brand Perception | Elevates your brand, making it look more professional. |
Investing in your photography is investing directly in these core metrics.
From Clicks to Conversions
Ultimately, every photo on your product page has one job: to sell. To see this in action, look at how successful brands showcase the value of their items, like this guide on what makes Efytal Jewelry keepsake quality perfect for gifting.
By getting your photography right, you’re not just showing what you sell. You’re creating desire and building a brand that customers will trust and come back to again and again.
Building Your DIY Photography Studio
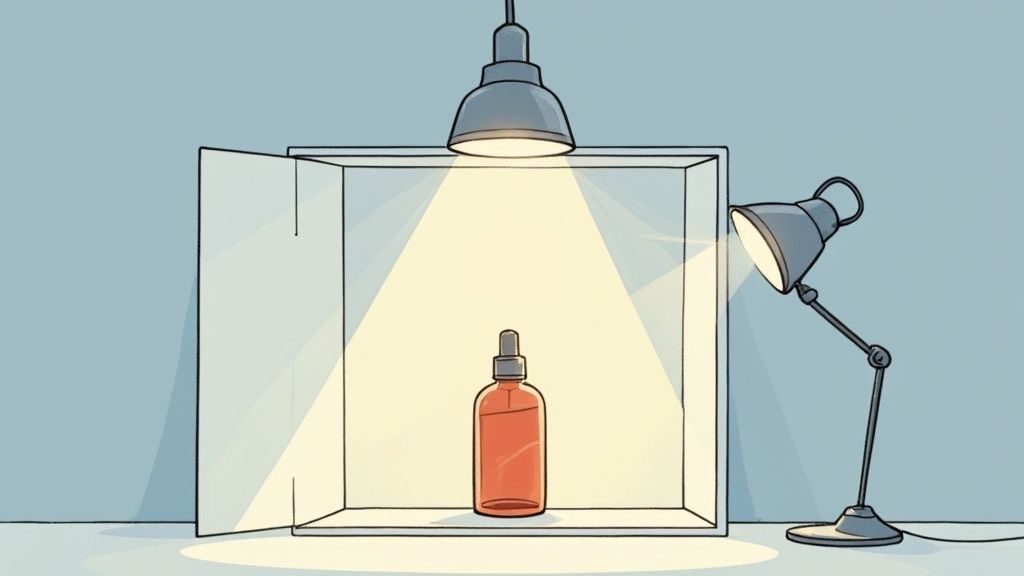
You don't need a professional studio to create stunning product photos. Believe it or not, a dedicated corner of a room, a simple table, and a few household items are all it takes to build a setup that delivers consistently great results. The real secret is in mastering the fundamentals: lighting, background, and stability.
The most powerful—and affordable—light source you have is the sun. A large window provides soft, diffused natural light that is incredibly flattering for almost any product. Just set up your shooting area near a window, but make sure to avoid direct sunbeams. Those create harsh, distracting shadows that can kill a shot.
If you're looking for more ways to get professional results without breaking the bank, digging into some extra affordable product photography tips can really elevate your setup.
Choosing Your Background
Your background is the stage for your product. Its only job is to make your item the hero, not steal the show. The right background really depends on the story you want to tell and where the final image will live.
-
The Classic White Sweep: For standard e-commerce listings on platforms like Amazon or Shopify, a clean white background is the industry standard. You can create this "infinity sweep" by taping a large piece of white poster board to a wall and letting it curve gently down onto your table. This technique creates a seamless, shadowless backdrop that makes your product pop.
-
Lifestyle and Textured Backdrops: To show your product in its element, use backdrops that hint at a real-world environment. Think about a rustic wooden board for artisanal food or a soft, neutral-colored fabric for handmade jewelry. These textures add a ton of depth and personality to your shots.
This image shows just how dramatically different backgrounds—from clean white to textured surfaces—can alter a product's story.
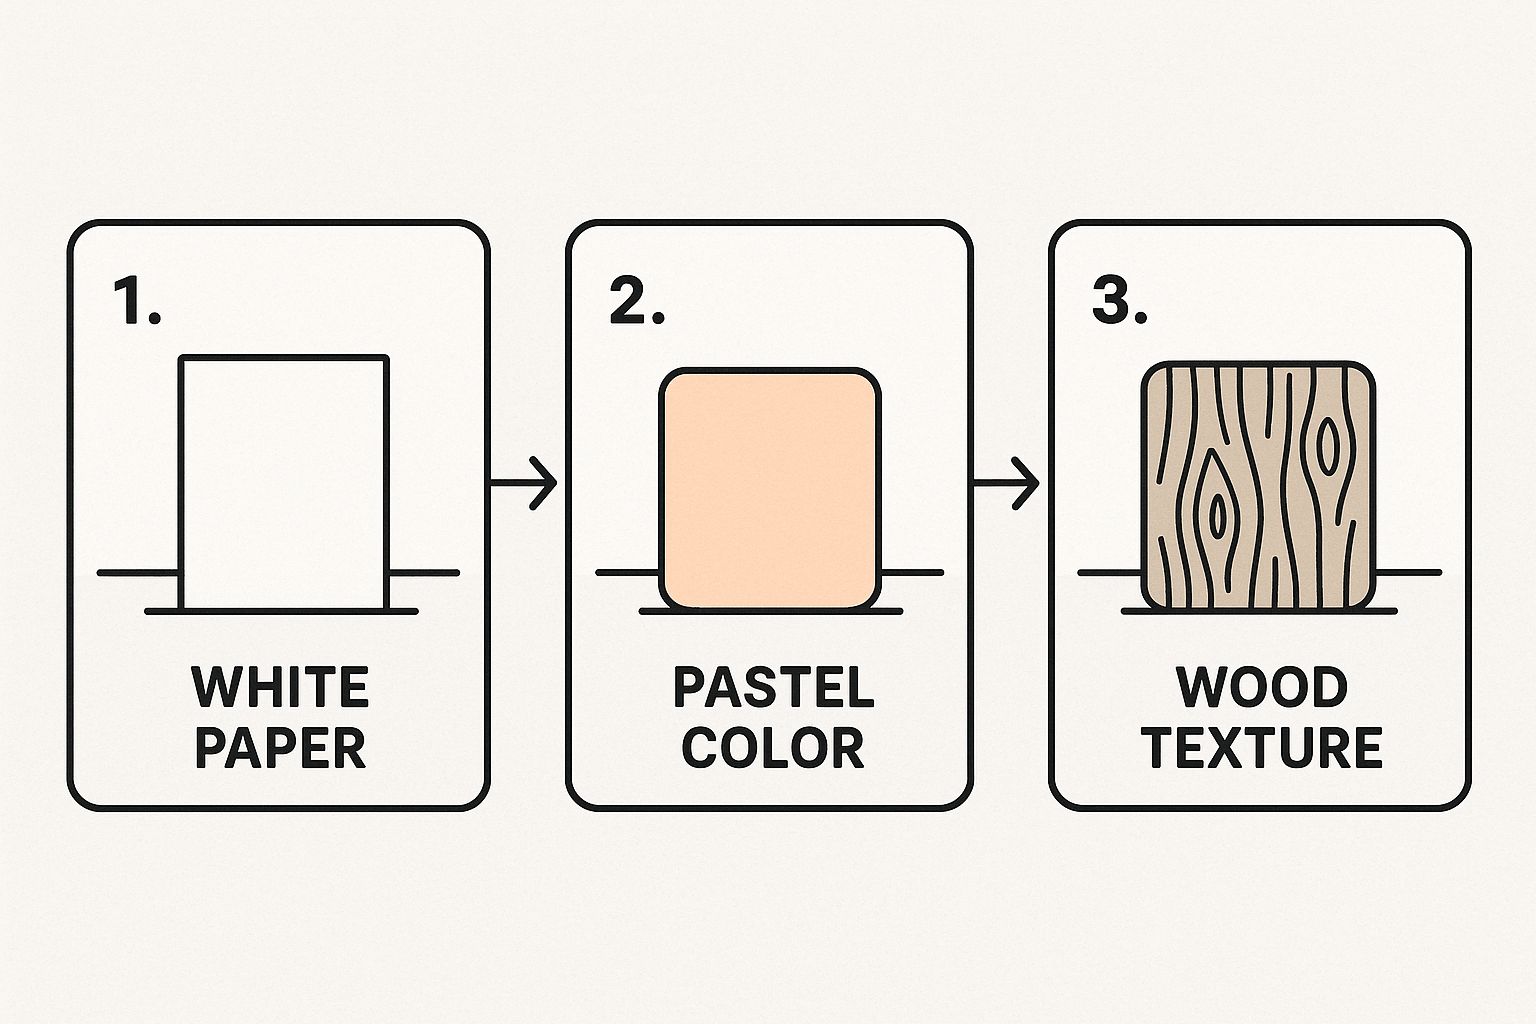
The key takeaway is that your background choice is a critical part of your brand's visual identity. It can convey anything from sleek minimalism to rustic charm in an instant.
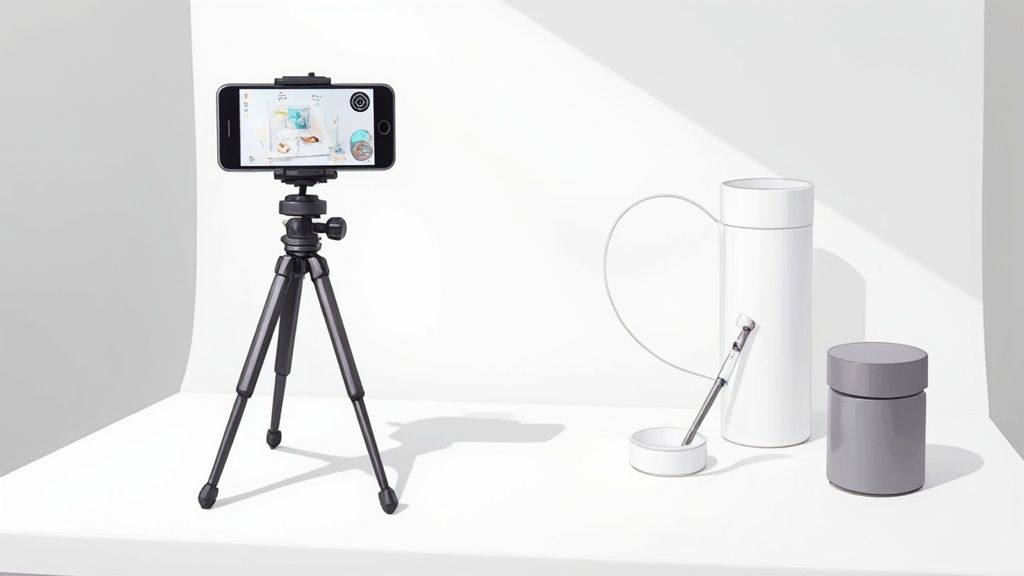
Stabilizing Your Camera for Sharpness
Blurry photos are the fastest way to lose a potential customer's trust. The culprit is almost always a shaky camera, even if the movement is microscopic. A stable camera is absolutely non-negotiable for achieving crisp, professional-looking images.
A basic tripod is one of the best investments you can make, and you can find plenty of affordable options online. It guarantees every shot is framed consistently and remains perfectly still. This is especially crucial in lower light conditions that force your camera to use a slower shutter speed.
Pro Tip: No tripod? No problem. A stack of books or a sturdy box can work just as well in a pinch. Just place your smartphone on the stack, use a small object to prop it up at the right angle, and set a timer to take the shot. This eliminates the camera shake caused by you tapping the shutter button.
Tapping into Your Smartphone’s Hidden Camera Power
It’s easy to forget just how powerful the camera in your pocket really is. Modern smartphones have democratized product photography, giving sellers the ability to capture stunning, sales-driving images without a mountain of expensive gear.
This accessibility is a huge factor in the e-commerce product photography market's growth, which was already valued around $2.5 billion and continues to expand. With more people shopping on their phones, the demand for crisp, clean visuals is higher than ever. You can dig into some of the key drivers behind this growing market on Data Insights Market.
The secret to getting professional results is simply knowing how to move beyond the default point-and-shoot mode. A few intentional tweaks to your settings can make all the difference.
First, Master These Key Camera Settings
Your journey from amateur to pro starts in your phone’s camera settings. These aren’t complicated adjustments, but they give you a ton of creative control and stop your photos from looking like casual snapshots.
The very first thing I tell everyone to do is turn on the gridlines. This simple overlay is an absolute game-changer for composition. It helps you straighten your shots and apply classic principles like the Rule of Thirds to make your product pop. A crooked photo just screams unprofessional, and the grid is your first line of defense.
Next up is learning to lock your focus and exposure. Just tap and hold on your product until you see a box pop up (it often says AE/AF Lock). This is huge. It stops the camera from randomly shifting focus or changing the brightness if you move slightly, guaranteeing your product stays perfectly sharp and evenly lit.
My Go-To Trick: Once the focus is locked, you can almost always slide your finger up or down to manually tweak the brightness. It’s the perfect way to brighten a scene just a little without blowing out the highlights on your product.
Whatever You Do, Don't Use Digital Zoom
If there's one mistake I see over and over, it's pinching to zoom. This is digital zoom, and all it does is crop the image and stretch the pixels. The result? A grainy, low-quality mess every single time. It's a photo-killer.
There are much better ways to get a tighter shot:
- Just Move Closer: The best solution is often the simplest. Physically move your phone closer to the product to fill the frame. This keeps your image quality pristine.
- Use Other Lenses: If your phone has a telephoto or "2x" lens, switch to that. It’s an optical zoom, so you won’t lose any quality.
- Crop It Later: My advice is to always shoot a little wider than you think you need. You can easily crop the photo in post-production and still have a much cleaner, more detailed image than if you had used digital zoom.
Consider a Third-Party App for Full Control
When you're ready to really take the reins, third-party camera apps are a fantastic way to get DSLR-level control. They unlock manual settings that your phone's built-in app often keeps hidden away.
Look for apps that let you manually adjust:
- ISO: The camera’s sensitivity to light.
- Shutter Speed: How long the shutter stays open.
- White Balance: For getting your colors just right.
- Manual Focus: To dial in that razor-sharp focus on tiny details.
Apps like Halide for iOS or ProCam X for Android can turn your phone into a creative powerhouse. Mastering these tools puts you in complete control, allowing you to create incredible product photos with the device you use every day.
Composing Shots That Tell Your Product's Story
A great photo does more than just show an item; it sells an experience. It's what gives a customer the confidence to click "add to cart." This is where composition comes in—it's the art of arranging everything in your frame to tell a compelling story and guide your customer's eye right where you want it to go.
The e-commerce product photography market is a huge slice of the global commercial photography industry, which is valued at a whopping $5.1 billion. In fact, product-specific work makes up nearly 45% of that—about $2.3 billion—and it's not slowing down. Getting your composition right is how you get a piece of that action. You can dig deeper into the impact of product photography on e-commerce on ElectroIQ.
Think of composition as the visual merchandising for your online shop. It’s all about making intentional choices to spotlight what makes your product worth buying.
Using Angles to Showcase Features
The angle you shoot from can completely change how a customer sees your product. Don't just settle for one straight-on photo. Move around, experiment with different perspectives, and you’ll tell a much more complete story. You can answer a customer's questions before they even think to ask them.
- Eye-Level: This is your bread and butter—the standard, head-on shot. It gives a clear, honest look at the product, and you absolutely need it.
- 45-Degree Angle: Shooting from slightly above gives the product a sense of depth and dimension. This works wonders for showing the top and front of things like shoes, electronics, or kitchen gadgets.
- Top-Down (Flat Lay): The "bird's-eye view" is a modern classic for a reason. It's perfect for laying out apparel, food, or a whole collection of items in a clean, organized way.
When you offer a few different angles, you give shoppers a virtual 360-degree tour of your product. That kind of clarity goes a long way in eliminating hesitation.
Frame the Narrative with Different Shot Types
Beyond just changing the angle, mixing up your shot types creates a gallery that keeps people clicking. Each type of photo has a specific job to do in building your product's story and showing its value.
I see this all the time: people only take wide shots. A truly effective product page needs a mix of views that pull the customer in, from the big picture all the way down to the tiny details that signal quality.
Make sure you get these essential shots in your gallery:
- The Detail Shot: Get in close. A tight shot is where you show off the craftsmanship—the texture of a leather wallet, the delicate stitching on a dress, or the engraving on a piece of jewelry. This is your proof of quality.
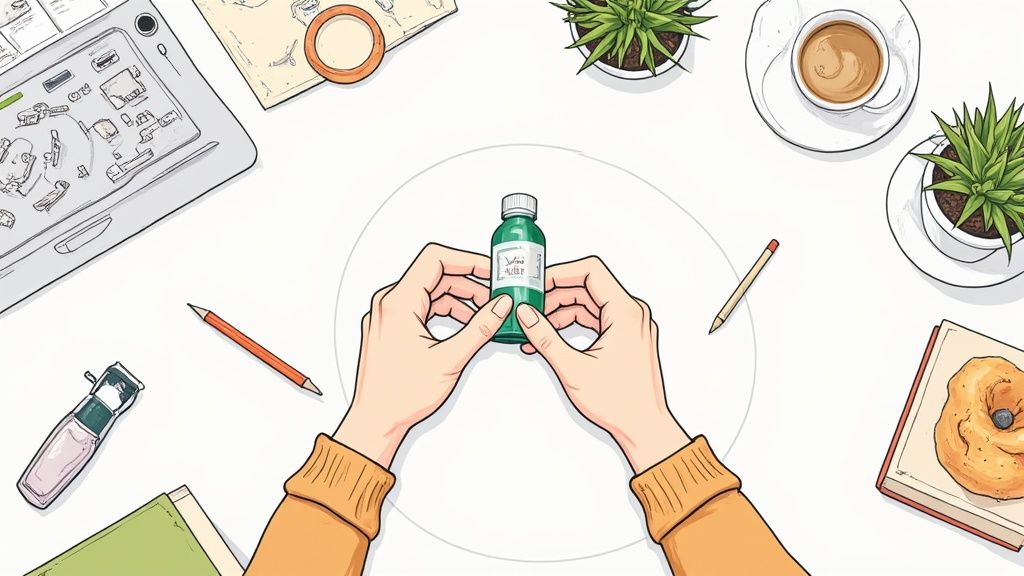
- The Lifestyle Shot: This is the "in-context" photo that shows your product in action. A backpack on someone's hike or a coffee mug on a cozy desk helps customers imagine it in their own lives, which is key for creating an emotional connection.
- The Scale Shot: Put your product next to something familiar, like a coin or a smartphone. This gives an immediate, clear sense of its actual size. It’s one of the simplest ways to manage expectations and cut down on returns.
Editing Your Photos for That Polished, Professional Look
The magic really happens in post-production. This is where you take a good snapshot and turn it into a fantastic, sales-driving image. Remember, the goal of editing isn't to trick anyone or change the product itself. It's about enhancing what's already there, making sure the photo represents your item accurately and professionally.
A great first step is always to crop for impact. A tight, well-composed crop immediately draws the customer's eye to your product, cutting out any dead space around the edges that might be distracting. Try to stick with a consistent aspect ratio for all your photos—it creates that clean, uniform grid on your product pages that just looks right.
Fine-Tuning the Details
Once you've got the composition locked in, it's time to tweak the lighting and color. I’ve found that most photos, even those shot in great light, can use a little bump in brightness to feel more alive. Adding just a touch of contrast will give the image more depth, making the details pop and preventing it from looking flat.
Color is where you build trust. Your camera doesn't always see color the same way our eyes do, and that’s where white balance correction is your best friend. If your white background has a slight yellow or blue tint, adjusting the white balance will bring it back to a pure, neutral white. This ensures your product colors are spot-on, which is crucial for customer satisfaction.
My Two Cents: Consistency is everything. Every photo should feel like it belongs to the same professional brand. True-to-life colors build customer trust and can seriously cut down on returns from people who thought they were buying something in a different shade.
Let AI Do the Heavy Lifting
Not too long ago, getting a professional edit meant spending hours learning complex software like Photoshop. But things have changed. Modern AI-powered tools have made high-end editing accessible to pretty much anyone, no matter their technical skill. These platforms handle the most tedious parts of the job for you.
For instance, AI can remove the background from your photo with incredible precision in seconds—a task that used to be a real headache. This frees you up to place your product on a clean white background or even generate entirely new, realistic scenes that fit your brand’s vibe. If you want to see what's possible, checking out modern product photo editing services can be a real eye-opener.
This screenshot from ProdShot's website shows exactly what I'm talking about. You can upload a simple photo and let the AI instantly generate a whole bunch of professional, on-brand scenes.
The technology is smart enough to understand the product and create backgrounds that complement it, from minimalist studio shots to detailed lifestyle scenes, all with believable lighting and shadows.
The Power of Smart Automation
AI editing is more than just swapping out backgrounds. These tools can also analyze your image and automatically apply the best adjustments for brightness, contrast, and sharpness, taking all the guesswork out of the equation. This means you can get consistent, high-quality results across your entire product catalog in just a few clicks.
- Generate New Scenes: You can create amazing lifestyle shots without ever hiring a photographer or buying props.
- Perfect the Lighting: The AI can automatically correct for less-than-ideal lighting, making every product look its absolute best.
- Keep it Consistent: Applying the same high-quality style to every single image becomes effortless.
By bringing these intelligent tools into your workflow, you can save a ton of time and focus on what you do best: growing your business. The final edit is no longer a technical hurdle but a genuine opportunity to make your brand shine.
Common Questions and How to Solve Them
Even with the best guide, you're bound to hit a few snags when you first start shooting your products. It's completely normal. Getting past these common hurdles is what separates the beginners from the pros. Let's walk through some of the questions I hear most often.
One of the biggest headaches is dealing with reflections, especially on anything shiny—jewelry, glassware, you name it. The trick isn't to eliminate the reflection, but to control what it reflects. Don't point your light source directly at the item. Instead, bounce it off a big white surface like a foam board. This creates a large, soft light that wraps around your product, giving you a clean, high-end look without the harsh glare.
Another classic problem is getting a truly pure white background. You set up a perfect white sweep, take the shot, and… it looks gray. This happens to everyone. The camera's meter tries to make everything a middle gray. You need to gently overexpose the background without blowing out the highlights on your product. A quick "levels" or "curves" adjustment in your editing software will let you push those gray pixels to a crisp, clean white.
Getting the Details Right
So, what’s the right image resolution for an online store? I always aim for at least 2000 pixels on the longest side, saved as a JPEG. This gives you plenty of detail for the zoom features on platforms like Shopify or Etsy, letting customers get a really good look at the quality. Just make sure to export for the web to keep the file size down so your pages load quickly.
And how many photos do you actually need per product? There’s no single right answer, but the sweet spot is usually between 5 and 8 images. This gives you enough shots to cover all your bases: multiple angles, a close-up of the details, a lifestyle shot showing it in use, and one for scale. You want to visually answer any question a potential customer might have before they even think to ask it.
Key Insight: Your job isn't just to show the product; it's to show its value. A picture of a backpack is fine. But a shot of its roomy interior packed for a weekend, or another showing how it sits on someone's back, is what actually convinces someone to buy.
Finally, the big question: should you just hire a pro? Doing it yourself is more manageable than ever, but sometimes, calling in an expert is the smartest move. It's helpful to understand the cost of professional product photography to see if it makes sense for your hero products. It can save you a ton of time and deliver incredible results that give your sales a serious boost.
Ready to create stunning, sales-driving product photos in seconds? With ProdShot, you can turn simple smartphone pictures into professional-grade images without any editing skills. Let our AI instantly remove backgrounds, generate realistic scenes, and give your entire catalog a polished, consistent look. Try ProdShot for free and see the difference.