

Learning how to take a great jewelry photo really comes down to three things: getting your shot set up with the right background and lighting, dialing in the right settings on your smartphone, and then giving the image a final polish in editing.
When you get these three areas right, your pieces will look just as stunning online as they do in person.
Setting the Stage for Flawless Jewelry Photos
Honestly, more than half the battle is won before you even touch your phone's camera button. You don't need a fancy studio—a simple, well-thought-out space is your most powerful tool. The whole point is to create an environment where your jewelry is the undeniable hero of the shot.
This prep work is the foundation for photos that look effortlessly professional. And in a global jewelry market worth around $348 billion, how you present your work visually is everything. In fact, fine jewelry alone accounts for a massive $237 billion of that market, which just goes to show how critical high-quality images are for capturing that intricate craftsmanship.
Find Your Light Source
If I could only give you one piece of advice, it would be this: light is everything. Forget your phone's built-in flash—it's harsh and unflattering. What you're looking for is soft, natural light.
The sweet spot is usually next to a large window on a slightly overcast day. This kind of light is naturally diffused, meaning it wraps around the jewelry gently, which helps minimize those harsh shadows and distracting reflections.
Direct sunlight is your enemy. It creates intense glare and can completely wash out the delicate details on a piece. If the sun is a bit too bright, just hang a thin white sheet over the window to soften the light even more. It’s a simple trick that works wonders.
Choose a Simple Background
Your background has one job: to make your jewelry look good. It shouldn't compete for attention. A clean, non-distracting surface is what lets the tiny details of your pieces really stand out.
While a classic white background is always a safe bet for e-commerce, don't be afraid to experiment with a little texture to add some character.
Here are a few of my go-to options:
- Matte Slate: This gives you a sophisticated, dark contrast that really makes gold and silver pop.
- Linen Fabric: A piece of linen provides a soft, organic feel that’s perfect for handmade or bohemian-style pieces.
- White Foam Board: You can pick this up anywhere, it's cheap, and it gives you a perfectly clean, seamless look every time.
The real secret to a professional shot is controlling what isn't in the frame. A simple background cuts out all the noise, forcing the viewer's eye straight to the product's quality and detail. This is a core principle in all great product photography.
When you focus on a clean setup first, you're essentially creating the perfect canvas. This prep work not only makes the actual shooting process a breeze but also saves you a ton of time during editing. For anyone just getting started, our complete guide on jewelry product photos has even more tips to get you going.
Taking Your Smartphone Camera Off Autopilot
Your smartphone has an incredibly capable camera, but its default "auto" mode is a generalist. It's designed to quickly snap a decent photo of your family at the park, not to capture the intricate details and sparkle of fine jewelry. To get images that look truly professional, you need to step in and take control of a few key settings.
These small, intentional adjustments are what separate a quick snapshot from a high-quality product photo that drives sales. The professional photography market is projected to hit $81.83 billion by 2032, and that growth is fueled by the demand for specialized, high-quality images that automatic settings just can't deliver. The secret sauce for pros is mastering manual controls, and you can do the same thing right on your phone. If you're curious, you can learn more about the evolving demands of the photography market and how photographers are adapting.
Lock in Your Focus and Exposure
The single most important adjustment you can make is done before you even think about hitting that shutter button. By default, your phone's camera tries to guess what's important in the frame, and with small, shiny objects, it often gets it wrong.
But you can easily tell it what to do. Just tap on the most critical part of your piece—the main gemstone on a ring, for instance, or the unique clasp on a necklace. A little box or circle will appear on your screen. Now, press and hold that spot for a second or two. You should see "AE/AF Lock" (or something similar) pop up.
This simple move locks both the Auto Exposure (AE) and Auto Focus (AF). You've just told your camera, "This right here is the hero. Keep it perfectly sharp and don't dare change the brightness, even if my hand wobbles a bit." This one trick is a game-changer for getting crisp, consistently lit shots every time.
This image shows a classic, simple setup that uses controlled lighting to make jewelry pop.
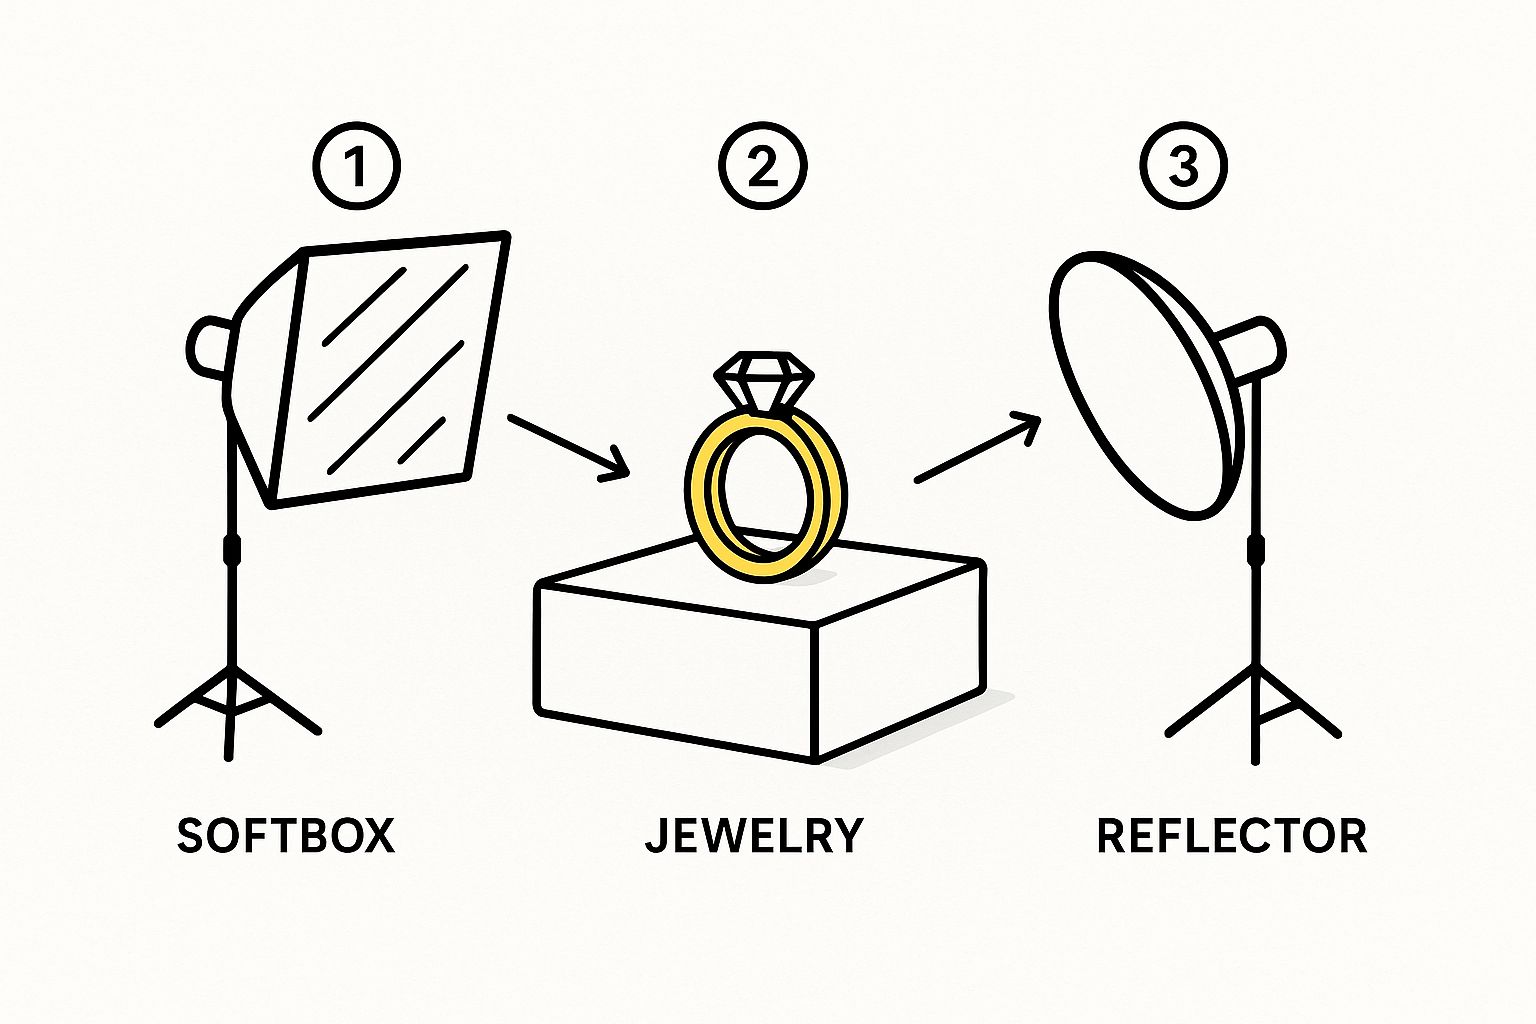
As you can see, a primary light source (like a softbox) paired with a simple reflector creates that beautiful, diffused light that gets rid of ugly, harsh shadows and lets the piece shine.
Fine-Tuning the Details
Once you've locked your focus, there are a couple more quick tweaks you can make. Next to that focus box, you'll probably see a small sun icon with a slider. This is your manual exposure control. Sliding it up or down adjusts the brightness. For jewelry, I often find that nudging it up just a little bit can make metals gleam and gems sparkle without blowing out the highlights.
Two other pro settings worth getting familiar with are ISO and White Balance:
- ISO: This is all about your camera's sensitivity to light. Your goal is to keep this number as low as possible—think ISO 100. A low ISO gives you a clean, crisp image. If you raise it too much, your photo will start to look grainy and noisy. Only increase it as a last resort if your shot is just too dark and you can't add more light.
- White Balance (WB): Ever take a photo where your silver ring looks strangely blue, or a gold piece looks way too orange? That's a white balance issue. This setting corrects the color temperature of the light. Adjusting the WB ensures your colors are true-to-life, which is absolutely critical for selling jewelry online.
Capturing Angles That Convert Customers
Okay, you've got your lighting sorted out and the camera settings are ready to go. Now for the creative part—actually shooting the photos. This is where your eye for detail really comes into play. You're not just taking a picture of a product; you're telling its story and showcasing the artistry that makes it special.
The basic top-down "flat lay" shot has its place, but it shouldn't be your only shot. Remember, your customers can't pick up the piece and examine it themselves. Your photos have to do that work for them, giving a full, almost 360-degree sense of the item. The angles you pick will completely change how a potential buyer sees the quality and design.
Finding the Perfect Perspective
One of the biggest mistakes I see is people taking every single photo from the same boring, eye-level angle. With something as intricate as jewelry, even a tiny shift in perspective can reveal stunning details and make the image pop. Before you even snap the picture, think about what makes that particular piece stand out and choose an angle that puts that feature front and center.
Here are a few go-to angles you should have in your toolkit for every shoot:
- The 45-Degree Angle: This is your money shot, especially for rings and earrings. It adds depth and shows off the details on the side of a setting or the beautiful drop of an earring. A flat photo just can't compete.
- The Macro Detail Shot: Get in close. Really close. Use your phone's macro mode or a cheap clip-on lens to focus on the tiny things—the clasp on a necklace, the delicate prongs holding a stone, or a unique engraving. This is the shot that screams quality and craftsmanship.
- The "In-Use" or Lifestyle Shot: This isn't a technical angle, but it's crucial. Showing jewelry on a model, even if it's just your own hand or neckline, gives an instant understanding of scale and style. It helps customers picture themselves wearing it, which is half the battle.
A great jewelry photo does more than just document the product; it anticipates the customer's questions. Does it lay flat? How big is the clasp? How does it catch the light? Your angles should provide these answers visually.
Staging Tricks for a Professional Look
Let's be real—getting jewelry to sit just right for a photo is a pain. Rings tip over, chains get tangled, and pendants never lie flat. The good news is that a couple of simple, cheap tools can fix all of this and make your shots look like they came from a high-end studio.
A tiny dab of museum putty or wax is the secret weapon every pro photographer uses. You can stick a pea-sized amount behind a ring to make it stand up perfectly or use it to hold a necklace chain in that perfect, elegant curve. It’s completely invisible to the camera and comes right off without leaving any gunk behind.
For adding a bit of dimension, clear acrylic blocks are a game-changer. Placing a bracelet or pendant on one of these blocks creates a soft shadow and a subtle "floating" effect. It adds a touch of class and cleanly separates the jewelry from the background. These small staging details make a massive difference, creating a cohesive and trustworthy look across your entire online store.
Polishing Your Shots with AI Photo Editing
Snapping the photo is just the beginning. The real magic, where good shots become great, happens in post-production. This is where you add that professional polish that builds trust and makes customers feel confident hitting "buy." Not too long ago, this step meant wrestling with expensive software and spending years learning the ropes.
Thankfully, that's no longer the case.
AI-powered tools have completely flipped the script on photo editing, especially for small business owners and solo entrepreneurs. What used to take hours of painstaking work can now be done in minutes, often with just a single click.
The Power of One-Click Edits
The single biggest time-saver for anyone selling online is background removal. For marketplaces like Amazon or even your own Shopify store, a clean, consistent background isn't just a nice-to-have; it's a requirement for a professional look. AI tools can instantly lift your jewelry off its original background and place it onto a crisp, pure white canvas.
This is a massive leap forward. Anyone who's tried to manually trace the tiny links of a necklace chain in traditional software knows how frustratingly tedious it is. An AI tool gets it done perfectly in a few seconds, delivering that clean, "floating" look that puts all the attention squarely on your product.
AI is also incredibly good at smart retouching. We've all been there—you think you've captured the perfect shot, but then you zoom in and see a tiny speck of dust on the gemstone or a faint scuff on the metal. Intelligent retouching can zap these little blemishes without softening the sharp facets and intricate engravings that make the piece special.
The point of editing isn’t to change what the jewelry looks like. It's about removing all the little distractions so its real quality can shine. AI excels at this, cleaning things up without faking it—and that authenticity is everything for building buyer confidence.
Getting That Consistent, Professional Vibe
One of the biggest forces changing jewelry photography today is the smart use of AI. Right now, about 85% of jewelry brands are using AI to make their workflow smoother, and many small businesses have slashed their photo editing costs by up to 93%. It makes automating background removal, applying smart lighting fixes, and getting a consistent look across a whole collection incredibly simple. It's no surprise that clean white backgrounds are the go-to for 38% of jewelry companies—they make the product pop and help drive sales.
It's this consistency that really separates an amateur-looking shop from a professional brand. Here’s how AI helps you get there:
- Uniform Backgrounds: Whether you prefer pure white, a soft gray, or a specific brand color, AI ensures every single photo has the exact same background. No more slight variations.
- Consistent Lighting: AI can look at all your photos and apply similar brightness and contrast adjustments, making your entire catalog look like it belongs together.
- Automated Cropping: You can set rules to automatically crop every image to the same dimensions, which makes your product grid look clean and organized.
This level of polish is no longer out of reach. And it goes beyond just basic edits; understanding the deeper potential of Unlocking Insights with AI Image Analysis shows just how sophisticated these tools have become at interpreting and improving visual content.
For anyone looking to really streamline the process, checking out specialized product photo editing services can be a total game-changer. They handle all the technical stuff, letting you focus on what you do best. In the end, taking a great jewelry photo is as much about the final polish as it is about the initial click.
Common Photography Mistakes and How to Fix Them
Knowing what not to do is just as important as knowing the best techniques for taking jewelry photos. Even if you have the perfect setup, a few common slip-ups can easily ruin your shots, leaving you with images that look amateurish and don't do your beautiful pieces justice.
The good news? These mistakes are easy to spot and even easier to fix once you know what you’re looking for. Think of this as your personal troubleshooting guide for getting consistently stunning results.
Taming Harsh Reflections and Glare
Shiny objects reflect everything. This is hands-down the single biggest challenge in jewelry photography. You’ll often see distracting reflections of your phone, your hands, or even the ceiling lights in your final shot. This is a dead giveaway that your light source is too direct and harsh.
The solution is all about diffusion. Instead of letting a bare light hit your jewelry, you need to soften it. Place a thin white sheet, a piece of parchment paper, or a professional diffuser between your light source and the piece. This simple trick scatters the light, wrapping it around the jewelry for a gentle, even glow that kills those sharp reflections.
One of the quickest ways to spot a professional jewelry photo is by what you don't see—distracting glare. Mastering soft, diffused light is the key to making metals gleam instead of just looking like a mirror.
Fixing Blurry Photos and Inaccurate Colors
Two other classic issues that can sink a sale are blurriness and weird, off-putting colors. A blurry image instantly signals a lack of quality and can make a potential customer second-guess your craftsmanship.
- The Problem: Blurry Shots. This is almost always caused by a tiny bit of camera shake, especially when you're shooting in lower light. Our hands are never perfectly still, no matter how hard we try.
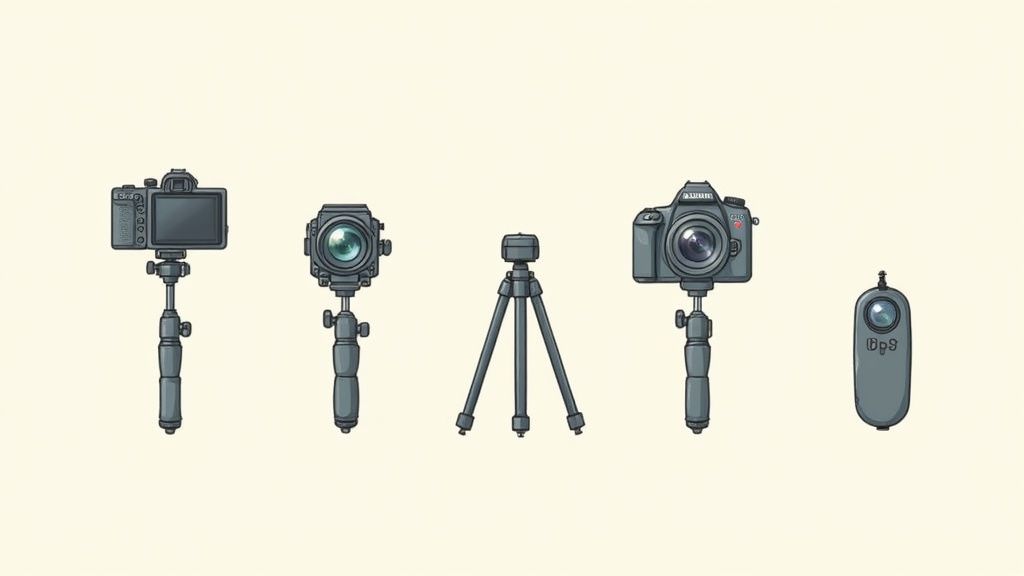
- The Fix: Use a Tripod. Seriously, a small, inexpensive smartphone tripod is a non-negotiable tool for this job. It holds your camera perfectly steady, guaranteeing that every intricate detail is captured with tack-sharp focus.
Inaccurate color is another major turn-off. If your silver ring looks slightly blue or your gold necklace has an orange cast, the culprit is almost always your white balance (WB) setting. Don't just rely on your phone's "auto" mode.
Take a second to manually adjust the WB setting to match your lighting conditions (for example, choose "daylight" or "cloudy"). This ensures your colors are true-to-life. Building a trustworthy online store means showing products exactly as they are, which is a core part of our guidance on professional Shopify product photography. Nailing these details is the final step in creating images that look polished, professional, and ready to convert browsers into buyers.
Got Questions About Jewelry Photography? Let's Get Them Answered.
Jumping into jewelry photography can feel like walking into a minefield of technical jargon. It's totally normal to have questions, and honestly, it's easy to get bogged down in the details. But you'll find that the answers are usually way simpler than you think.
Let's clear up a few of the most common hurdles people run into when trying to get that perfect shot. Once you nail these fundamentals, you'll have the confidence to make your pieces look incredible.
What’s the Secret to Perfect Lighting for Jewelry?
This is the big one. If I had a dollar for every time I've been asked this, well, you know the rest. The answer is almost always soft, diffused light.
Imagine the light coming through a big window on a cloudy day—it's gentle, it's even, and it wraps around your jewelry beautifully. That’s the goal. This kind of light kills the harsh glare and deep, distracting shadows that hide all the beautiful details you've worked so hard on.
Your worst enemy here is "hard light," like direct sun or a bare bulb. It creates those awful, sharp reflections on metal and can completely blow out the facets on a gemstone, making it look flat. To get that pro-level softness, you can:
- Hang a thin white sheet over a window to tame direct sunlight.
- Use a piece of white foam board to bounce light back into the shadows.
- Grab a photography softbox. They're literally designed for this exact job.
How Do I Capture Those Tiny Details with Just My Phone?
Today's smartphones have phenomenal cameras, but getting them to focus on the super-fine details of jewelry—like a maker's mark or the delicate prongs holding a stone—is tough. The trick is to get up close and personal without losing that sharp focus.
Your phone’s camera will probably start to struggle and blur as you move in. This is where a clip-on macro lens becomes your new best friend. Seriously, these things are a game-changer. They're inexpensive, snap right onto your phone, and let you get incredibly close while keeping everything perfectly crisp. It's the single best investment for showing off the craftsmanship that justifies your prices.
When an online shopper can clearly see the tiny, perfect details of a clasp or a setting, it builds a massive amount of trust. A sharp macro shot tells a story of quality that words just can't.
Can I Really Skip the DSLR and Still Get Pro Photos?
Yes, you absolutely can. This is probably the biggest myth in product photography right now. While a big, fancy DSLR camera is a fantastic tool, it is no longer the gatekeeper to professional, e-commerce-ready images.
Think about the workflow you have access to today. You've got an advanced camera right in your pocket, and when you pair that with smart techniques and powerful AI editing tools, you've got a killer combination. You can snap a high-res shot with your phone, then pop it into an app like ProdShot to instantly remove the background, fix the lighting, and clean up any tiny smudges.
This process gives you that clean, consistent, and polished look that used to require thousands of dollars in gear and years of experience. The tech we have now puts incredible results within anyone's reach.
Ready to turn your smartphone snaps into stunning, sales-driving product photos? With ProdShot, you can get professional results in seconds. Try ProdShot for free and see how easy it is to make your jewelry shine!