
When you boil it down, taking killer product photos at home really comes down to a few key things: finding great natural light, setting up a dead-simple backdrop, getting your smartphone camera settings dialed in, and then a quick final edit.
If you can master this simple workflow, you’re learning one of the most valuable skills for growing an online business. It literally turns a corner of your living room into a functional, money-making photo studio.
Why Great Product Photos Are Your Secret Sales Weapon
In ecommerce, your photos aren't just pictures. They’re your digital storefront. They’re your best salesperson, working 24/7. Most importantly, they're how you build trust before a shopper ever even thinks about clicking "add to cart."
Think about it: in a real store, people can pick things up, feel the texture, and see the size for themselves. Online, your photos have to do all of that heavy lifting. That's why high-quality photography isn't a "nice-to-have"—it's a must-have.
Good visuals do more than just show off your product. They scream professionalism, a deep care for quality, and a brand that has its act together. Blurry, dark, or sloppy images can make even the most amazing product look cheap and untrustworthy, sending potential customers running for the hills. On the flip side, crisp, bright, and beautiful photos let a small home-based brand go toe-to-toe with the big guys.
If you're just getting started and need a quick overview of the entire process, this table breaks it down into the most essential actions.
Quick Start Guide to Home Product Photography
| Phase | Key Action | Pro Tip |
|---|---|---|
| 1. Setup | Find a spot next to a large window for soft, natural light. | Overcast days are your best friend! Direct sun creates harsh shadows. |
| 2. Staging | Use a simple white poster board or a clean, neutral surface as a backdrop. | Keep it simple. The focus should be 100% on your product, not a busy background. |
| 3. Shooting | Tap your phone screen to focus on the product and adjust the exposure (brightness). | Use a small tripod or prop your phone against something to avoid blurry shots. |
| 4. Editing | Use a simple editing app to crop, brighten, and enhance the colors slightly. | Don't overdo it with filters. The goal is an accurate, appealing photo. |
This simple four-phase process is the foundation for creating images that will help you build a professional-looking online store.
The Real-World Impact on Your Business
The link between photo quality and sales isn't just a hunch; the data is crystal clear. Studies have found that 9 out of 10 online shoppers say high-quality photos are one of the most important factors when deciding to buy.
Even more telling, websites with professional-looking product images can see a 33% higher conversion rate than sites with amateur shots. Want to see the full breakdown? You can explore the full findings on product photography impact.
This sales bump happens for a few core reasons:
- It Builds Instant Trust: Great photos tell customers you're a serious seller who cares about quality and their experience.
- It Clears Up Doubt: Showing your product from multiple angles answers questions about size, texture, and features before they’re even asked. This also means fewer returns.
- It Boosts Perceived Value: Professional presentation makes your products look more desirable and can easily justify a higher price tag.
The takeaway is simple: Better photos lead directly to more sales. The time you spend learning how to take great product photos at home is one of the best investments you can make in your business's growth.
How Your Photos Fuel Your Marketing
Beyond your product pages, these images become the bedrock of your entire marketing plan. They're the assets you'll pull for social media, email campaigns, and online ads.
Creating a library of stunning, on-brand images gives you the tools to grab attention everywhere you show up online. To get the most out of your new photos, it helps to understand the different types of content on social media that actually work. This guide will walk you through exactly how to create those powerful visual assets, step-by-step.
Here's a rewrite of the section, following the style of the provided examples and human-writing requirements.
Building Your DIY Photo Studio for Under $50
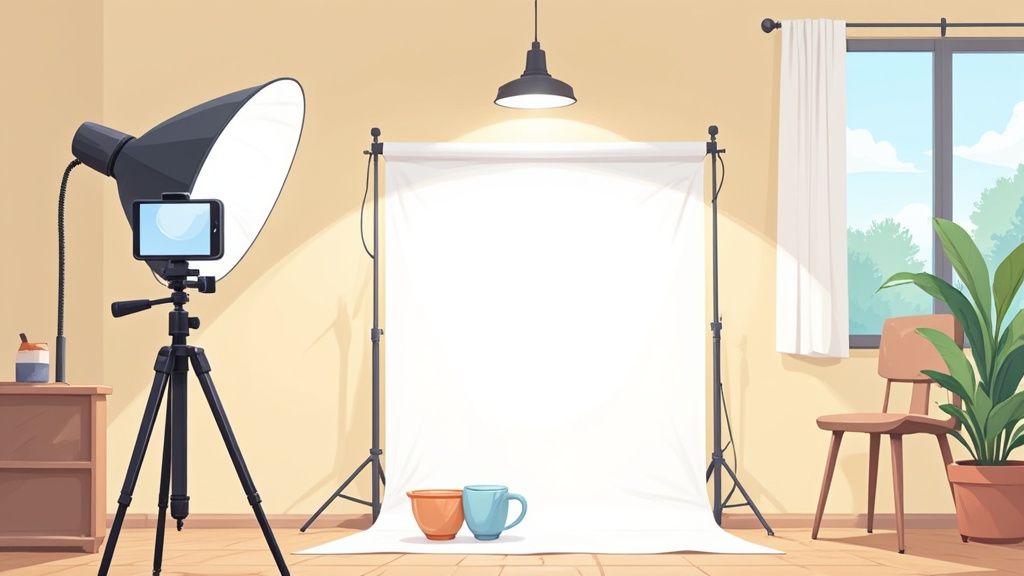
Let’s get one thing straight: you do not need an expensive, dedicated studio to create professional product photos. In fact, you can pull together a surprisingly effective setup for less than the cost of a nice dinner out, mostly using stuff you already have lying around. Learning how to take product photos at home really just starts with creating a smart little space.
The goal isn't to perfectly replicate a high-end studio. It's about controlling two things that truly matter: light and background. Get those two right, and you're 90% of the way to a fantastic shot. Let's walk through how to build your mini-studio on a shoestring budget.
This simple, 4-step infographic breaks down the entire process, from setting up your lighting to getting that final, polished edit.
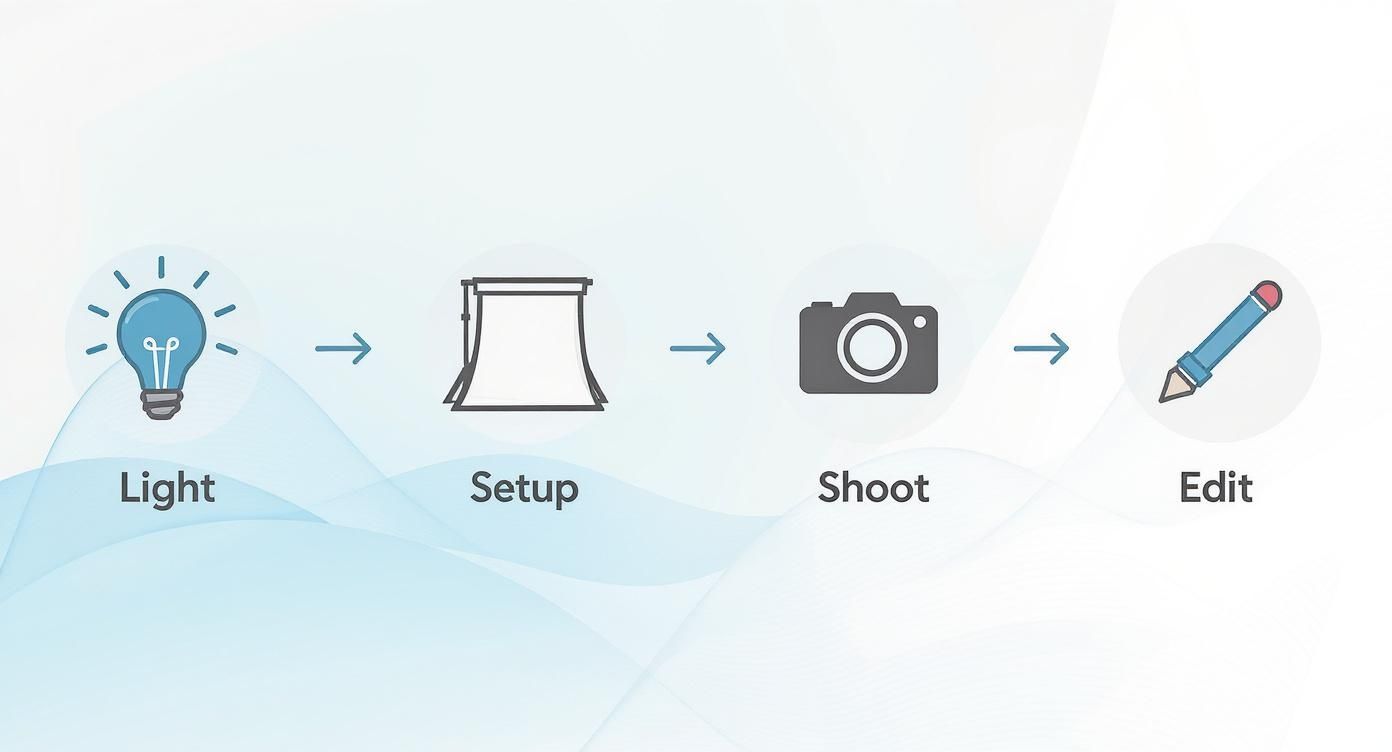
Think of it as a roadmap. It shows that amazing results come from a series of simple, deliberate actions, not from complicated, expensive gear.
Finding and Taming Natural Light
Your biggest asset is natural light, and the best part is, it's completely free. Find the biggest window in your home—that's your new best friend. What you're looking for is bright, indirect light. Direct, harsh sunlight creates ugly, dark shadows that will swallow up your product’s details.
Set up a small table or a sturdy box right beside the window, not directly in front of it. This placement gives you a soft, directional light that creates dimension and brings out the shape of your product.
Pro Tip: The absolute best time to shoot is usually mid-morning or late afternoon, especially if it’s a slightly overcast day. The clouds act like a massive, natural diffuser, scattering the sunlight to create this beautiful, soft, even glow that’s perfect for photography.
What if the sun is just too bright? No problem. Just tape a thin white bedsheet or even a big piece of parchment paper over the window. This simple trick instantly softens that harsh light, giving you an effect that’s remarkably similar to a professional softbox for just a few pennies.
Crafting a Seamless White Background
A clean, seamless background makes your product the undeniable star of the show. You don't need to buy a professional vinyl backdrop. Your secret weapon here is a simple piece of white poster board from any craft store.
To get that pro look, you’ll want to create a "sweep." This is just a gentle curve that gets rid of the distracting corner where your table meets the wall.
- Lay the poster board on your table.
- Gently curve the back of the board up against a wall or prop it up with a few heavy books.
- Use a piece of tape to hold the top of the board against the vertical surface.
That easy curve creates an "infinity" effect, making it look like your product is floating in a clean, professional white space. It’s one of the simplest hacks to make your shots look instantly better.
DIY Lighting Tools for Perfect Shots
Even with a great window, you'll probably have some shadows you need to manage. Instead of dropping cash on lighting gear, you can make your own incredibly useful tools for next to nothing.
The DIY Reflector
Your most powerful tool will be a reflector. Its job is to bounce light back into the shadowed side of your product, filling them in and brightening everything up.
- How to Make It: Grab a sturdy piece of cardboard and cover one side completely with aluminum foil, making sure the shiny side is facing out.
- How to Use It: Position the reflector opposite your window, just outside the camera's view. Then, just angle it until you see it visibly lighten the shadows on your product. You will be genuinely shocked at the difference this one little thing makes.
The DIY Lightbox
For smaller items like jewelry, skincare, or electronics, a lightbox is perfect for creating soft, even light from all sides.
- How to Make It: Find a decent-sized cardboard box. Cut out big windows on the top and two opposite sides, but leave a 1-2 inch frame for stability. Tape white tissue paper or a piece of thin white fabric over these openings.
- How to Use It: Place your product inside the box on a small white poster board sweep. Then, just shine lamps through the fabric-covered sides. The material diffuses the light, bathing your product in a gentle, almost shadow-free glow.
Simple Artificial Lighting for Cloudy Days
Let's be real, natural light isn't always an option. For dark, cloudy days or late-night photo sessions, a simple artificial light is a must-have. Don't even think about expensive studio strobes. A basic LED ring light or even a bright desk lamp with a daylight-balanced bulb (5000K-6500K) will work wonders.
When you're using artificial light, the key is to understand the difference between hard and soft light.
- Hard Light: A bare bulb creates sharp, well-defined shadows. It can be a cool, dramatic effect, but it’s usually unflattering for most products.
- Soft Light: A light source that’s diffused through something—like a lampshade or a white sheet—creates soft, feathered shadows. This is almost always what you want for product photos because it shows detail without being distracting.
To soften any lamp, just place a white t-shirt or a sheet of parchment paper in front of it (just be careful not to let it touch a hot bulb!). This one diffusion trick will immediately elevate the quality of your lighting. With these budget-friendly tools in hand, your home setup is officially ready for action.
Using Your Smartphone Camera for Flawless Shots
Let’s get one thing straight: you don’t need a fancy DSLR to compete online. The powerful little camera in your pocket is more than capable of creating gorgeous, professional-quality product photos. The secret isn't the gear—it's knowing how to take control of it and move beyond the simple "auto" mode.
It’s no surprise that 78% of small businesses now use smartphones as their primary camera for product shots. Mobile camera tech has gotten ridiculously good. More importantly, we know that high-resolution images can boost conversion rates by up to 94% compared to blurry ones. It's a skill that directly impacts your success. You can discover more insights about these product photography statistics to see just how big a difference your phone can make.
Mastering Focus and Exposure Manually
Your phone's auto mode is built for everyday snapshots, not for making your product the star of the show. To get those crisp, bright, and accurate images, you need to tell your camera exactly what to look at and how bright to make the scene.
It's easier than it sounds. On any iPhone or Android, just open your camera app and tap the screen right on your product. A little yellow or white box will pop up, confirming your focus point.
But here’s the game-changing part. When you tap, a small sun or lightbulb icon appears next to that box. Slide your finger up or down the screen to manually adjust the exposure—a fancy word for brightness. This one simple tweak is often the difference between a dark, amateur-looking photo and one that feels bright and professional.
Locking Your Settings for Consistency
We’ve all been there. You get the focus and brightness just right, but then you move your hand a millimeter and the camera "helps" by readjusting everything, ruining your shot. The fix is the AE/AF Lock (Auto Exposure/Auto Focus Lock).
To use it, just tap and hold on your product for a couple of seconds. You’ll see a little "AE/AF Lock" banner appear at the top of your screen. Now, your focus and exposure settings are locked in. You can move the phone around to perfect your composition without the camera fighting you. This is an absolute must for getting consistent shots.
Simple Composition Techniques That Work
Composition is just the art of arranging things in the frame to look good. You don't need to be an artist; you just need a couple of go-to principles.
- The Rule of Thirds: Picture a tic-tac-toe grid over your screen. Instead of plunking your product right in the center square, try placing it along one of the lines or where the lines cross. It instantly makes the photo more dynamic. Go ahead and turn on the grid in your phone's camera settings to make this a no-brainer.
- Embrace Negative Space: Don't crowd the frame. Leaving some empty "breathing room" around your product actually helps draw the eye to it. This is called negative space, and it makes your images feel less cluttered and more high-end.
These little tricks guide the viewer’s eye naturally. For sellers on specific platforms, mastering composition is crucial, as we cover in our guide to optimizing product photos for eBay sellers.
Why Shooting Multiple Angles Is Non-Negotiable
A single photo can’t tell the whole story. Your customers want to pick up the product and inspect it from all sides, just like they would in a real store. Giving them multiple angles builds trust and answers their questions before they even have to ask, which is a huge step in preventing returns.
For every product, aim for a core set of shots:
- The Hero Shot: A clean, straight-on view from the front.
- Profile Shots: Clear views from the left and right sides.
- The 45-Degree Angle: This shows the front and one side, giving a better sense of depth.
- The Back Shot: Don't forget details like tags, clasps, or input ports.
- A Detail Shot: A tight close-up to highlight texture, cool features, or craftsmanship.
This set gives a customer everything they need to click "add to cart" with confidence.
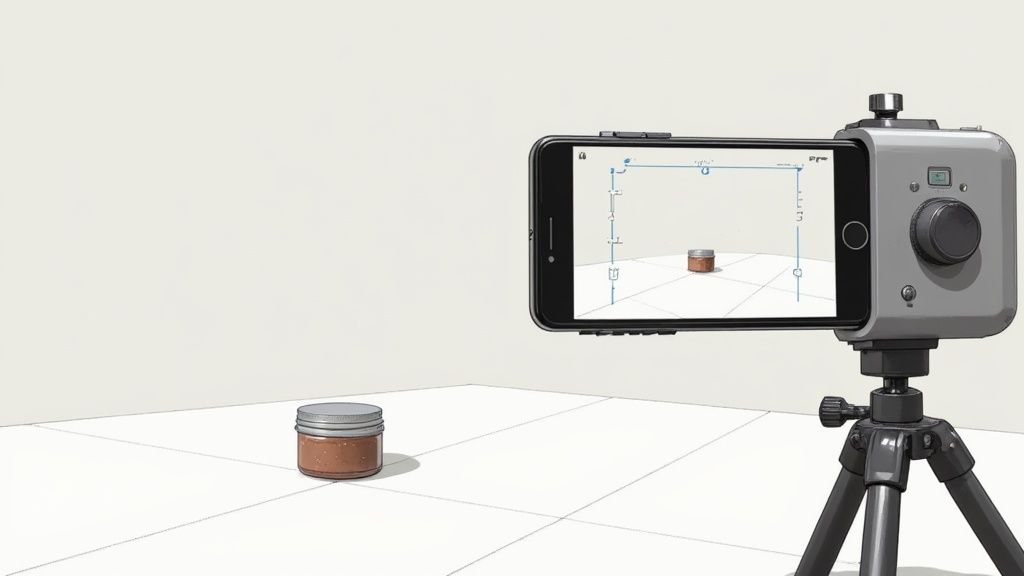
Your Single Best Investment: A Tripod
Seriously. If you buy only one piece of gear, make it a cheap smartphone tripod. Shaky hands are the #1 killer of good product photos, and a tripod completely eliminates that problem. Every shot will be tack-sharp.
A tripod does more than just stop the shakes. It forces you to be more intentional with your framing. It guarantees your angles are identical from one product to the next, which is the key to making your entire store look cohesive and professional.
You can get a decent one for less than $20, and it will improve your photos more than any other tool. It's the simplest, most effective step you can take towards getting flawless shots every single time.
Photography Techniques for Different Products
Here's a hard-earned lesson from the trenches of e-commerce: not all products are created equal in front of the camera. The perfect setup for a leather handbag might make a delicate necklace look flat and uninspired. If you really want to learn how to take product photos at home, you have to play to your product's strengths.
This means getting specific. A cozy sweater needs to look soft and touchable, while a piece of jewelry has to scream brilliance and precision. Let's dig into the go-to techniques for some of the most popular online store categories.
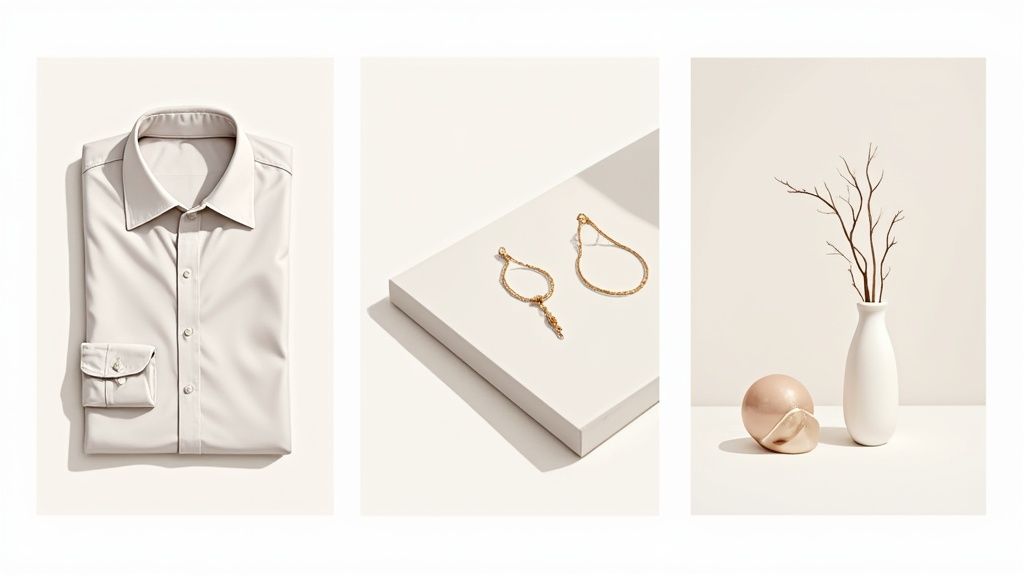
Mastering Apparel and Clothing Shots
With clothing, it all comes down to shape, texture, and fit. Your photo has to do the work a customer would do with their hands and eyes in a physical store. For this, you have two fantastic options: the flat lay and the ghost mannequin.
The flat lay is your most accessible starting point. Just lay the garment on a clean, flat surface—that white poster board sweep is perfect here, but a nice light-colored wood floor can also work wonders—and shoot from directly overhead.
- A Little Pro Trick: To keep your flat lays from looking, well, flat, use a bit of tissue paper or a few cotton balls tucked under the shoulders or waist. This simple move adds a hint of dimension and makes the garment feel much more lifelike.
- Style it Right: Think about how the item would naturally fall. Fold sleeves neatly or arrange the hem in a gentle curve. You can add a complementary prop, like a pair of boots or a simple bracelet, but never let it steal the spotlight from your main product.
The ghost mannequin effect is a more advanced technique, but it's a total game-changer. It creates a crisp, 3D look as if an invisible person is wearing the clothes. You achieve this by taking two shots: one with the item on a mannequin (or even a live model), and a second shot of the inside back/collar area. In post-production, you’ll merge these two images to erase the mannequin, revealing the garment’s full shape and interior lining.
Capturing the Sparkle in Jewelry
Jewelry is notoriously tough to shoot. It’s tiny, detailed, and ridiculously reflective. The secret is to meticulously control your lighting to kill unwanted glare and bring out that brilliant sparkle.
Soft, diffused light is non-negotiable. A simple DIY lightbox is your best friend here because it wraps the piece in gentle light, smoothing out harsh reflections. Try placing your light source at a 45-degree angle; this often catches the facets of a gemstone perfectly without bouncing a reflection of your living room back into the lens.
To really nail reflection management, try making a "cone" out of white paper. Cut a small hole at the tip for your phone's lens to peek through. When you place this over the jewelry, it blocks reflections from the rest of the room and gives you a much cleaner, more professional shot.
A macro lens attachment for your phone is one of the best small investments you can make. It lets you get incredibly close to capture the fine details—the clasp, any engravings, the stone settings—that really justify the price tag. For a deeper dive, you can learn more about how we perfect jewelry product photos with our specialized guide.
Showcasing Electronics and Gadgets
When you're shooting electronics, your goal is to showcase clean lines, highlight key features, and make sure the screen looks great. Your biggest enemy is glare. Whatever you do, never use your phone's built-in flash. It will create a nasty, harsh hotspot on any screen or glossy surface.
Instead, go back to your diffused natural light source. Position the gadget so the light hits it from the side, which defines its form without bouncing straight into your camera. A rookie mistake is shooting a device with the screen off—it just looks like a dead black box. Always turn the screen on and display a clean home screen or your brand's wallpaper.
- Show Off the Features: Use multiple angles to get shots of important ports, unique buttons, or cool design elements.
- Provide a Sense of Scale: For one or two shots, include a common object like a coffee mug or a hand reaching for the device. This gives customers an instant understanding of its true size.
- Wipe it Down: Fingerprints and dust are extra visible on electronics. Give every surface a thorough wipe with a microfiber cloth right before you start shooting.
Creating Lifestyle Scenes for Home Decor
For items like pillows, vases, and artwork, context is king. Customers aren't just buying an object; they're buying how it will make their space feel. A clean, white-background shot is still crucial for the main listing, but the lifestyle photo is what seals the deal.
You don't need a full-on studio set. Just create a small, aspirational vignette. Selling a decorative pillow? Don't just toss it on the floor. Style it on a beautifully made bed or a chic armchair to help the customer envision it in their own home.
Here’s a quick breakdown of the two shots every home decor product needs:
| Shot Type | Purpose | Best Practices |
|---|---|---|
| White Background | Shows the product clearly, without distraction. This is a must for most marketplaces. | Light the item evenly to capture its true color and texture. Get shots from the front, back, and sides. |
| Lifestyle/In-Context | Helps customers visualize the item in their own space and creates an emotional pull. | Style with a few complementary items. Use soft, natural light to create a warm, inviting mood. |
When styling a lifestyle shot, remember the rule of odds. Grouping items in threes or fives tends to be more visually appealing. Your goal is to create a vibe that makes someone think, "I want my home to feel just like that." When you tailor your photography to your product, you stop just showing an item and start telling a story that truly connects with your customers.
Editing Your Photos for a Professional Finish
Getting the shot is only half the battle. The real magic—the stuff that turns a decent product photo into an image that actually drives sales—happens in the edit.
Post-production isn't about faking it. It’s about polishing your image to correct for the small things your camera couldn't quite handle, presenting your product in its truest, most appealing light.
You don't need a degree in graphic design or an expensive software subscription to get that polished look. A few simple, strategic tweaks can make all the difference, turning a slightly dim, crooked shot into a bright, crisp photo that looks right at home on any professional storefront. Let's walk through a simple workflow anyone can master.
Starting with the Essentials
Before you get fancy, every photo needs a quick check-up on the basics. Think of these as the foundation for a great final image. Free but powerful apps like Snapseed or even your phone's built-in editor are more than enough for this stage.
- Crop and Straighten: Is the product framed well? Is the horizon perfectly level? Use the crop tool to trim away any distracting empty space and the straighten tool to fix tilted angles. This one tiny fix instantly makes your photo look more intentional and professional.
- Brightness and Contrast: Smartphone cameras often capture pure white backgrounds as a dull light gray. Gently bump up the brightness (or exposure) until your background looks clean and white, but be careful not to "blow out" the details on your product itself. A little extra contrast can also make your product pop.
- White Balance: Does your product's color look true to life? Indoor lighting can easily cast a weird yellow or blue tint on everything. The white balance or temperature tool is your best friend here—use it to neutralize any color cast so your customers see the product's real colors.
The Power of AI for a Flawless Finish
Once you've dialed in the basics, it’s time for the tasks that used to require hours of tedious work in Photoshop. Today, AI-powered editing tools can deliver stunning results in seconds, making them an essential part of any DIY product photography setup.
The rise of AI editing has been a complete game-changer. A recent study found that 76.7% of e-commerce brands use solid background colors for their main product photos—a look that AI can nail in an instant. You can learn more about trends in the e-commerce photography market to see just how much these tools are shaping online retail.
One of the most common requirements for marketplaces like Amazon and Shopify is a pure white background. This used to be a major headache for sellers, but modern AI tools now handle it with a single click.
Tools like ProdShot are built from the ground up for exactly this. You just upload your photo, and the AI intelligently identifies the product, strips away the original background, and swaps in a perfect, studio-quality white backdrop.
The clean, simple interface makes it obvious that you don't need any technical skills to get professional results—the AI does all the heavy lifting for you.
Beyond just removing the background, these smart tools can offer a whole suite of enhancements. For those who want an even more hands-off approach, exploring professional product photo editing services can be a great way to ensure top-tier quality and consistency across hundreds of listings.
AI editors often include features that can:
- Auto-Correct Color: The AI analyzes your image and adjusts the colors to be vibrant and accurate.
- Generate Realistic Shadows: A subtle drop shadow makes your product look grounded and realistic, not like it’s floating awkwardly in space.
- Resize for Any Platform: Instantly create perfectly sized versions of your photo for Instagram, your Shopify store, or Etsy thumbnails, ensuring your brand looks great everywhere.
Common Product Photography Questions
Even when you've got a solid plan, a few questions always seem to pop up as you're getting the hang of taking product photos at home. Let's tackle some of the most common hurdles new sellers run into, giving you clear, straightforward answers to help you shoot with more confidence.
What Is the Best and Cheapest Lighting?
Hands down, the best and cheapest lighting you can find is natural light from a big window on an overcast day. It’s soft, it’s diffused, and it costs absolutely nothing.
To make the most of it, set up your product right next to the window. You want to avoid those harsh, direct sunbeams that create deep, unflattering shadows. Think bright, but soft.
If you have to shoot at night or don't have a good window, a simple LED ring light or even a standard desk lamp can get the job done. The trick is to use a daylight-balanced bulb (look for 5000K-6500K on the box) and soften the light. You can do this by taping a thin white sheet or a piece of parchment paper over the lamp to diffuse it.
How Many Photos Should I Take for Each Product?
You should aim for 5-8 photos for every single product. Giving shoppers this much visual information builds a ton of trust and answers their questions before they even have to ask. The right set of photos can dramatically cut down on returns.
A winning photo set usually includes:
- A classic "hero" shot on a clean, white background.
- Shots from all the important angles (front, back, side, and a 45-degree view).
- A close-up detail shot to show off texture, materials, or special craftsmanship.
- An "in-context" or lifestyle shot that shows the product being used.
Is My Phone Good Enough for Product Photography?
Absolutely. The camera in your pocket is more powerful than you think and is completely capable of producing professional-looking shots. The secret to great product photos isn't a thousand-dollar DSLR—it’s your control over lighting, composition, and editing.
Honestly, using a cheap tripod to keep your phone steady and following the tips in this guide will get you way better results than an expensive camera used poorly. Your phone is all you need to get started. If you want to go a bit deeper on the fundamentals, this is a great guide on what product photography is and how to capture stunning shots.
The biggest thing to remember is this: mastering the basics of light and setup with your smartphone will improve your photos more than any expensive gear ever will.
How Do I Get a Pure White Background?
Getting that perfect, pure white background (#FFFFFF) that you see on Amazon is a two-step dance.
First, you set the stage. Start with a physical white backdrop—a curved piece of poster board (a "sweep") works perfectly. Light it as brightly as you can without blowing out the details on your actual product. Even with great lighting, your camera will probably see this as light gray, not pure white.
That’s where step two comes in: editing. The most reliable way to get that clean, commercial look is to use a photo editing app or an AI tool to remove the background entirely and replace it with a pure white one. This is how the pros do it, and it's the standard for almost every major online marketplace.
Ready to turn your phone snapshots into professional, marketplace-ready images in just a few seconds? With ProdShot, you can erase backgrounds, add realistic shadows, and generate stunning visuals with AI.