
Let's be honest: when it comes to e-commerce, light background images aren't just a "nice-to-have" anymore. They're table stakes. Think of them as the silent salesperson doing the heavy lifting—they cut through the noise, build immediate trust, and make your product the absolute hero.
Why a Clean Background is Your Unfair Advantage

It’s easy to look at a clean product photo and just think, "that looks professional." But the real power is psychological. A simple, uncluttered background does something incredible: it lowers the cognitive load for your customer. When their brain isn't trying to process a busy, distracting scene, all that focus goes right where you want it—on your product's quality, details, and features.
This isn't just a gut feeling; it’s a strategy backed by cold, hard data and pioneered by the giants of online retail. Research shows that clean, distraction-free images can increase a shopper's intent to buy by a massive 24% compared to photos with cluttered backgrounds.
There’s a reason Amazon made pure white (RGB 255, 255, 255) the gold standard for its main images. It just works. Other major players like eBay, Etsy, and Google Shopping followed suit because the formula is proven to convert browsers into buyers. If you want to dive deeper into the numbers, this AI product photography report is packed with insights.
It's More Than Just a Marketplace Rule
Meeting platform requirements is one thing, but the benefits of a clean aesthetic run much deeper. It’s about building a brand that people trust.
- Build Instant Trust: Consistency across your product shots creates a cohesive and professional brand image that feels reliable.
- Show Off the Details: Without any visual noise, customers can zoom in and appreciate the textures, colors, and craftsmanship you've worked so hard on.
- Win on Mobile: On a tiny screen, simplicity is king. A light background makes sure your product pops and is clearly visible, no matter the device.
The name of the game is making the buying decision as easy and frictionless as possible. A light, consistent background removes one more piece of friction, helping shoppers clearly visualize the product in their own life. That’s a critical step toward the checkout button.
The good news? You no longer need a massive budget or a fancy studio to get this professional look. The gap between a high-end shoot and what you can achieve yourself has narrowed dramatically.
Of course, a great photo is only half the battle. To really turn these images into a sales weapon, you also need to implement proven image optimization strategies to ensure they load fast and look great everywhere. Thanks to smarter techniques and accessible AI tools, anyone can now create images that sell.
Preparing Your Product for the Perfect Shot
That journey to a stunning light background image starts long before your camera even comes out of the bag. If you ask any pro, they'll tell you that meticulous prep is what really separates a forgettable snapshot from a high-converting product photo. It’s all about controlling every variable you can to make sure your product looks absolutely flawless.
Every item has its own quirks. For a slick new gadget, you'll want a microfiber cloth and some compressed air to get rid of every last speck of dust and fingerprint. If you’re shooting a shirt, a quick pass with a steamer is non-negotiable—you have to get rid of the wrinkles and creases from shipping. Trust me, even the slightest imperfection gets magnified a hundred times under focused lighting.
Create a Strategic Shot List
Once your product is looking pristine, it’s time to plan your angles. Don't just start snapping away randomly. A deliberate shot list tells a complete visual story for your customer. You need to think like a buyer who can’t physically hold the item. What do they really need to see to feel confident hitting that "buy now" button?
A solid shot list is your roadmap. It keeps you efficient, ensures you get every view you need, and saves a ton of time.
To get you started, here's a checklist I use to capture every angle that answers customer questions and builds that crucial confidence.
Your Essential Product Photography Shot List
| Shot Type | Purpose | Pro Tip |
|---|---|---|
| The Hero Shot | A straight-on or slightly angled front view that clearly identifies the product. This is your main image. | Make it pop. This is the first impression, so ensure the lighting is perfect and the product is centered and sharp. |
| Profile & Back | Shows all sides so there are no surprises for the customer. Builds transparency and trust. | Don't skimp here. Customers want to see what the back looks like, especially for electronics or clothing. |
| The 45-Degree Angle | Gives a great sense of the product's depth, dimension, and form. It adds a bit of dynamism. | This angle often highlights the product's design features. Experiment to find the most flattering 45-degree perspective. |
| Close-Up/Detail | Zooms in on unique features, textures, branding, or key components like zippers or connection ports. | This is where you show off quality. Focus on what makes your product special—the stitching, the material, the logo. |
| Scale Shot | Shows the product next to a common object (like a coin or phone) to give a sense of its real-world size. | Super important for small items where size can be deceiving online. It helps manage customer expectations. |
This isn't just a to-do list; it's a strategy for communicating value without words. Each angle you capture is another question answered, moving your customer one step closer to a decision.
A well-planned shot list does more than guide your photoshoot; it systematically answers a customer's unspoken questions. Each angle you capture is a piece of information that builds trust and moves them closer to making a purchase.
Finally, think about your space. You don't need a massive studio. A small table near a window with plenty of soft, indirect natural light is often perfect. Just make sure to clear the area of any clutter that could cast weird colors or reflections onto your product.
Getting these foundational elements right makes everything that comes next so much easier. To really master this, it's worth digging into the nitty-gritty of Amazon product photography best practices, as they've set the standard for what works. This prep work truly sets the stage for a successful shoot.
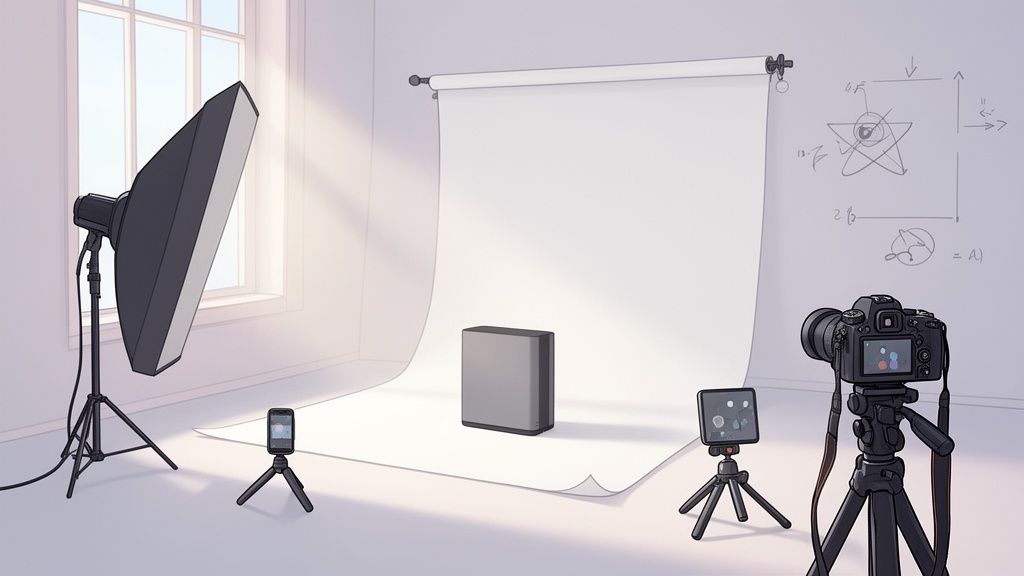
Building a DIY Lighting and Background Setup
You really don’t need a fancy studio to create professional light background images. Honestly, some of the best-looking shots come from simple, clever setups you can build with stuff you probably already have at home. This is all about working smart to get that clean, high-converting look without breaking the bank.
The first thing you need is a seamless background. For this, we’ll create what’s called a 'sweep' or an 'infinity cove'. It’s a simple trick that gets rid of that hard, distracting line where a table meets a wall, making your product look like it's floating in a professional studio.
Just grab a large piece of white poster board or a roll of white paper. Lay it on a table and gently curve it up against a wall, then tape the top edge to the wall. Your product sits on the flat part of the paper, and the curve creates that smooth, clean backdrop. Easy.
Harnessing Natural Light with a Window
Next up is lighting. Your best, most flattering light source is completely free: a window. What you're aiming for is soft, diffused light that wraps around your product and keeps harsh shadows at bay. Stay away from direct, beaming sunlight—it creates sharp, ugly shadows and can blow out the highlights on your product.
Set up your little studio next to a large window. The ideal time is on a bright but overcast day, or simply choose a window that isn't getting hit with direct sun. This gives you a perfect softbox effect without any equipment at all.
To make the most of this natural light, here’s a simple placement strategy:
- Place your product about two to three feet away from the window.
- Position your camera or phone directly in front of the product.
- The window light should hit your product from the side, at roughly a 90-degree angle.
This side-lighting technique is the secret sauce. It illuminates one side of your product beautifully while letting the other side fall into a gentle shadow. That contrast is what creates depth and makes your product look three-dimensional and way more appealing.
Mastering Shadows with a DIY Reflector
That soft shadow is great for adding shape, but we don't want it to be a black hole where details get lost. This is where your final DIY tool comes in: a reflector. Its job is to bounce some light back into those shadowed areas, softening them up and revealing more of the product’s details.
No need to buy anything fancy. A simple piece of white foam core from a craft store works perfectly. You can even make a great one by wrapping a piece of cardboard in aluminum foil—just be sure to use the dull side to avoid creating harsh, shiny spots.
Place your DIY reflector on the side of your product opposite the window. Light from the window will hit your product, and the reflector will bounce it right back, filling in those shadows. You can move the reflector closer or further away to control exactly how bright you want the shadows to be.
Creating great light background images is less about expensive gear and more about knowing how to shape the light you have. A simple paper sweep, a window, and a piece of foam core are often all you need to get 90% of the way to a pro-level shot.
This simple, three-part process—the sweep, the window, and the reflector—is a rock-solid foundation for amazing product photography.
The infographic below shows the core workflow you should follow even before you start thinking about lights.
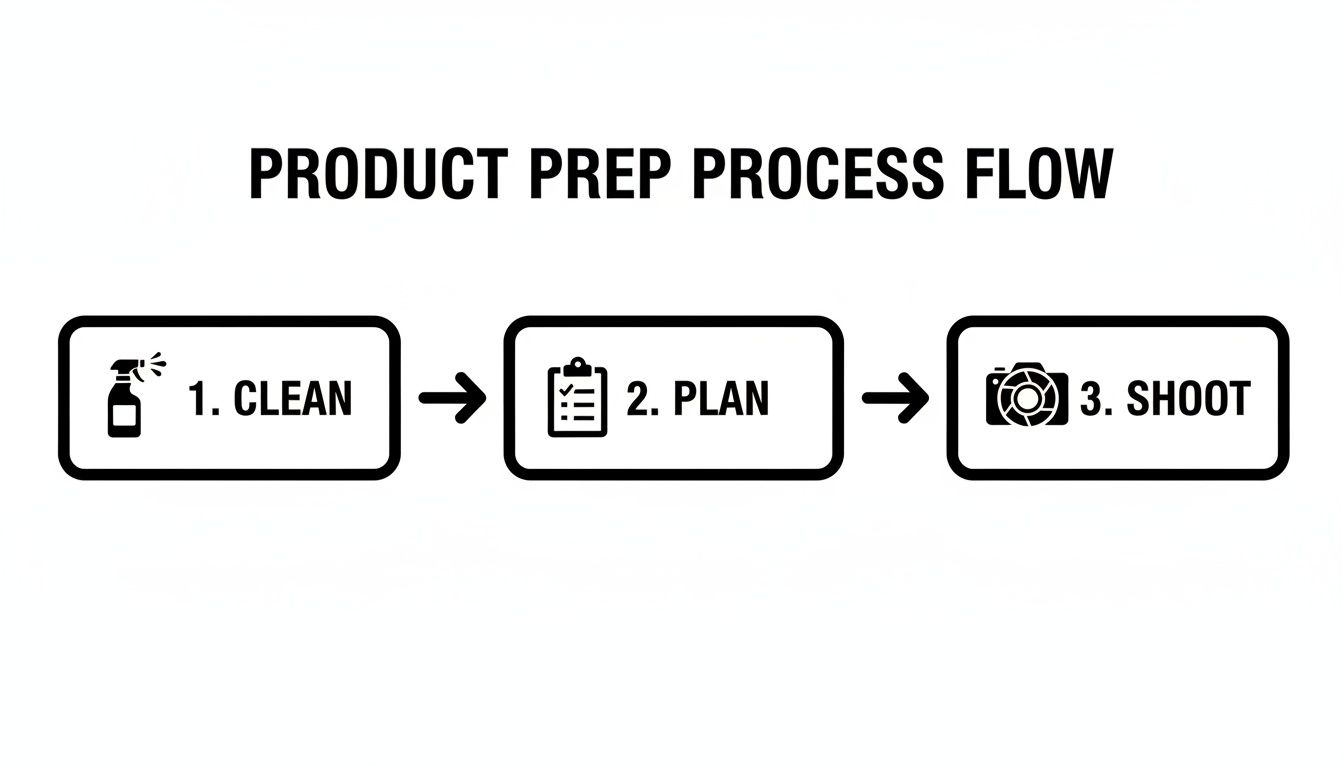
It’s a good reminder that every great shoot starts with careful cleaning and planning. And if you're taking these photos for a Shopify store, you'll probably want to remove the background from your Shopify images later on to get that perfectly consistent look across all your listings.
Nailing Your Camera and Smartphone Settings
A great DIY setup is a fantastic start, but the right camera settings are what really make your light background images shine. It doesn't matter if you're using the latest iPhone or a dedicated camera; knowing how to make a few simple adjustments is what separates amateur shots from professional results. You don't need to be a photo geek to get this right.
First things first: get a tripod. This is non-negotiable, no matter what you're shooting with. Even the steadiest hands will create a tiny bit of blur, and that's enough to ruin an otherwise perfect shot. A tripod locks your camera or phone in place, guaranteeing every single image is tack-sharp and consistent—a must for a clean, professional-looking product gallery.
Smartphone Photography Essentials
Your phone's camera is a powerhouse, but its automatic settings are designed for quick snapshots, not product photos. You need to take control.
Before you start shooting, tap and hold on your product right on the screen. This locks the focus and exposure. It’s a simple move that prevents the camera from constantly changing the brightness or focus point between shots. Inconsistent lighting is a dead giveaway of amateur work.
Also, dig into your camera settings and turn on the gridlines. They're a massive help for lining up your product perfectly in the frame every time. And one last golden rule: never, ever use the digital zoom. It’s a sham. All it does is crop your picture and blow it up, destroying the quality. If you need a closer shot, physically move your phone closer.
Unlocking Your DSLR or Mirrorless Camera
If you're working with a camera that has manual controls, you've got even more power to create incredible images. The main goal here is to get your entire product perfectly sharp, from the front edge to the very back.
To achieve this, you'll want to dial in a higher f-stop (that’s your aperture setting). A good starting point is somewhere between f/8 and f/11. This gives you a deep "depth of field," making sure every last detail is crisp.
Next, drop your ISO as low as it will go—usually ISO 100 or 200. A low ISO gets rid of digital noise and grain, which is that speckled, unprofessional look that can kill a great photo. Since your camera is locked down on a tripod, you can use a slower shutter speed to let in more light without a hint of blur.
Getting your settings right in the camera saves a mountain of time later. A clean, sharp, and well-exposed photo is 90% of the battle won before you even think about editing.
For a lot of small retailers and Etsy sellers, the editing process itself is the biggest headache. The good news is that AI tools have come a long way, automating what used to take hours of tedious work. Big e-tailers like Wehkamp use AI to cut their background removal time from 12 hours down to just 1.2 seconds per image—with 94% of those images processed without a single error.
You can see more stats about how AI is changing e-commerce photography and understand how this shift lets sellers spend more time shooting and less time stuck behind a computer screen.
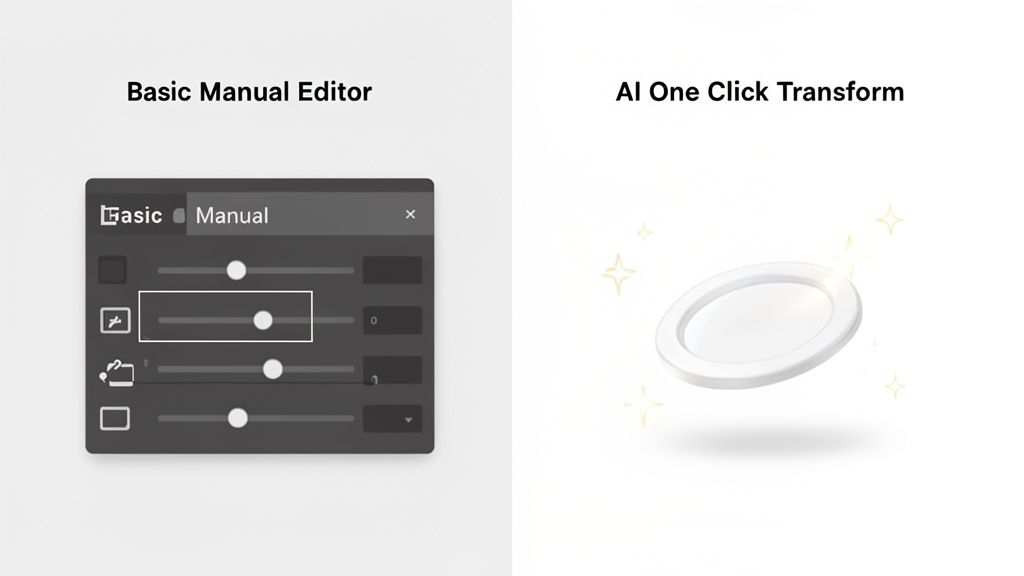
From Manual Edits to AI-Powered Perfection
The magic of a truly great product photo often kicks in long after you've put the camera down. Post-processing is where good shots become great, but the path you take to get there has split into two very different directions: the traditional, hands-on manual route and the modern, AI-powered approach.
For years, editing light background images was a meticulous, step-by-step ritual. You’d import your photos into software like Photoshop and get to work, perfecting each one by hand. This workflow is all about control, giving you the final say over every single pixel.
The Traditional Editing Workflow
The manual approach involves a standard checklist of tweaks and fixes. While it can feel a bit slow, mastering these fundamentals is an invaluable skill for any product photographer.
You'll find yourself running through a few key tasks every time:
- Cropping and Straightening: The first thing you'll always do. It's all about making sure your product is perfectly aligned and framed for a balanced, professional look.
- Exposure and Contrast Adjustments: This is the fine-tuning stage. You’ll be bumping up the brightness and tweaking the tonal range to make the product pop without losing crucial details in the shadows or highlights.
- White Balance Correction: A critical step. This is where you remove any weird color casts from your lighting so your whites look genuinely white and the product colors are spot-on.
- Blemish and Dust Removal: Time to get picky. Using clone stamps or healing brushes, you meticulously hunt down and erase tiny imperfections on the product or background.
This process gives you absolute control, but it demands both time and a fair bit of technical skill. It can easily become a major bottleneck, especially when you have dozens—or even hundreds—of photos to get through.
The real problem with manual editing isn't just the work itself; it's the opportunity cost. Every hour you spend meticulously cutting out a background or adjusting shadows is an hour you're not spending on marketing, customer service, or actually growing your business.
The Game-Changing AI Approach
Thankfully, there's a much faster way now. Modern AI tools like ProdShot have completely reimagined the post-processing workflow. Instead of being a hands-on editor, you get to be a creative director, guiding smart algorithms to nail the perfect result in seconds.
The AI workflow is refreshingly simple. You just upload your raw, unedited photo, and the system does the heavy lifting.
- One-Click Background Removal: The AI flawlessly spots your product and cuts out the background, leaving you with a clean slate to work with.
- Intelligent Lighting and Reflections: It then adds realistic lighting, shadows, and even subtle reflections that make the product look like it was shot in a high-end studio.
- Instant Scene Generation: From there, you can drop your product into custom-generated scenes or just stick with a classic light background, all with a single click.
This isn't just about moving faster; it's a genuine business advantage. In fact, research shows that 71% of e-commerce businesses are already using AI for tasks like this, which is leading to higher conversion rates and more sales.
By embracing an AI-first mindset, you shift your energy away from tedious editing and toward high-impact activities for your business. Tools like the ProdShot AI product photo generator give you the power to get professional-grade images to market faster than ever, giving you a serious leg up on the competition.
Got Questions About Light Backgrounds? We’ve Got Answers.
Even with a solid plan and the right gear, you're bound to hit a few snags when shooting light background images. It just happens. Let’s walk through some of the most common issues I see and how to fix them so you can get back to creating clean, professional shots.
What's the "Right" Shade of White Anyway?
This question comes up all the time. While pure, stark white (RGB 255, 255, 255) is the gold standard for marketplaces like Amazon, it isn't your only option. Honestly, it can sometimes feel a bit cold or unnatural.
Don't be afraid to experiment with a subtle off-white or a very light gray. These shades can add a layer of sophistication and warmth that makes a product feel more premium. For instance, a light cream background can beautifully complement handmade jewelry, while a soft gray gives metallic products a sleek, modern edge. The most important thing is to pick a tone and stick with it for a consistent look across all your listings.
How Do I Get Rid of That Yellow or Blue Tint?
Ah, the dreaded color cast. If your "white" background is looking more like a pale yellow or a chilly blue, the culprit is almost always your white balance. Most cameras and phones are set to Auto White Balance (AWB) by default, and while they do a pretty good job guessing the color temperature, they can get it wrong.
Mixed lighting is a common trigger for this. You might have cool, blueish light coming from a window on a cloudy day and warm, yellowish light from an indoor lamp. The camera gets confused. The easy fix is to manually set the white balance to match your main light source—look for settings like "Daylight" or "Tungsten."
Pro Tip: For dead-on color every single time, grab a gray card. Just snap one photo with the card filling the frame before you start your shoot. Later, in your editing software, you can use the white balance dropper tool on that gray card image to instantly neutralize any color cast. Apply that setting to all the other photos from that session, and you're golden.
Nailing the color and consistency is what separates amateur shots from a professional-looking online store. On a visual-heavy platform like Instagram Shopping, a cohesive look and feel directly impacts how shoppers perceive your brand. Data from BigCommerce even shows that this kind of visual consistency can boost conversions by up to 26%. Sellers are now turning to AI tools to cut their editing costs by as much as 70%, which lets them get products to market way faster and jump on seasonal trends before their competitors do. Learn more about how AI is transforming e-commerce photography.
What If My Product Is White?
Photographing a white product on a white background is a classic challenge, but it's totally doable. The trick is to stop thinking about making the product stand out and start thinking about defining it with shadows.
You need to use your lighting to sculpt the product's shape with soft, gentle shadows. This is where that side-lighting technique we talked about becomes critical. By hitting the product from an angle, you’ll create subtle highlights and shadows that trace its edges, making it pop right off the background. If you're still struggling to get that perfect separation, you might want to look into professional product photo editing services to give your images that final, polished touch.
Ready to stop wrestling with manual edits and start creating stunning, sales-driving images in seconds? With ProdShot, you can transform simple photos into professional, marketplace-ready visuals with the power of AI.