
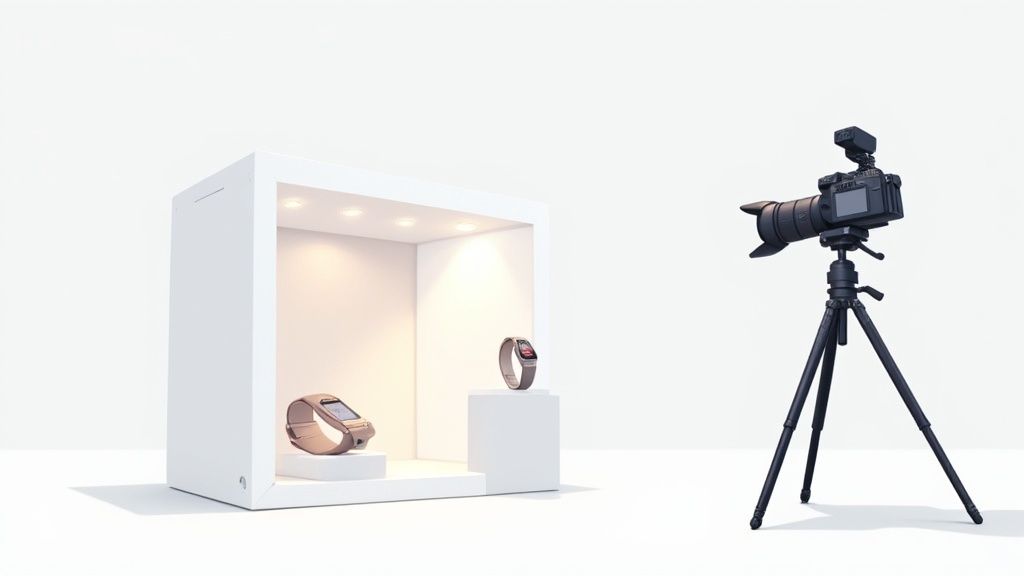
Ever wonder what a light box is and why it's so critical for product photography? Think of it as a small, portable studio. It's basically a box with see-through sides and a clean white background, built to drench your product in soft, even light. This setup is the secret to erasing those harsh, distracting shadows.
For any e-commerce store, getting a light box is probably the single most effective move you can make. It's what takes your product shots from looking like amateur phone snaps to crisp, professional images that actually convert.
Why Better Lighting Literally Sells Your Products
Let's be real—bad photos are a sales killer. An image snapped under a regular lamp in your living room usually comes with ugly shadows, weird color tints, and a background that screams "I did this on my kitchen table." This instantly signals to a potential customer that you might not be a serious, professional brand. It’s a tiny detail with a huge impact on your store's credibility.
Now, picture that same product shot inside a light box. It’s bright, clean, and looks like it belongs in a real catalog. The consistent, soft lighting makes your products look incredible and builds immediate trust with shoppers, whether they're on Shopify, Amazon, or Etsy. This isn't just about making things look pretty; it's about driving real business results.
The Hidden Cost of Bad Photos
Subpar visuals do more than just look unprofessional—they hit your bottom line, hard. When customers can't clearly see the details of a product, they get hesitant. That hesitation leads directly to lower conversion rates.
Worse yet, it often leads to more returns when the product that shows up doesn't quite match what they thought they were buying. Investing in a simple lighting setup is almost always cheaper than the long-term cost of professional product photography.
Professional images signal quality and reliability, which can directly boost conversions and reduce cart abandonment. Think of your lighting setup as the foundation for a catalog that truly sells.
Marketplaces Don't Just Prefer Quality—They Demand It
To really get the most out of your visuals, you have to know what the big e-commerce platforms expect. For instance, Amazon has incredibly strict guidelines. If you sell there, digging into a comprehensive guide on Amazon product photography is a must.
Clean, well-lit images aren't just a nice-to-have anymore; they're the price of admission to compete effectively. This trend has only accelerated with the explosion of e-commerce. In fact, the global photography light box market is projected to hit $300 million by 2032, which is double its 2023 value. This isn't just a niche tool; it's becoming standard equipment for sellers everywhere.
Choosing the Right Light Box for Your Products
So, you're ready to level up your product photos. The big question is: do you buy a pre-made light box or build one yourself? This isn't just about saving a few bucks; it's about what works best for your products, your space, and how you like to work. Both paths can get you to those crisp, professional shots you're aiming for, but they're built for different needs.
A ready-made light box is all about convenience. You get consistency and a quick setup right out of the box. On the other hand, a DIY setup gives you total control and can be a lifesaver for your wallet, especially if you're just getting your e-commerce legs under you.
This little decision tree can help you figure out if a light box is even the right move for you right now.
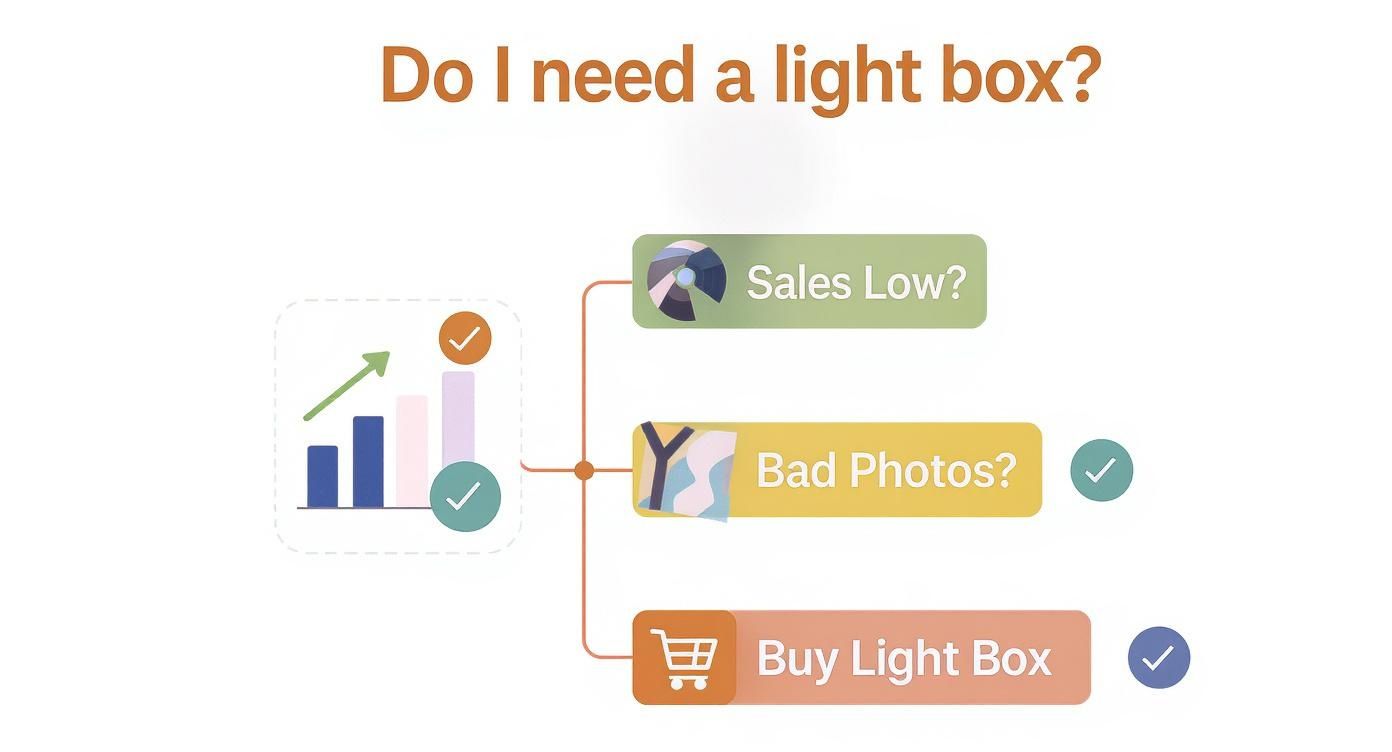
As you can see, if lackluster photos are hurting your sales, a light box is a pretty direct and effective fix.
Before we dive into the nitty-gritty of each option, let's break down the pros and cons side-by-side.
Buy vs. Build Your Light Box Comparison
This table should help you quickly weigh what matters most to you—whether it’s getting started fast, saving money, or getting the perfect custom setup.
| Factor | Buying a Pre-Made Light Box | Building a DIY Light Box |
|---|---|---|
| Cost | Higher initial investment, typically $50 – $200+ | Very low cost, often under $30 using household items. |
| Setup Time | Quick and easy. Most fold open in minutes. | Requires time and effort to assemble and source materials. |
| Quality & Consistency | Designed for even, consistent lighting. Reliable results. | Quality depends on materials and skill. Can be excellent, but requires tweaking. |
| Customization | Limited to the size and features included. | Fully customizable to fit your specific products and lighting needs. |
| Portability | Excellent. Most are designed to fold down for storage. | Can be bulky and less durable for transport unless designed carefully. |
| Best For | Sellers who need professional results fast and value convenience. | Budget-conscious sellers, DIY enthusiasts, or those with unique product sizes. |
Ultimately, both are valid choices. A pre-made box gets you shooting faster, while a DIY box puts you in the driver's seat of your studio setup.
Buying a Ready-Made Light Box
If you decide to buy, don't just grab the cheapest one you see. Look for features that actually solve problems and give you creative control. A good light box is more than just a white cube with a light.
Here’s what I always tell people to look for:
- Adjustable LED Brightness: This is non-negotiable. You need to be able to dial the light up or down. It’s the only way to avoid blowing out the details on a white product or losing a dark product in the shadows.
- Multiple Backdrop Colors: Most decent kits come with black, white, and gray sweeps. The classic white is your go-to for marketplaces like Amazon, but having other colors on hand is fantastic for creating a different vibe for your own website or social media campaigns.
- Portability and Size: Think about where you'll be shooting. A lot of these light boxes are designed to collapse flat, which is a huge plus for small spaces. And please, measure your biggest product first!
I can't tell you how many people I've seen buy a light box that’s too small. You need breathing room. Measure your largest item and add at least a few inches to every dimension. Trust me on this.
Going the DIY Route
If you're watching your budget or just love a good project, building your own light box is a fantastic way to go. You can get shockingly good results with stuff you might already have lying around. At its core, all you need is a cardboard box, some white tissue paper or fabric for diffusion, white poster board for the inside, and a couple of desk lamps.
The DIY approach has exploded as more people start their online businesses from a corner of their living room. In fact, back in July 2025, search interest for photography light boxes shot up by a massive 59.79%. It just goes to show how many sellers are waking up to the power of good lighting. If you're curious, you can learn more about the growing demand for these tools and what it signals for the e-commerce world.
Dialing In Your Camera and Light Box Settings
Alright, you've got your light box set up and your product is staged perfectly. Now comes the fun part: translating that pristine setup into a stunning digital image. This is where a few key camera settings can make the difference between a photo that’s just okay and one that looks genuinely professional.
It doesn’t matter if you're using a high-end DSLR or just the smartphone in your pocket—the principles for getting a sharp, bright, and color-accurate photo are the same. Let’s walk through the specific adjustments that will get you there.
Smartphone Camera Settings for Flawless Shots
Your phone is an incredibly powerful tool for product photography, but leaving it on full auto mode can be a recipe for inconsistent results. The camera might decide to refocus or tweak the brightness right in the middle of a shoot, throwing off your entire session. The secret is to take back manual control.
The most important trick is to lock your focus and exposure. On pretty much any modern smartphone, you can do this by tapping and holding on your product on the screen. You'll see a box or circle pop up, often with a little sun icon, confirming that the settings are locked in place.
By locking the focus and exposure, you ensure every single photo in your series has the same sharpness and brightness. This one simple step is the secret to creating a consistent, professional-looking product catalog with nothing but your phone.
Once it's locked, you can usually slide your finger up or down to fine-tune the brightness. You’re aiming for an image that looks bright and clean, but not so bright that you lose the details in the whitest parts of your product (what photographers call "blowing out the highlights").
DSLR Settings for Ultimate Clarity and Depth
If you're shooting with a DSLR or mirrorless camera, you have a lot more control. While the dials and menus might seem intimidating at first, you only need to master a few core settings for fantastic light box photography. For the best results, switch your camera over to Manual (M) or Aperture Priority (Av) mode.
Think of it as the three pillars of a great product shot:
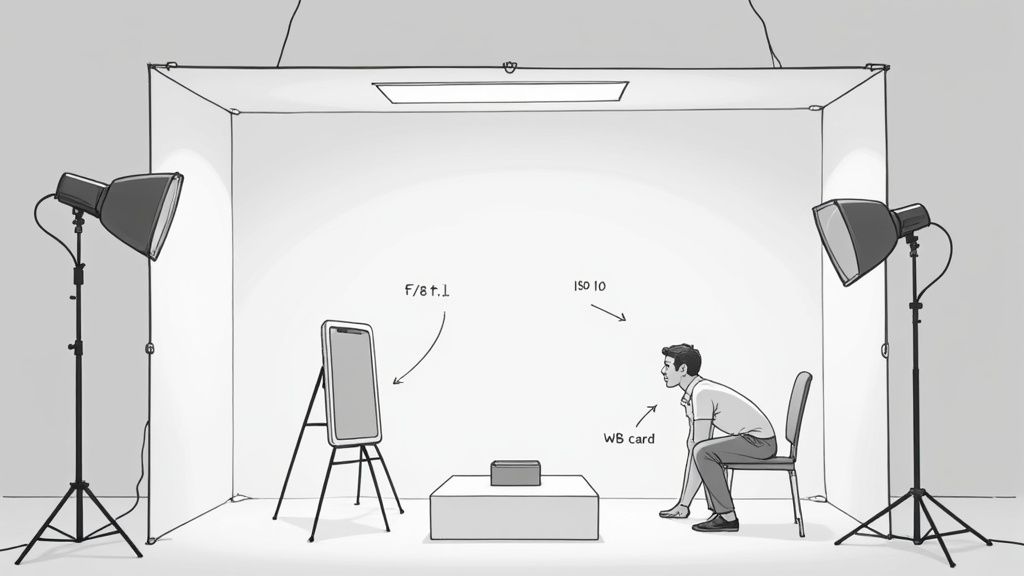
- Aperture (f-stop): This controls how much of your product is in focus, a concept known as "depth of field." For most products, you want the entire thing to be sharp, from the front edge to the back. Setting your aperture to f/8 to f/11 gives you a deep depth of field, making sure every last detail is crisp.
- ISO: This setting is all about your camera's sensitivity to light. A low ISO creates a cleaner, higher-quality image with less digital grain or "noise." You should always set your ISO to its lowest native setting, which is usually ISO 100 or 200.
- Shutter Speed: This is simply how long the camera's shutter stays open to let light in. In Manual mode, you’ll adjust this last to get the right exposure after you've set your aperture and ISO. Since your camera should be on a tripod, you can use a slower shutter speed without having to worry about motion blur.
Mastering Your Light Box Lighting
Your camera settings and your lighting have to work together. The built-in LEDs in your light box are designed to create soft, even light, but how you position them makes a huge difference.
Don't just flip them on and hope for the best. Move the LED strips or panels around to "wrap" the light around your product. A great starting point for most items is to have one light source from the top and one or two from the front sides, angled at about 45 degrees. This technique fills in any harsh shadows without completely flattening the image, which helps preserve a sense of dimension.
Finally, to nail your colors, grab a white balance card or even just a plain piece of white printer paper. Take a quick test shot with the card filling most of the frame. Then, dive into your camera's menu and use that photo to set a custom white balance. This literally tells your camera what true white looks like under your specific lights, guaranteeing your product colors are spot-on every time.
Lighting and Staging Different Product Types
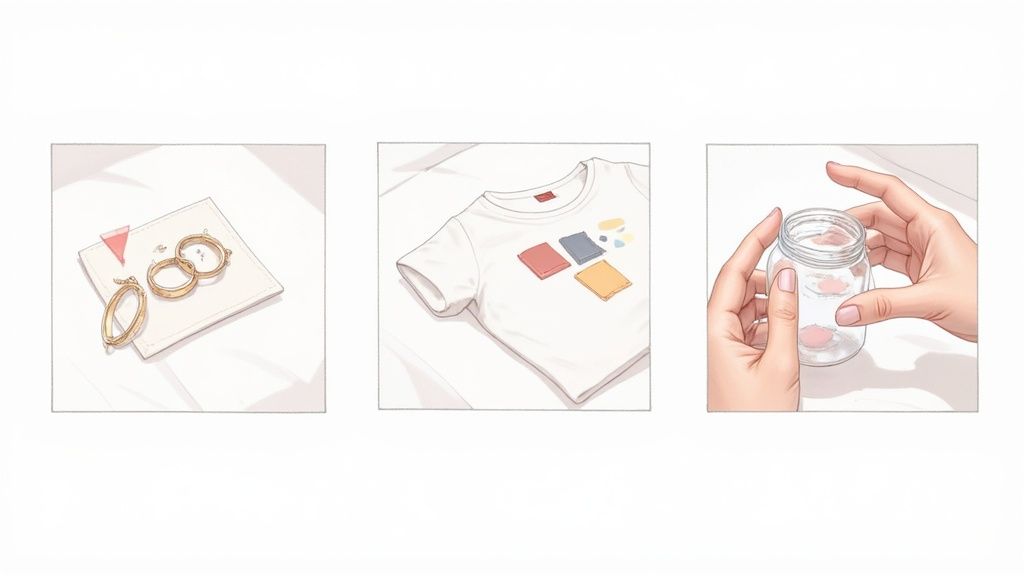
Okay, once you have your camera settings dialed in, the real fun begins. A light box is your stage, and every product has a unique story to tell. You just can't shoot a delicate silver necklace the same way you shoot a rugged leather wallet. The trick is to adapt your lighting and staging to highlight what makes each item special.
This isn't about finding a magic, one-size-fits-all formula. It's about looking closely at the material, texture, and shape of your product and figuring out how to make it look absolutely irresistible.
Taming Reflections on Jewelry and Glassware
Shiny, reflective stuff is the final boss of product photography. Jewelry, sunglasses, glassware—they act like tiny mirrors, picking up every single light source, the room around you, and even your own reflection.
The goal isn't to kill all reflections, because that would just make the item look flat and dead. You want to control them.
Your secret weapon here is diffusion. If your light box came with a diffuser panel that hangs between the LEDs and your product, use it. If not, don't sweat it. A simple sheet of white tissue paper or a thin piece of white fabric taped over the lights will soften that harsh glare into a gentle, flattering sheen.
Here are a few more tricks I've picked up for handling shiny surfaces:
- Change the Angle: Don't just blast your product with light from the front. Try moving your LED strips to the sides, or even slightly behind the item. This changes how the light bounces back at the camera and can dramatically cut down on distracting glare.
- Use Black Cards for Definition: Ever notice how a super-polished silver ring can almost vanish into a white background? Grab some small black foam cards and place them just out of the camera's view. They'll create dark, crisp reflections that beautifully outline the product's shape.
- Get Up Close: For the really fine details—like gemstone facets or tiny engravings—switch to your camera’s macro mode or use a dedicated macro lens. Getting that close lets you capture the intricate craftsmanship that makes a piece worth its price. If you want to really master this, our guide on how to photograph jewelry goes way deeper into making your pieces sparkle.
Capturing Texture in Apparel and Fabrics
When you're selling clothes online, texture is king. Your customers can't reach through the screen and feel the fabric, so your photos have to do that job for them. The whole game is about using light to bring out the weave, softness, or pattern of the material.
A flat lay is probably what you'll be doing for most clothing in a light box. For this, you’ll want to position your main light source at a sharp angle from the side. We call this raking light. It creates tiny shadows across the fabric's surface that make the texture really pop. Whatever you do, avoid lighting straight down from the top—it flattens everything out and makes the fabric look boring.
A classic mistake is blasting fabrics with too much light. It blows out the texture and washes out the color. It's much better to underexpose the shot just a little and then bump up the brightness in post-production to keep all those beautiful details intact.
Making Food and Cosmetics Look Irresistible
With food and cosmetics, you're selling an experience. The product has to look fresh, delicious, and true-to-life. Staging is just as crucial as your lighting here. A boring, head-on shot of a jar of face cream isn't going to excite anyone.
Play around with your angles. A 45-degree angle is often a great starting point for showing both the packaging and the product itself. For things like lipstick or lotion, try creating a small, artful smear right next to the product. It’s a great way to show off the true color and texture.
Here’s a little pro tip: use a small, focused accent light to create a bright little highlight on a glossy surface, like the side of a lip gloss tube or a piece of gourmet chocolate. Even a tiny flashlight will work. That little pop of light adds a dynamic, fresh feel that draws your customer's eye right where you want it.
Editing Your Photos for a Professional Finish
Getting a great shot inside your light box for product photography is a huge win, but honestly, that’s only half the battle. The final, critical step is post-production. This is where you transform good photos into polished, marketplace-ready assets that actually convert.
Not too long ago, this meant sinking hours into complex software like Photoshop. Thankfully, that's no longer the only way.
AI-powered tools have completely changed the game, automating the most tedious parts of photo editing. Imagine just uploading your new light box images and having software instantly strip out the background, generate a realistic shadow, and resize everything perfectly for Shopify or Amazon. It's a massive time-saver.
Streamline Your Workflow with AI Editing
Instead of painstakingly tracing your product's outline with a pen tool or getting frustrated with the clone stamp, you can now lean on a service like ProdShot. You just upload your raw image, and the AI does all the heavy lifting for you.
In just a few seconds, the AI can knock out several key tasks:
- Background Removal: It cleanly and precisely cuts your product out, leaving you with a transparent PNG you can place on any background you want.
- Shadow Generation: The AI adds a natural-looking shadow that gives your product depth and stops it from looking like it's floating in space.
- Smart Resizing: It automatically crops and resizes your images to meet the exact specifications for platforms like Amazon, Etsy, or Instagram. No more guesswork.
Just look at the kind of professional results you can get with a couple of clicks.
This is a perfect example of how a basic product photo becomes a clean, crisp, marketplace-ready image with that crucial pure white background and a subtle, realistic shadow.
From Raw Image to Marketplace Ready
This modern workflow isn't about trying to become a professional photo editor overnight. It's about building an efficient system that delivers a consistent, high-quality look across your entire product catalog. And that consistency is what builds brand trust and makes your store feel legitimate.
The goal of editing isn't to fundamentally change the photo. It's about enhancing it to meet professional standards. A great edit should be invisible, leaving the customer focused solely on your amazing product.
Once you’ve captured your shots with great lighting, the next hurdle is making sure they meet the strict guidelines of whatever platform you're selling on. For instance, if Amazon is your main channel, you have to play by their rules. It pays to check out a guide on Amazon image requirements and best practices to avoid having your listings rejected.
By bringing smart editing tools into your process, you can spend less time pushing pixels around and more time on what actually grows your business. If you're looking to get your time back, it's definitely worth exploring how AI-powered product photo editing services can slot into your workflow.
Even with a killer setup, you're going to have questions once you start shooting inside a light box. It happens to everyone. A few quick answers can usually clear up the biggest roadblocks and get you back to creating amazing product shots.
Let's break down some of the most common things people ask.
What’s the Best Background Color to Use?
For the vast majority of e-commerce sites like Amazon or Shopify, pure white is king. It’s not just a trend; it makes your product the undeniable star of the show and meets the main image requirements for most marketplaces. You’re aiming for a clean, distraction-free look that builds trust at a glance.
Your next best bet is a light gray. It gives off a soft, modern vibe and is fantastic for helping white or very light-colored products pop without creating a jarring contrast. Luckily, most light box kits come with both white and gray sweeps, so you're covered from day one.
The gold standard for e-commerce is a pure white background (#FFFFFF). Think of it less as a style choice and more as a conversion strategy. It removes visual noise and makes your product look crisp and professional.
How Do I Stop Reflections on Shiny Stuff?
Ah, the classic battle. Photographing jewelry, glass, or anything with a polished surface means you’re going to be fighting glare. The secret isn't to kill reflections completely—that just makes the item look dull and fake. The goal is to control them, turning harsh glare into soft, flattering highlights.
I’ve got a couple of go-to moves for this.
- First, grab the diffuser sheet that came with your light box. Hanging this cloth between the LEDs and your product is an instant game-changer, softening the light immediately.
- Second, play around with the position of your lights. Shifting them to the sides, or even further back, can completely change how light bounces into your lens.
For those with a DSLR, a circular polarizing filter is a powerful tool for even more precise control over reflections.
Is a Light Box Even Good for Large Products?
Honestly, no. Most light boxes are built for small to medium-sized things—think cosmetics, watches, shoes, or small electronics. Once you start trying to photograph furniture, big handbags, or kitchen appliances, they just don't work. The space is too cramped to get good lighting angles or a clean composition.
If you’re selling bigger items, you'll need to scale up your setup. You can get the same beautiful, diffused light by using a large seamless paper backdrop on the floor or a big table, flanked by separate studio lights equipped with softboxes. It’s the same principle as a light box, just without the box.
Tired of fighting with manual editing to get your photos ready for primetime? ProdShot uses AI to instantly remove backgrounds, create hyper-realistic shadows, and format your images perfectly for any online store.
Give your free trial a spin and see what it can do for your photos.