
Looking to give your product photos that professional, eye-catching pop? Creating an outline photo online is one of the fastest ways to do it. The idea is to use an AI photo editor to lift the product from its background and then wrap it in a clean, customizable outline, also known as a "stroke." This technique can take a decent photo and turn it into a marketplace-ready image in just a few minutes.
Why Pro Outline Photos Are a Game-Changer for E-Commerce

In a crowded online marketplace, your photos do all the talking. They’re the very first touchpoint a customer has with your product, and often, they're the only one. A shopper can’t pick up your item, feel its weight, or examine its texture. Your images have to do all of that heavy lifting.
Crisp, professionally outlined photos aren't just a nice-to-have anymore. They’re a core part of building trust and actually closing the sale. A clean outline slices your product away from any background noise, forcing a buyer’s attention right where you want it: on the item itself. This focus is absolutely critical for showing off quality and detail.
Build Trust, Lower Risk
When a customer sees your product floating on a clean background with a sharp outline, it sends a clear signal of professionalism. It tells them you’re a serious seller who cares about presentation. This has a direct psychological effect by lowering their perceived risk.
Think about it—a cluttered or amateur photo can make a business look untrustworthy, making shoppers hesitate. A perfect cutout, on the other hand, removes all doubt. It presents the product honestly and clearly, which is exactly what you need to turn a curious browser into a confident buyer.
We know that an estimated 75% of online shoppers lean heavily on product photos when deciding to buy. Clean, outlined images boost that confidence by showing the product without any distractions, which has a real impact on conversion rates and how much customers think your brand is worth.
Get a Leg Up on the Competition
Scroll through any top-performing Shopify or Amazon store. You'll notice they all have one thing in common: high-quality, consistent product photos. Using an outline helps your products stand out from the sea of other listings. Even a subtle white or light gray outline can make your image pop against the standard white backdrop of most e-commerce sites, leading to more clicks.
This single technique delivers a few key wins:
- A Stronger Brand Image: When all your product photos look uniform, it builds a cohesive and professional brand identity that sticks in a customer's mind.
- Higher Perceived Value: A product that’s presented well is almost always seen as being higher quality. This can even help you justify a higher price point.
- Better Conversion Rates: By building trust and making product features easy to see, outlined photos are brilliant at nudging customers from "just looking" to "add to cart."
How to Prepare Your Photos for a Perfect Outline
While creating a great outline photo online can feel like one-click magic, the final quality hinges entirely on the picture you start with. Think of it this way: you can't cook a gourmet meal with subpar ingredients. The same is true here. A well-prepared source photo is your secret weapon for a flawless, professional-looking cutout.
The good news? You don't need a pricey DSLR or a full-blown photo studio. Your smartphone is more than powerful enough to get the job done right. The key is making it dead simple for the AI to see exactly where your product ends and the background begins.
Set the Stage with Background and Light
Your background and lighting are the two most critical pieces of the puzzle. If you shoot your product against a busy, cluttered background, you're forcing the AI to play a guessing game. That’s how you end up with jagged edges or, even worse, bits of your background stuck to your product.
To get a clean edit every time, start with a simple, clean backdrop.
- Go Plain: A solid-colored wall, a big piece of poster board, or even a clean, ironed bedsheet can work wonders.
- Create Contrast: This is a big one. Place dark products against light backgrounds and light products against dark backgrounds. This high contrast gives the AI a crystal-clear path to follow.
Next up is lighting. Harsh, direct light is your enemy. It creates dark, distracting shadows and bright "hotspots" that can completely throw off an AI tool. A handbag shot in direct noon sun, for instance, will have sharp shadows that the AI might mistake as part of the bag itself.
Your best bet is almost always soft, diffused natural light. Try shooting near a big window on an overcast day. This light wraps around your product evenly, cutting down on harsh shadows and revealing its true shape and color. You’re essentially handing the AI a perfect blueprint to work from.
To make this even easier, here’s a quick checklist to run through before you start shooting with your phone.
Smartphone Photography Checklist for AI Editing
| Checklist Item | Why It Matters for AI | Simple Tip |
|---|---|---|
| Clean Your Lens | A smudged lens creates a hazy, low-contrast image that’s hard for AI to analyze. | Wipe your phone's camera lens with a soft, microfiber cloth before every shoot. |
| Use a Plain Background | Busy backgrounds confuse the AI, leading to messy cutouts and inaccurate edges. | A piece of white poster board or a solid-colored wall is perfect. |
| Ensure High Contrast | The AI needs a clear difference between your product and the background to work well. | Put a light product on a dark surface, and a dark product on a light one. |
| Find Soft, Even Light | Harsh shadows can be mistaken for part of the product, creating incorrect outlines. | Shoot near a window on a cloudy day or use a lamp with a diffuser. |
| Tap to Focus | Blurry edges are impossible for AI to trace accurately, resulting in a fuzzy outline. | Tap directly on your product on your phone screen to lock the focus there. |
Following this simple list drastically improves the odds that your AI-generated outlines will come out looking clean and professional on the first try.
Master Focus and Angles
With your setup ready, the last step is to nail the shot itself. A blurry, out-of-focus photo is the number one cause of a bad outline. It’s simple: the AI can't draw a crisp line around an edge that's fuzzy to begin with. Always, always tap your product on your smartphone screen to lock the focus right where it needs to be.
Don't just take one photo. Snap a few from different angles. Your customers will want to see the front, back, side, and maybe a detailed 45-degree view. Giving them these perspectives builds trust and gives you more options for that perfect hero image on your product page.
Having a library of these clean, multi-angle shots is a huge time-saver, especially if you're selling on a platform like Shopify. For a deeper look at optimizing your workflow, check out our guide on how to remove the background from Shopify product images. A little prep work here really does go a long way.
Using AI Tools to Instantly Outline Photos Online
If you’ve ever spent what feels like an eternity in Photoshop, painstakingly tracing the outline of a product, you know the frustration. It’s tedious work. Thankfully, modern AI photo editors have completely changed the game, turning a once-dreaded task into something you can knock out in seconds.
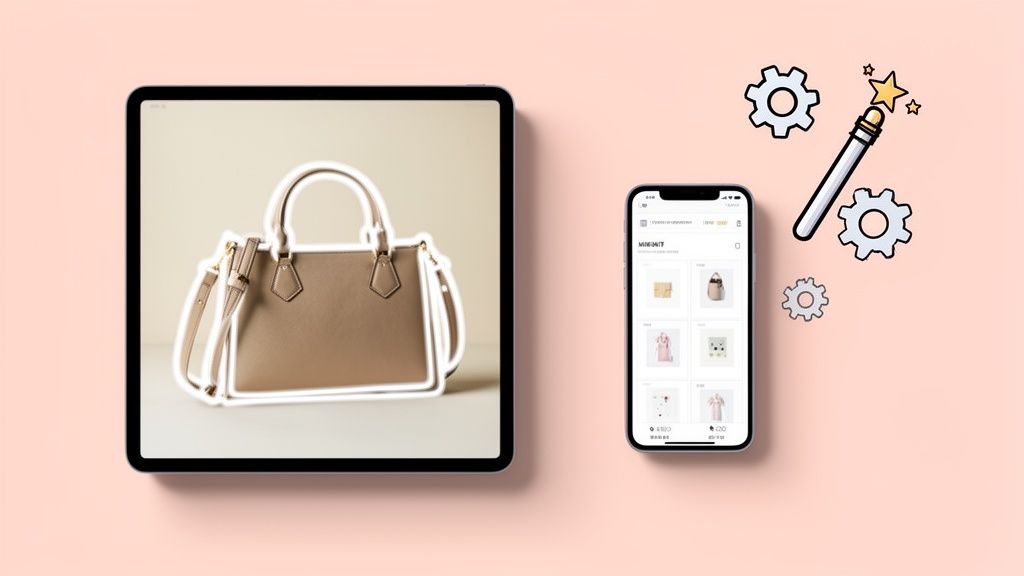
Let’s say you just snapped a picture of a new leather handbag with your phone. The photo itself is pretty good, but the background—your slightly cluttered stockroom—isn’t exactly doing you any favors. It just doesn’t have that clean, professional look you need for your Shopify store. This is the perfect job for an AI tool like ProdShot.
Getting from Raw Photo to Polished Cutout
The whole process is incredibly straightforward. You start by uploading that photo straight from your phone or computer into the editor. Right away, the AI gets to work analyzing the image, figuring out what’s the handbag and what’s the background.
In a single click, the messy background vanishes. No more fussing with selection tools or drawing complex paths; the technology does all the heavy lifting for you. This instant background removal is the crucial first step to creating a great outline. You’re left with a perfectly clean cutout of your product, ready for its close-up.
What’s really powerful here is the sheer speed and accessibility. A task that might take a skilled designer 15-20 minutes per image can now be done in under a minute by literally anyone. That kind of efficiency is a game-changer when you're managing dozens or even hundreds of products.
Of course, the better your starting photo, the better the final result. You want to give the AI the best possible information to work with. This quick infographic breaks down the three most important things to get right before you even press the shutter.

Focus on a background that contrasts with your product, use soft and even lighting, and make sure your product is in sharp focus. Nail these three things, and you’ve got the recipe for a perfect AI-powered edit, every single time.
Customizing Your Outline in Clicks
With your product now isolated, adding the outline is just as simple. Look for a "Stroke" or "Outline" setting in your editor. This is where you get to be creative.
You’ll typically have control over two key options:
- Color: You can match the outline to your brand’s color palette for a cohesive look or just stick with a classic white or light gray. A subtle white outline is a great little trick for helping products stand out against Amazon's white search results page.
- Thickness: This lets you decide how bold you want to go. A thin 1-2 pixel outline adds a touch of sharp definition, whereas a thicker 4-5 pixel border creates more of a stylized "sticker" effect that works great for social media posts.
For our handbag, a simple 2-pixel white outline would add a crisp, professional edge that makes the product pop without being distracting. The entire workflow—from that messy stockroom photo to a perfectly outlined image ready for upload—takes less than a minute. That’s a level of efficiency we could only dream of a few years ago.
If you’re looking for a tool that automates this entire sequence, you can learn more about how an AI product photo generator can transform your images. It's all about working smarter, not harder, to create photos that build trust and drive sales.
Optimizing Your Outlined Photos for Top Marketplaces
You’ve created a fantastic outlined photo for your product, and it looks sharp. But the job isn't over just yet. Getting that image ready for the specific marketplace you sell on—whether it's Shopify, Amazon, Etsy, or eBay—is just as critical as the creative part.
A stunning photo can fall flat if it’s the wrong size, format, or resolution. Each platform has its own rules, and following them directly impacts everything from your page-load speed to your customer’s experience and even where you rank in search results. This isn't just about aesthetics; it's about performance.
File Types Decoded: PNG vs. JPEG
One of the first technical decisions you'll make is choosing between a PNG and a JPEG. Don't worry, the choice is actually pretty simple and comes down to one thing: your background.
Use PNG for Transparency: If you want your product to float on your website’s colored background or be layered in a creative post, PNG is your only option. It’s the only common format that supports a true transparent background, making it perfect for custom-branded Shopify stores.
Use JPEG for Solid Backgrounds: When your product sits on a solid white or colored background—which is mandatory for Amazon’s main image—JPEG is the way to go. JPEGs deliver great quality at a much smaller file size, which is absolutely essential for keeping your pages loading quickly.
A workflow I see all the time is saving a master file as a high-quality PNG with a transparent background. From there, you can easily export JPEG versions with a white background whenever you need them for different listings.
Size and Dimension Recommendations
Once you've picked a file type, it's time to think about image size. Uploading a massive photo straight from your camera is a surefire way to crush your site's loading speed. The real goal is to find that perfect balance between a crisp, clear image and a small, fast-loading file.
Pro Tip: Your file names are more important than you think for organization and even SEO. Instead of a generic name like
IMG_8431.jpg, try something descriptive likeblue-leather-handbag-front.jpg. It helps you manage your files and can give you a nice little boost in image search results.
Here are the key specs you need to know for the major platforms:
| Marketplace | Recommended Dimensions | File Size Goal | Notes |
|---|---|---|---|
| Amazon | At least 1000px on the longest side (1600px is better) | Under 500 KB | A square (1:1) aspect ratio is best. Main images MUST have a pure white background. |
| Shopify | 2048 x 2048px for square product photos | Under 200 KB | Shopify automatically compresses images, but starting with a well-optimized file is key. |
| Etsy | At least 2000px on the shortest side | Under 1 MB | Etsy's layout tends to favor landscape (horizontal) images in its listings. |
| eBay | At least 500px on the longest side (1600px is recommended) | As small as possible | A clean, uncluttered background is strongly encouraged to make your product stand out. |
These aren't just random suggestions. Amazon, for instance, requires images to be at least 1000 pixels on the longest side to enable their zoom feature—a tool that is a massive driver for conversions. If you want to dive deeper into this, our guide on professional Amazon product photography has you covered.
After outlining your photos, the next step is learning how to optimize website images for speed and SEO. This is what turns your great-looking images into high-performing assets that actually help you make sales.
Advanced Techniques to Make Your Product Images Pop

Alright, so you’ve learned how to outline photos online. That’s a great first step, but it’s just the beginning. The real magic happens when you add those extra touches that make a good image an absolute scroll-stopper.
A simple outline gets the job done, sure. But applying a few simple, advanced effects is what separates a standard product listing from a truly premium brand experience. Modern AI photo editors are packed with tools that used to require a professional retoucher, letting you add polish and realism in seconds.
Adding Realistic AI-Generated Shadows
A product just floating in a white void can look… well, flat. A shadow is the single fastest way to make it feel grounded and three-dimensional, which instantly makes it feel more real and high-quality to a shopper.
Thankfully, AI tools make this incredibly easy. Forget messing with complex shadow layers in Photoshop.
- Drop Shadow: This is the classic choice. It adds a soft, diffused shadow behind and under your product, giving it a gentle "lift" off the background. It adds depth without being loud or distracting.
- Reflection Shadow: Selling something with a glossy surface like jewelry, sunglasses, or electronics? An AI-generated reflection gives it that sleek, high-end look, as if it’s sitting on a polished studio surface.
These effects trick the eye into seeing depth, making your product feel more tangible. It’s a tiny detail that makes a huge psychological difference.
Instantly Improve Lighting and Vibrancy
Did your product shot come out a bit dark or dull? It happens to all of us, especially when shooting with a smartphone. Before you even think about doing a reshoot, try an AI lighting fix.
These tools analyze your photo's lighting and automatically correct it. In one click, an AI can brighten a dark image, sharpen the contrast, and boost the color vibrancy to make sure your product looks true-to-life. It’s perfect for breathing life back into an image that was shot on a cloudy day or under poor indoor lighting.
An AI lighting fix can be a total lifesaver. Imagine you have a photo of a colorful t-shirt that looks muted and sad. An AI enhancement can restore its true, vibrant colors in seconds, ensuring what your customer sees is exactly what they get.
Create and Apply a Consistent Brand Style
Consistency is the secret ingredient to a trustworthy brand. When every single product photo across your store shares the same aesthetic, it creates a cohesive, professional shopping experience that builds confidence.
This is where creating a style or preset becomes so powerful.
Once you dial in that perfect combination of background color, shadow style, and outline settings, you can save it as a reusable template. Applying this same look across all your images is what turns a simple product grid into a curated, high-end collection.
Integrating these polished images into a broader conversion-focused web design strategy is the final piece of the puzzle. Consistent, professional imagery isn't just about looking good—it's a critical element that builds the trust you need to turn casual browsers into loyal buyers.
Common Questions About Outlining Photos Online
Jumping into outlining your product photos is exciting, but a few common questions always seem to trip people up. It's completely normal. Let's clear the air on some of the most frequent sticking points so you can build a workflow for your e-commerce store that's fast, simple, and repeatable.
What About Photos With Busy Backgrounds?
One of the first things people ask is, "Can I really rescue a photo with a super busy, cluttered background?"
Technically, yes. Today's AI is shockingly good at isolating a product even from a messy scene. But just because you can, doesn't always mean you should. For the absolute best, cleanest results, simpler is always better.
Think about it: giving the AI a clean, contrasting background—like your product sitting on a plain white table or against a solid-colored wall—is the path of least resistance. It dramatically reduces the chance of errors, especially with tricky items like jewelry chains, fuzzy sweaters, or products with transparent parts. A simple backdrop helps the AI nail the cutout on the first try, saving you from tedious manual fixes down the line.
Choosing the Right Outline Color
So, what's the best color for your product outline? The real answer is that it completely depends on your goal and where the photo will live. There's no single "right" choice, but there are definitely smart ones.
For big marketplaces like Amazon or Etsy, a thin white or light gray outline is a classic pro move. It creates just enough separation to make your product subtly pop against the standard white background of the search results, grabbing a shopper's eye without being obnoxious.
If you're posting to your own Shopify store or on social media, you have more freedom to play. Using a color from your brand's own palette is a fantastic way to reinforce your visual identity. It creates a more stylized, cohesive look that feels intentional and high-end.
Ever had that moment of panic when your new transparent PNG shows up with a solid black background? Take a deep breath! Your file is almost certainly fine. This is a common quirk with basic photo viewers or web browsers that don't know how to render transparency, so they just fill the empty space with black.
The real test is to upload it somewhere that does support transparency. Drop it into your Shopify admin or a tool like Canva. You should see your beautiful, transparent background appear exactly as you intended.
How to Keep Your Outlined Photos Consistent
Consistency is the secret sauce that makes an online store look polished and professional instead of like a garage sale. The best way to lock in that consistency is to create a "style recipe" and use it for every single photo you create.
Find an AI tool that lets you save your settings as a reusable preset. You'll want to lock in:
- Background Color: The exact HEX code you want to use every time.
- Shadow Style: The specific angle, blur, and opacity of your drop shadow.
- Outline Settings: The precise color and thickness (in pixels) for your stroke effect.
By applying this same preset to every new batch of photos, you ensure every product looks like it belongs to the same thoughtfully curated collection. It’s a small step that makes a huge difference in how customers perceive your brand.
Ready to stop wasting time and start creating stunning, sales-driving images in seconds? With ProdShot, you can transform simple smartphone pictures into perfectly outlined, professional-grade product photos automatically. Try it for free and see how easy it is to elevate your brand at https://prodshot.net.