

Picture noise reduction is just a technical term for getting rid of that annoying visual grain or speckles in a digital photo. For anyone selling online, this isn't just a tiny detail—it's everything. Clean, high-quality images build immediate trust and directly boost sales. On the flip side, grainy photos can make even the best products look unprofessional and cheap.
Why Grainy Photos Are Costing You Sales
You know that sinking feeling. You’ve set up the perfect product shot, but the final image comes out grainy and amateurish. It's a frustration every e-commerce seller has felt. This visual static, known as picture noise, isn't just a minor flaw; it’s a major roadblock to building credibility on platforms like Shopify, Amazon, and Etsy, where the right visuals make or break a sale.
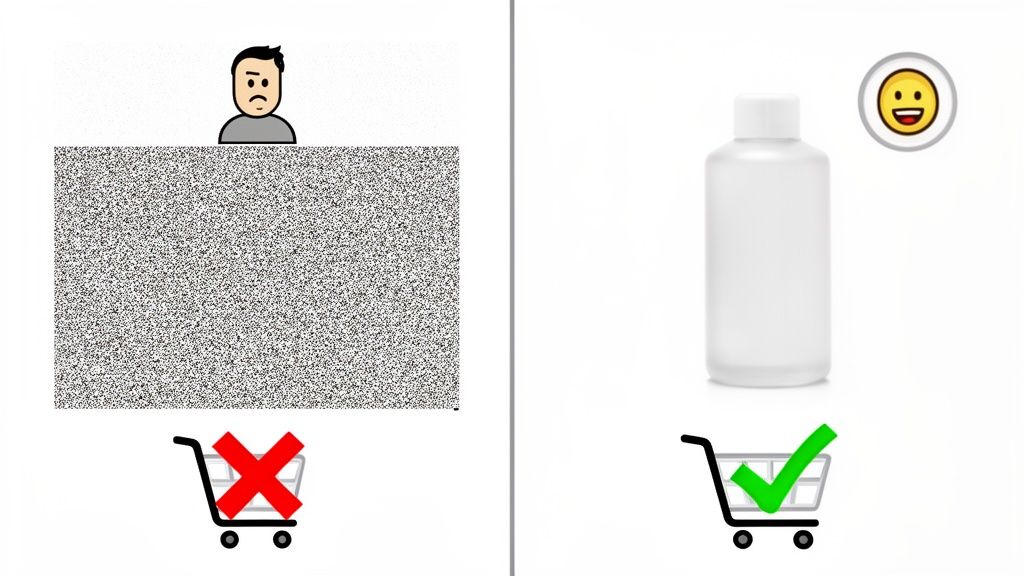
When a customer lands on your page and sees a grainy photo, it instantly sends the wrong message. It can make your products seem lower in quality and your brand less trustworthy, giving them every reason to click away without a second thought. The whole point is to show off your products with the clarity they deserve, so nothing distracts from their real value.
The Impact on Customer Perception
Think about it: a clean, sharp image communicates care and quality. A noisy one screams the opposite. This guide is a complete workflow designed to help you get that studio-quality clarity without needing a bunch of expensive gear. We'll cover everything from simple pre-shoot tweaks to powerful post-processing fixes.
Mastering picture noise reduction is a massive step in elevating your product game. If you're selling on Amazon, you might also find our insights on professional Amazon product photography useful.
Digital visual culture generates billions of images annually, many of which are noisy. Modern AI solutions learn to recognize patterns in noise, understanding how images degrade and then reconstructing clean versions by reversing that process. This allows e-commerce sellers to automatically elevate smartphone photos to professional standards.
And it's not just about what people see on their screens. Grainy photos can seriously mess up your printed materials, too. It’s so important for online businesses to get a handle on understanding pixel dimensions for perfect print quality to keep your brand looking sharp across every channel. By tackling image noise head-on, you ensure your visuals are crisp, professional, and ready to convert, whether they're on a website or a brochure.
How to Prevent Noise Before You Press The Shutter
The best way to deal with noisy photos? Stop the noise before it even starts. Honestly, this is where the real magic happens.
While post-processing software is incredibly powerful, think of it as a tool for enhancing a good photo, not rescuing a bad one. Starting with a clean, well-lit image from the get-go makes your editing process faster, easier, and the final results look infinitely more professional.
At its core, everything begins and ends with light. Noise is just the visual symptom of your camera’s sensor struggling in the dark. Give it plenty of light, and the sensor can capture a strong, clean signal. That's the bedrock of a noise-free product shot.
Harnessing Light to Your Advantage
You don't need a pricey studio to get fantastic light. A large window on a cloudy day gives you gorgeous, soft, and diffused light that's perfect for minimizing harsh shadows and keeping noise at bay. Just set up your product so that beautiful light falls across it, highlighting its shape and texture.
For more control and consistency, a simple, affordable LED panel is a game-changer. Unlike a window, an LED gives you the same quality of light every single time you shoot, day or night. That kind of consistency is a lifesaver when you need a uniform look across all your product listings.
When you're setting up your shot, think about the product's unique qualities.
- Reflective Items: For things like jewelry or glassware, you’ll want to diffuse your light source to avoid glaring hot spots that can hide details and confuse your camera's meter.
- Textured Fabrics: If you're shooting a sweater or a blanket, position your light at a slight angle. This will bring out all that lovely texture without creating deep, noisy shadows.
The Golden Rule of ISO
If light is the foundation, then ISO is the single most important camera setting you can control to eliminate noise. Think of ISO as your camera sensor's sensitivity to light. A low ISO number, like 100 or 200, means the sensor is less sensitive, which produces the cleanest, highest-quality image with virtually no grain.
When you crank up the ISO, you're essentially telling the camera to artificially boost the light signal it received. That amplification process is what creates digital noise—all those ugly, distracting speckles. For product photography, your goal should always be to use the lowest native ISO your camera can handle.
The challenge of amplifying a signal without introducing noise isn't new. In 1966, Ray Dolby developed a system for audio that fundamentally changed how we manage noise across all media. The core principles are surprisingly similar.
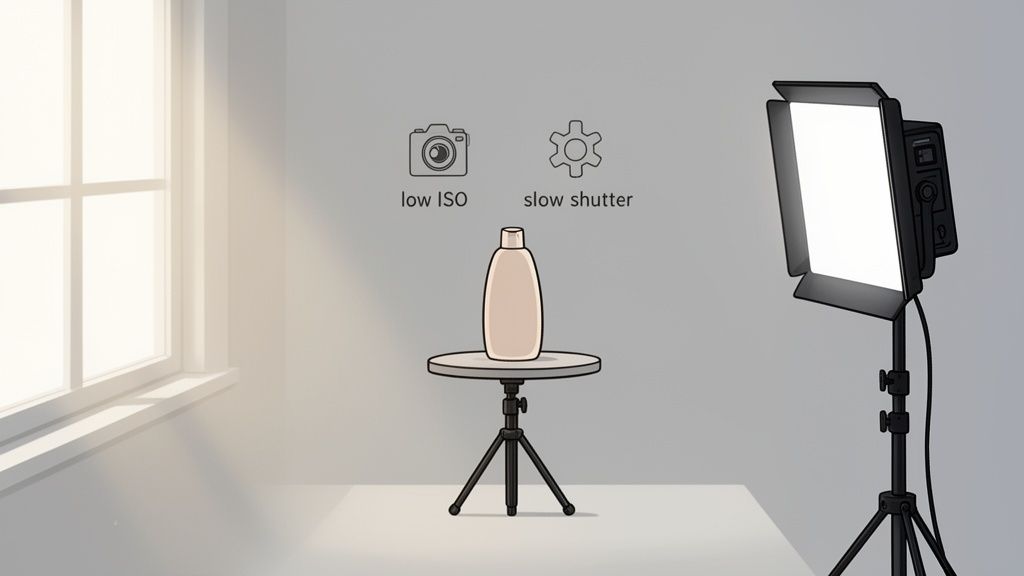
To keep your ISO low, you'll need to compensate with other settings. This usually means using a slower shutter speed, which makes a tripod essential for a sharp, stable shot. It's a small trade-off that pays off big time in your final image quality.
Getting this balance right before you ever open an editor is the key. This preventative approach not only makes your final images look better but also drastically cuts down on editing time—a major factor when you consider the overall cost of professional product photography.
Taming Your Smartphone Camera
Believe it or not, that little camera in your pocket is a powerhouse. Most people just point and shoot, but buried in your camera app is a ‘Pro’ or ‘Manual’ mode. Finding and activating this feature is your first real step toward taking control and stamping out picture noise before it even starts.
When you leave your phone on ‘Auto,’ you're letting it make all the calls. Its main goal is to prevent blur, so in less-than-perfect light, it cranks up the ISO without a second thought. That’s the #1 culprit behind grainy, noisy photos. Manual mode lets you step in and say, "Not so fast." You get to call the shots on the two most critical settings for clean product photos: ISO and shutter speed.
The ISO vs. Shutter Speed Trade-Off
Think of ISO and shutter speed as being on a seesaw. To keep the picture properly lit, when one goes down, the other has to go up. For the cleanest possible image, your mission is to keep that ISO as low as it can go—ideally, its base value, like ISO 50 or 100.
So, how do you do that without ending up with a dark, murky photo? You need to let more light hit the sensor, and the easiest way is with a slower shutter speed. By keeping the shutter open for longer, you’re giving the sensor plenty of time to drink in the light. This means it doesn't need to artificially amplify the signal with a high, noisy ISO.
The catch is simple, but it’s a big one. A slow shutter speed captures everything, including the micro-vibrations from your hands. The result? A blurry mess. This is why a tripod isn’t just a nice-to-have; it’s absolutely essential for this technique.
Pop your phone on a tripod—even a small, cheap one will do—and you've just unlocked the stability needed for shutter speeds of half a second, one second, or even longer. That simple piece of gear is the secret to using a rock-bottom ISO for incredibly sharp, noise-free product shots.
Always Shoot in RAW If You Can
One last pro tip: if your phone’s Manual mode has the option, always shoot in RAW. A standard JPEG file is like a cooked meal; the phone has already made permanent choices about color, sharpening, and noise reduction for you.
A RAW file (often a .DNG file on phones) is different. It’s like having all the raw ingredients. It saves every last bit of unprocessed data straight from the camera's sensor, giving you a massive amount of information to play with later. When you bring a RAW file into editing software, it has so much more detail to analyze. This allows it to do a much better job of telling the difference between unwanted grain and the delicate textures of your product, leading to a far cleaner, more natural-looking final image.
Choosing Your Noise Reduction Workflow
So, you’ve done everything you can in-camera, but there's still some pesky grain in your product shots. Don't worry, it happens. This is where your editing workflow becomes your secret weapon.
You essentially have two paths to take for picture noise reduction: the classic, hands-on software approach or the newer, faster AI-powered one. The best choice really boils down to how much control you want versus how quickly you need a clean, professional photo ready for your listings.
Let's break them down. Knowing the pros and cons of each will help you build a system that works for your business, whether you’re touching up a single hero image or batch-editing a hundred new arrivals.
This little decision tree can help visualize the thought process right from the get-go, especially when you're shooting with a smartphone.
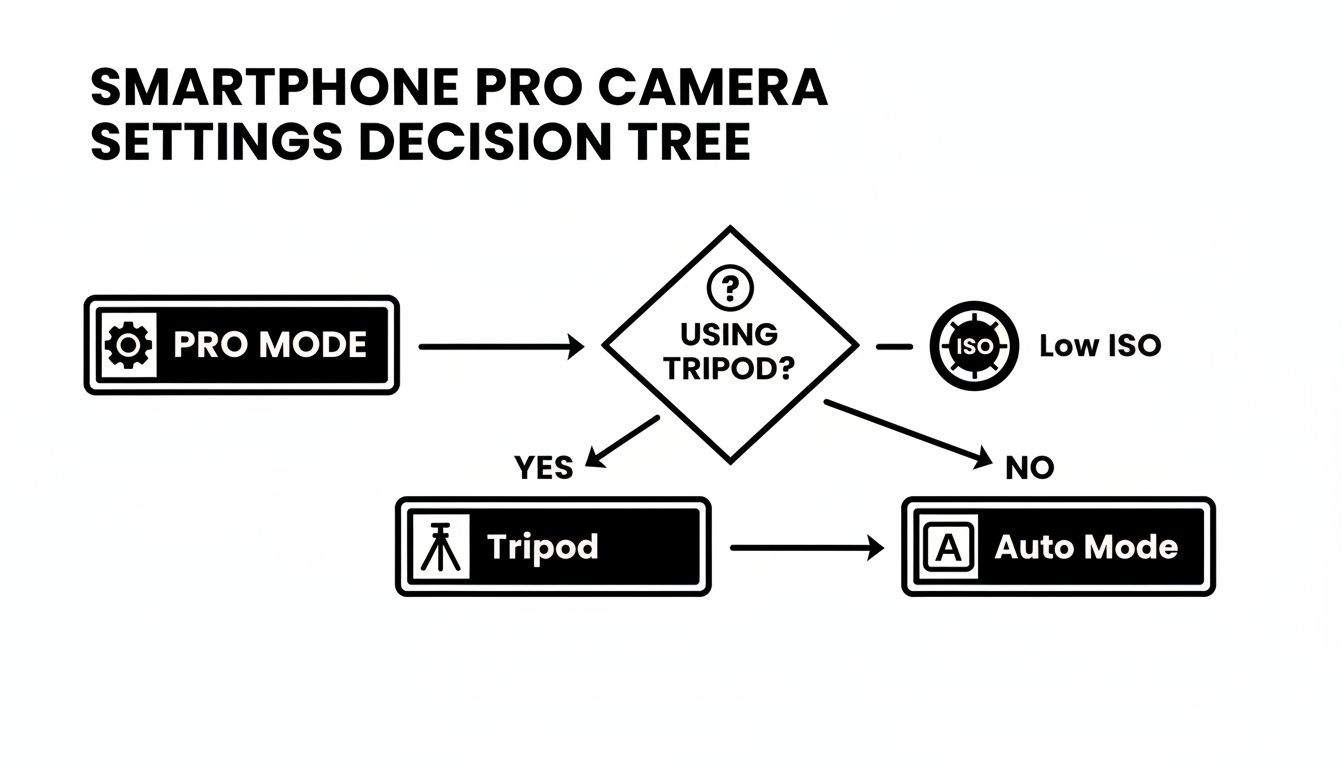
As you can see, grabbing a tripod is the first big step. It’s what opens the door to using "Pro Mode" settings that give you the cleanest possible images from the start.
The Traditional Software Method
For years, the go-to for fixing noise has been diving into the manual sliders in programs like Adobe Lightroom or Capture One. This approach gives you total, granular control over how the software finds and removes noise from your product photos.
You’ll mainly be working with two key sliders:
- Luminance: This one tackles the grayscale noise—that fine, sandy texture you see across an image. Be careful here. Pushing this slider too far is what creates that dreaded waxy, plastic-skin look, completely wiping out fine details.
- Color: This slider handles chroma noise, which shows up as random splotches of red, green, and blue, usually hiding in the darker parts of a photo. You can typically be a bit more aggressive with this one without causing much harm.
For product photos, a good starting point is to set the Color slider to around 25-30. Then, slowly nudge the Luminance slider up until the grain just starts to fade. You’ll probably land somewhere between 15 and 40.
The real challenge with manual sliders is walking that fine line between removing noise and preserving detail. Push it just a hair too far, and the delicate texture of a fabric or the brushed finish on a piece of metal gets smoothed into oblivion, making your product look fake.
It's a delicate dance. Researchers have found that what software metrics consider "good" denoising doesn't always match what our eyes perceive as a quality result. Often, cleaning up noise accidentally scrubs away crucial details, especially in the low-contrast areas where those important product textures live.
The Rise of AI-Powered Tools
The newer, more hands-off approach involves AI-powered tools built specifically for picture noise reduction. Instead of making you fuss with universal sliders, these smart tools analyze the content of your image. They’ve been trained on millions of photos, so they know the difference between unwanted digital grain and the essential texture of your product.
What this means in practice is that an AI tool can intelligently remove distracting noise from a smooth background while keeping the crisp edge of your product sharp and the weave of a textile clear. For anyone selling online, this is a massive time-saver.
The whole process is often just one click. You upload your photo, the AI does the heavy lifting, and you get a clean shot that still looks natural and sharp. If you’re managing a large inventory, the hours you save can be huge. If you're looking for ways to speed things up, exploring different product photo editing services can reveal some great shortcuts.
For a deeper dive into refining your product images and getting rid of all kinds of imperfections (noise included!), check out this excellent A Modern Guide to Photo Editing for E-commerce.
Which Workflow Is Right for You?
So, how do you decide? It really comes down to your budget, how comfortable you are with editing software, and how much time you have. Each method has its place in a modern e-commerce workflow.
To make it clearer, here's a quick comparison of the two approaches.
Comparing Noise Reduction Methods
| Feature | Traditional Software (e.g., Lightroom) | AI Tools (e.g., ProdShot) |
|---|---|---|
| Control | Full manual control over every slider. | Automated, one-click process. |
| Speed | Time-consuming; requires individual adjustment. | Extremely fast, ideal for batch processing. |
| Learning Curve | Steeper; requires practice to master. | Minimal; intuitive for beginners. |
| Detail Preservation | At risk of over-smoothing if not careful. | Excellent; AI protects textures and edges. |
| Best For | Photographers who want precise artistic control. | E-commerce sellers needing speed and consistency. |
Ultimately, there’s no single "best" method—only the best method for your specific situation. If you're a photographer who enjoys the craft of editing, manual tools offer unparalleled control. But if you're an e-commerce seller focused on getting dozens of products online quickly and consistently, AI is your new best friend.
Common Picture Noise Reduction Mistakes To Avoid
It’s surprisingly easy to go too far with noise reduction and end up with a product photo that looks worse than when you started. A heavy-handed approach can completely strip away the fine details that make your products look real and appealing.
Knowing the common pitfalls is the best way to steer clear of them. Instead of just cranking sliders all the way up, a more thoughtful, balanced approach will give you clean images that still feel authentic. The real goal is enhancement, not some kind of artificial perfection.
Over-Processing into a Plastic Mess
This is the most frequent mistake I see. People push noise reduction sliders way too far, especially the Luminance control in software like Lightroom. This aggressive smoothing completely obliterates fine textures, creating that dreaded "plastic" or waxy look.
Suddenly, a sweater loses its weave, wood grain vanishes, and brushed metal looks like a cartoon.
Instead of cranking the slider to 100, start low and be subtle.
- Always zoom in to 100% to see what’s actually happening.
- Slowly nudge the Luminance slider up until the worst of the grain softens. A value between 15 and 40 is often more than enough.
- Prioritize keeping texture over eliminating every last speck of noise. A little bit of fine grain is almost always less distracting than an unnaturally smooth surface.
Remember, you're not trying to create a flawless digital rendering; you're just trying to quiet down a distraction.
A successful edit is one you don't notice. The best noise reduction should make the image look like it was shot perfectly in the first place, not like it was rescued in post.
Ignoring How Marketplaces Treat Your Photos
Another critical error is forgetting that marketplaces like Amazon and Shopify will compress your images after you upload them. When you aggressively reduce noise, you often create large, smooth areas of solid color. These are prime targets for ugly compression artifacts like banding and blocking.
You might export a perfectly smooth image from your computer, only to find it looks blotchy and degraded once it’s live on your store. This happens because the compression algorithm gets confused by those subtle gradients and ends up introducing brand-new visual flaws.
To fight this, add a tiny bit of grain back into the image before you export. I know it sounds counterintuitive, but adding a subtle, uniform grain (Amount 5-10, Size 15-25 in Lightroom) gives the compression algorithm something to "grip," leading to a much cleaner final image on the web.
Trying to Rescue a Bad Photo
Ultimately, the biggest mistake is relying on noise reduction to save a fundamentally flawed photo. If your original shot is severely underexposed, blurry, or just poorly lit, no amount of editing is going to truly fix it.
Editing software is for enhancement, not miracles. Trying to salvage a terrible photo by aggressively smoothing and sharpening it will only create a heavily processed, unnatural image that screams "amateur." The best workflow always begins with capturing the best possible photo right from the start. Put your energy into getting the lighting and exposure right in-camera, and you’ll find you need far less correction later on.
Got Questions About Image Noise? We've Got Answers.
When you're chasing that perfectly clean product shot, a few common questions always seem to pop up. Getting to the bottom of these can make a huge difference in your workflow and the final quality of your images. Let's tackle the questions I hear the most.
Think of this as a quick-reference guide to help you make smarter decisions on the fly, whether you're behind the camera or in front of the computer.
Does Reducing Noise Actually Hurt Image Quality?
It's a bit of a balancing act. When you do it right, noise reduction is a lifesaver, cleaning up distracting grain and making the image look far more professional. But if you push it too far, you’ll end up with a soft, plastic-looking mess that’s stripped of all its important detail.
The trick is finding that sweet spot where the image is clean but still looks real. This is where modern AI tools really shine. They're smart enough to tell the difference between unwanted speckles and the actual texture of your product, so they can clean up the bad stuff while leaving the good stuff intact.
Can I Save a Really Dark Photo by Removing the Noise?
Honestly, probably not. While you can definitely improve it, completely rescuing a severely underexposed photo without destroying the details is next to impossible. The moment you crank up the brightness in post-production, you're also amplifying every bit of noise that was lurking in those shadows.
Your best bet is always prevention. Nail the exposure in-camera, and you’ll save yourself a world of pain later. If you absolutely have to salvage a dark shot, AI-powered tools will give you the best fighting chance, as they're much better at separating noise from detail in tough lighting situations.
Should I Use My Phone's Night Mode for Product Shots?
Night Mode is a fantastic feature for taking casual snaps in a dim restaurant, but it's not the right tool for product photography. It works by taking a bunch of photos over a few seconds and stitching them together, which can lead to weird alignment issues or an over-processed, unnatural look.
For professional, consistent results, grab a tripod and switch over to your phone's 'Pro' or 'Manual' mode. This gives you control. You can lock in a low ISO (like 100) and use a longer shutter speed to capture a single, crisp, and detail-rich image. It’s a little more work, but the quality is night and day.
Ready to stop wrestling with noisy photos? ProdShot uses AI to automatically clean up your product images, delivering professional, marketplace-ready shots in seconds. Transform your product photos for free today at ProdShot.