
When you're selling on Amazon, your product photos aren't just pictures. They're your most powerful sales tool on the world's biggest online shelf. Great images are what build trust, answer a customer's unspoken questions, and ultimately convince them to hit that "Add to Cart" button.
Think about it this way: in a physical store, people can pick up a product, feel its weight, and see it with their own eyes. On Amazon, your photos have to do all of that heavy lifting.
Why Great Images Are Your Strongest Sales Tool on Amazon
On Amazon, your product photos are your storefront, your top salesperson, and your brand's first handshake, all in one. As a potential customer scrolls through a nearly endless feed of results, they’re making split-second decisions. A sharp, clean, and compelling main image is what gets you the click over your competition.
Once they land on your product page, your other photos have an even bigger job. They need to seal the deal by building immediate trust and answering questions the shopper hasn't even thought to ask.
Building Trust Through Visuals
High-quality, professional-looking images instantly signal credibility. If your photos are blurry, poorly lit, or all over the place stylistically, a customer might assume the product itself is just as shoddy. This is where strategic product photography for Amazon can make or break a sale.
By showing your product from every important angle, demonstrating it in use with lifestyle shots, and highlighting key features with infographics, you’re making a strong case for its value. You’re showing, not just telling, and that transparency goes a long way in overcoming a buyer's natural hesitation.
The Data Behind the Clicks
The power of a good photo isn't just a gut feeling; the numbers back it up. Research consistently shows that images often carry more weight than product descriptions or even the price tag.
One landmark study revealed that 83% of US smartphone users found product images to be "very" or "extremely" influential. More recently, that number has held steady, with 75% of online shoppers relying heavily on photos to make their decision. This trend has only gotten stronger as Amazon has grown.
Investing in your visuals isn't just another business expense—it's a direct investment in your conversion rate. The right set of images can:
- Boost Click-Through Rates: A fantastic main image helps you stand out in a crowded search page.
- Increase Conversions: A full gallery of photos gives shoppers the confidence they need to buy.
- Reduce Return Rates: When photos accurately represent your product, customers know exactly what they’re getting, leading to fewer disappointments and returns.
A common mistake I see sellers make is treating their photos as an afterthought. Your images should be at the very core of your listing strategy, planned with just as much care as your pricing and keyword research.
To really see how much professional visuals can impact your sales, it’s worth reading up on creating stunning product photos for your business. At the end of the day, strong photography cements your brand as a serious contender. Getting a handle on the cost of professional product photography will also help you budget for this essential part of your business.
Amazon's Core Image Requirements at a Glance
Before you even start shooting, you need to know Amazon's rules. Getting these wrong can lead to your listing being suppressed or even rejected. This table breaks down the essentials you absolutely must get right.
| Requirement Type | Specification | Why It Matters for Your Listing |
|---|---|---|
| Main Image Background | Must be pure white (RGB 255, 255, 255) | This creates a clean, uniform look across Amazon's search results and is a non-negotiable rule. |
| Image Size | Minimum 1000 pixels on the longest side; 1600+ pixels recommended | Larger images enable the zoom feature, which lets customers inspect details and significantly boosts conversions. |
| File Format | JPEG (preferred), TIFF, PNG, or GIF | JPEG offers the best balance of quality and file size for fast loading times. |
| Product-to-Frame Ratio | Product must fill 85% or more of the image frame | This ensures your product is the hero of the shot and is clearly visible in thumbnail views. |
| Content Restrictions | No text, logos, watermarks, or extra props on the main image | The main image must be a clean, unobstructed view of the product itself. Secondary images can have these elements. |
Getting these technical details right is the first step. It ensures your images are approved and look professional, setting the stage for you to get creative with your other shots.
Getting a Handle on Amazon's Technical Image Requirements
Getting your product photos live on Amazon can feel like you're trying to solve a puzzle. The rules might seem overly technical at first glance, but they're all there for a reason: to create a clean, consistent, and trustworthy shopping experience for millions of people. Once you understand the "why" behind these rules, the whole process becomes much less intimidating and you'll avoid those frustrating image rejections.
The single most important photo in your entire listing is your main image. It's the first thing a potential customer sees in a sea of search results, and Amazon has some very strict, non-negotiable standards for it. This isn't just about making things look nice; it's about building a uniform visual catalog that lets shoppers easily scan and compare products at a glance.
Mastering the Pure White Background
Your main image absolutely must sit on a pure white background. We're not talking off-white or light gray—it needs to be the digital equivalent of pure white, which is RGB (255, 255, 255). This rule is non-negotiable because it makes your product pop and removes any distracting background clutter.
For most sellers, achieving this perfect white backdrop means a little bit of post-production editing to digitally remove the background. Honestly, skipping this step is one of the fastest ways to get your listing flagged and suppressed by Amazon's automated systems.
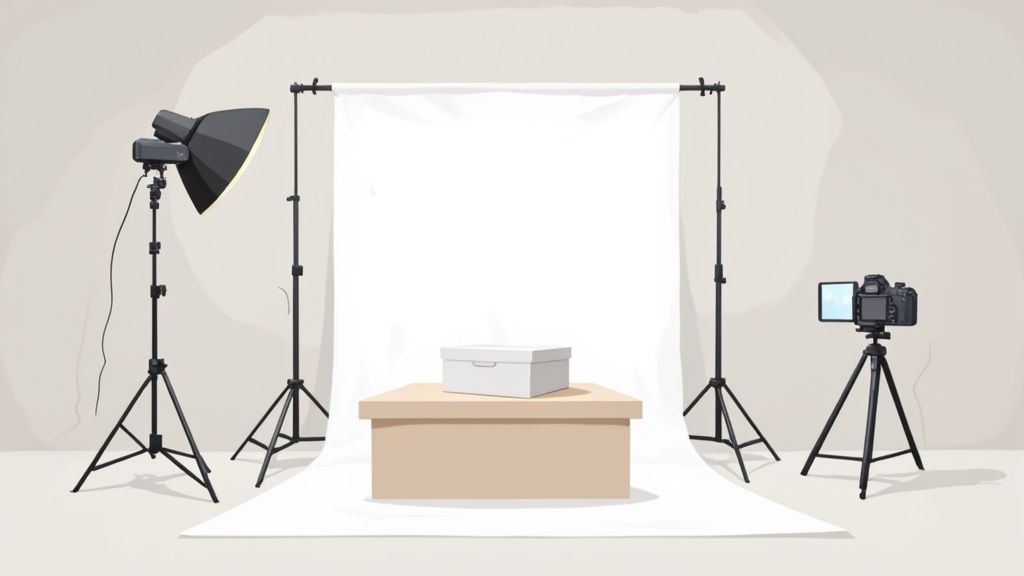
This visual lays out the basic gear that helps you capture clean, well-lit photos right from the start, which makes getting that perfect white background in post-production a whole lot easier.
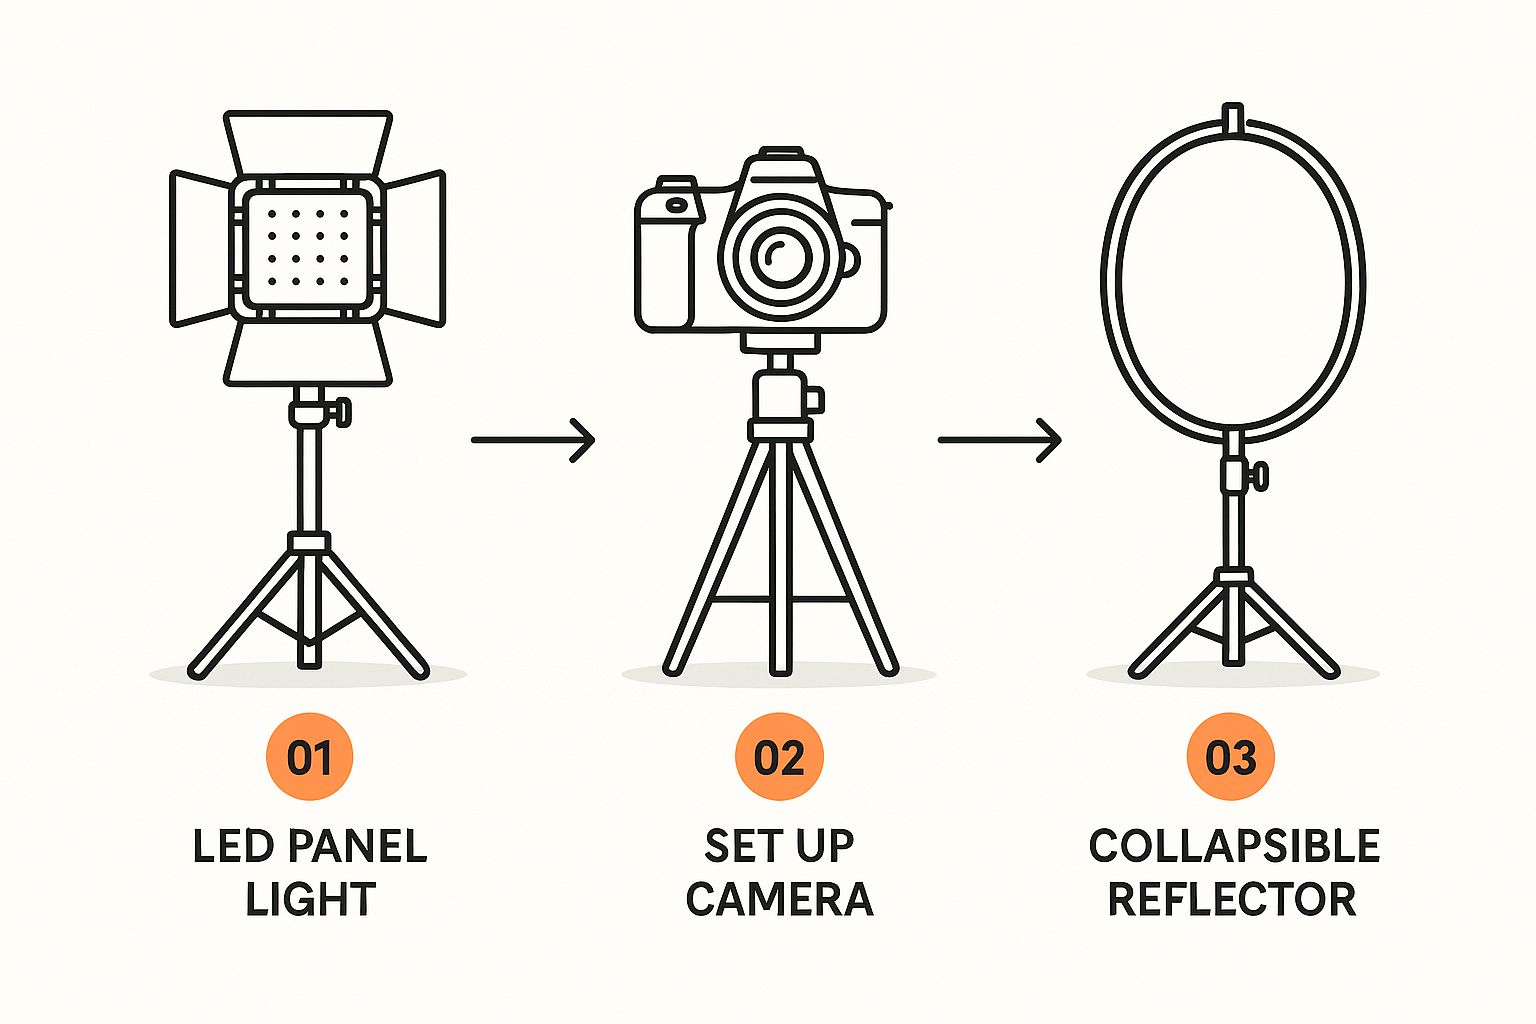
Starting with a solid setup—good lighting, a stable camera, maybe a reflector—means you'll spend less time fighting with the image in editing software and end up with a much more professional-looking final product.
Pixel Dimensions and the All-Important Zoom
Image size is another technical detail you have to get right for your product photography on Amazon. To unlock the platform's incredibly valuable zoom feature, your photos need to be at least 1000 pixels on the longest side. This isn't just a vanity metric; it lets shoppers get up close and personal with your product, simulating the experience of picking it up and examining it in a real store.
The zoom function is a serious conversion driver, not just a neat feature. Listings with zoom-enabled images consistently see better engagement and more sales because they give buyers the confidence they need to click "Add to Cart."
While 1000 pixels is the floor, I always tell people to aim higher. The sweet spot for many successful sellers is around 2500 by 2500 pixels. This ensures your images look crisp and premium, even when a customer zooms all the way in. This is easy to achieve with any decent camera, but if you find your images are just a little too small, you can use a quality online tool to resize your images without destroying the quality.
Choosing the Right File Formats and Color Modes
Amazon gives you a few options for file formats, but let's be real, some are better than others. Here’s a quick rundown of what you’ll be working with:
- JPEG (or JPG): This is the undisputed champion for Amazon. It strikes the perfect balance between high image quality and a manageable file size, so your photos look fantastic without bogging down the page load time.
- TIFF: While TIFF files offer incredible quality, they're usually huge. For web use, they're often total overkill and not worth the extra file size.
- PNG: This format is your go-to if you need a transparent background for your secondary images, like in an infographic. For the main product shot, however, stick with JPEG.
Just as critical is the color mode. Always save your images in the sRGB (Standard Red Green Blue) color profile. This is the universal standard for the web, and it ensures the colors of your product look accurate no matter what screen or browser someone is using. If you accidentally upload an image in CMYK (which is for printing), the colors will look dull, washed out, and just plain wrong on the listing.
What to Leave Out of Your Main Image
When it comes to your main image, less is more. Amazon has a zero-tolerance policy for extra fluff that could distract from the product itself. Getting this wrong is probably one of the most common reasons for an image rejection.
Your main image must not have any of the following:
- Text or Logos: No promotional callouts, brand logos, or graphic overlays of any kind.
- Watermarks: Absolutely forbidden.
- Multiple Angles: The main image must show a single, clear view of the product.
- Props or Accessories: Only show what the customer is actually buying. Don't include items that are just for staging.
Save all that creative energy for your secondary images! Those slots are your playground for adding text to highlight key features, showing the product in a real-world lifestyle shot, or building out helpful infographics. But for that all-important main hero image, keep it clean, simple, and 100% focused on the product.
Creating Your Own Product Photography Studio
You don’t need a fancy commercial studio to get professional-grade product photography for Amazon. Honestly, with a bit of creativity and the right approach, you can create incredible, compliant images right from your home or office. It's all about controlling your environment, not about having the most expensive gear.
This kind of setup won't break the bank. The real goal here is to build a repeatable process that delivers consistent, high-quality results every single time you list a new product. Let's walk through how to build a simple, effective space for your photoshoots.
The Foundation: Your Camera and Tripod
First things first: the camera. A DSLR gives you a ton of manual control, but let's be real—the cameras on modern smartphones are more than capable for this job. Success has far more to do with how you use the camera than the device itself.
No matter what you're shooting with, a tripod is non-negotiable. Seriously. Even the steadiest of hands will introduce a little bit of shake, which leads to slightly blurry photos. A tripod gets rid of that risk completely, ensuring every shot is tack sharp. It also makes it easy to maintain the exact same angle and framing from one shot to the next, which is a huge time-saver.
Choosing Your Lighting Source
Lighting is everything in product photography. It sets the mood, defines the clarity, and gives your images that professional polish. You really have two main paths to go down: natural light or artificial light.
- Natural Light: This is my favorite budget-friendly option. The light from a large window can be absolutely beautiful, providing a soft, diffused look. The trick is to set up near the window, not in direct, harsh sunlight, which creates ugly, hard-edged shadows.
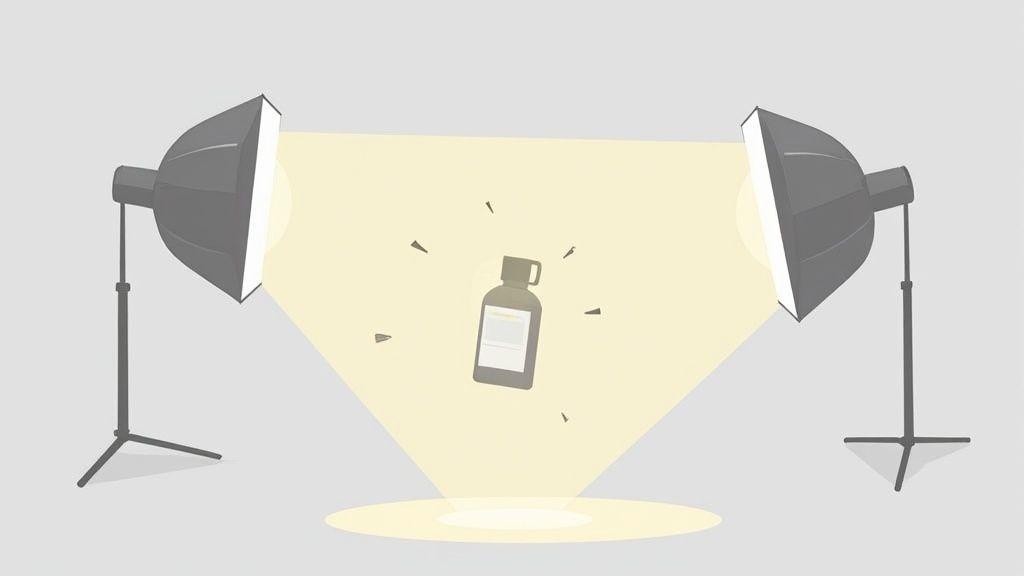
- Artificial Light: If you need to shoot after dark or just want complete control, a basic lighting kit is a smart investment. You don't need to splurge on expensive strobes. A couple of simple LED panel lights paired with softboxes will work wonders. A softbox is just a fabric modifier that goes over the light, making it larger and softer, so it wraps around your product beautifully.
A little tip I always give beginners: start with natural light from a north-facing window. It provides nice, consistent, indirect light for most of the day. Then, grab a cheap white foam board and place it on the opposite side of your product. This will bounce light back, filling in any dark shadows. It's a simple trick that makes a massive difference.
Creating the Perfect White Backdrop
For your main Amazon image, that pure white background is a must. You don't need a professional cyclorama wall—a simple roll of white paper or a large sheet of poster board is all it takes to create what’s called a "sweep."
A sweep is just a backdrop that curves smoothly from a vertical surface (like a wall) down to the horizontal surface your product sits on (like a table). This creates a seamless, infinity-like background with no distracting horizon line. Just tape the top of the paper to a wall and let it curve naturally onto your shooting surface.
Dialing in Your Camera Settings
Whether you're using a DSLR or your phone, getting comfortable with a few key settings will take your photos to the next level. Most smartphones now have a "Pro" or "Manual" mode that unlocks these controls.
- Aperture (f-stop): This controls how much of your photo is in focus. For most product shots, you want everything to be sharp, so you’ll want a higher f-stop number, like f/8 or f/11 on a DSLR.
- ISO: This is your camera's sensitivity to light. You want to keep this as low as possible—think 100 or 200—to avoid that ugly, grainy "noise." Since you're using a tripod and have good lighting, you won't need to crank this up.
- Shutter Speed: This is simply how long the camera's sensor is exposed to light. Because your product is still and your camera is locked down on a tripod, you can use a slower shutter speed without worrying about motion blur. This is what allows you to keep that ISO nice and low for a super clean image.
Tackling Tricky and Reflective Products
Some products are just a pain to shoot. I'm talking about highly reflective stuff like jewelry, chrome, and glassware. They act like mirrors, reflecting everything in the room—including you and your camera.
The solution is to control what's being reflected. You can build a small "tent" around the product using white foam boards on the sides and top. This way, the only thing the item can reflect is a clean white surface. Just cut a small hole in the front panel, big enough for your camera lens to poke through. This technique dramatically cuts down on distracting reflections and gives you a much better starting point for editing.
Telling a Story with Your Product Images
Once you’ve nailed the technical requirements, the real work begins. Your product photos are so much more than a simple gallery; they're a visual conversation with your customer. You get between 7 and 9 image slots, and each one is a golden opportunity to answer a question, spark desire, and guide a shopper from a casual browse to a confident purchase.
Think of it as a silent sales pitch that works in seconds. Your main image is what gets them to click from a crowded search results page, but it's the rest of your images that actually close the deal. This is your chance to stop showing the product and start demonstrating its value.

Building a Winning Image Carousel
To tell a complete story, you need to be intentional with every single image slot. Don’t just throw up a bunch of slightly different angles. Instead, create a logical flow that anticipates exactly what a customer wants and needs to see.
A really solid image carousel usually follows a natural progression, something like this:
- The Hero Shot: This is your main image, crisp and clean on a pure white background. It has to be instantly recognizable.
- Alternate Angles: Give them the full picture—back, side, top, maybe even the bottom. This helps people understand the product's construction and feel.
- The "In-Use" Lifestyle Photo: Show your product in a real-world setting. This is absolutely critical for helping customers imagine it in their own lives.
- Feature Callout Infographic: Use an image with clean text overlays to point out key features. It’s way easier to digest than a dense block of text in the bullet points.
- Scale and Size Comparison: Show the product next to a universally understood object (like a phone or a coffee cup) or in someone's hands. This gives a much better sense of its actual size than just listing dimensions.
- Benefit-Focused Lifestyle Photo: Take the "in-use" shot a step further. Don't just show the product being used; show the positive outcome. For a water bottle, this might be a shot of someone looking energized and happy on a hike.
- The Packaging Shot: If your packaging looks premium or is designed for gifting, flaunt it! This can seriously boost the perceived value of your product.
The Power of Lifestyle and Infographic Images
Your main image gets the click, but it's the lifestyle and infographic photos that do the heavy lifting when it comes to conversions.
Lifestyle shots forge an emotional connection. When a customer sees a coffee mug on a cozy desk or a backpack on a stunning mountain trail, it bridges the gap between their screen and their reality. It makes the product tangible and desirable.
Infographics, on the other hand, appeal to the logical side of the brain. They are incredibly powerful for communicating important details quickly. You can use them to highlight things like:
- Materials: "Made with 100% Organic Cotton"
- Dimensions: A simple graphic showing height, width, and depth.
- Unique Selling Points: "Leak-Proof Lid" or "TSA-Approved Size"
This one-two punch of emotional and informational visuals paints a complete picture, leaving no room for doubt or unanswered questions. The effort you put in here pays off directly. In fact, analytics show that professional product photography for Amazon can boost conversion rates by as much as 30% compared to listings with subpar images. It’s clear that great photography is a core business decision, not just a nice-to-have. You can learn more about the impact of professional Amazon product photography from MyAmazonGuy.
When you're planning your lifestyle shots, really think about your target customer's aspirations. You're not just selling a yoga mat; you're selling a moment of peace, wellness, and self-care. Your images need to capture that feeling.
Learning from Top Sellers
Go spend some time looking at the best-selling products in your category. What do you see? They almost never leave an image slot empty. Their carousels are meticulously planned, with every single photo serving a clear purpose.
They show the product, explain its features, demonstrate its benefits, and build a powerful brand story—all within those nine images. When you treat your image slots like the strategic assets they are, you create a complete, satisfying shopping experience that builds the trust a customer needs to confidently click "Add to Cart."
Giving Your Photos That Final Professional Polish
The real magic in creating knockout product photography for Amazon often happens after the camera is put away. The post-production or editing stage is where a good, well-lit shot is transformed into a crisp, clean image that not only grabs a customer’s attention but also sails through Amazon's strict technical requirements.
Think of editing as your final quality control checkpoint. It’s your opportunity to fix small blemishes, get the colors just right, and create a consistent, trustworthy look across your entire product listing. Whether you're a Photoshop veteran or a seller just looking for a fast, simple workflow, mastering a few key editing steps is a non-negotiable part of the process.
The Traditional Editing Workflow
For decades, the go-to tool for professional photo editing has been Adobe Photoshop. While it definitely has a learning curve, its power lies in the granular, pixel-level control it gives you—something that can be a lifesaver for tricky retouching jobs. For an Amazon seller going this route, the workflow usually boils down to a few core tasks.
It almost always starts with background removal. This is the big one, especially for your main "hero" image. You'd typically use something like the Pen Tool to meticulously trace the product's outline, creating a perfect selection. Then, you place that cutout onto a new, pure white background (that’s RGB 255, 255, 255).
Next up is color correction. The colors your camera captures aren't always a perfect match for the real-life product. In Photoshop, you’d adjust the white balance to neutralize any weird color casts—like a yellowish tint from indoor lighting—to make sure the color is true to life. This single step can dramatically reduce returns from buyers claiming, "it didn't look like the photo."
Finally, you get into the fine-tuning: retouching. This is where you zoom in and clean up the little things. Using tools like the Spot Healing Brush, you can zap away a tiny speck of dust that landed on your product or use the Clone Stamp Tool to cover a small scuff mark. These tiny details are what separate an amateur shot from a truly professional one. If you want to go deeper on these techniques, a good guide on product photo retouching can walk you through the specifics.
The New Wave: AI-Powered Editing Tools
While powerful, the traditional software route can be a real time-sink, not to mention costly. This is where a new generation of AI-powered editing tools is changing the game. These platforms are built from the ground up for e-commerce sellers, automating the most repetitive and tedious editing tasks.
Instead of spending minutes manually tracing your product, an AI tool does the same job in seconds with a single click. These smart algorithms have been trained on millions of images, so they know exactly how to distinguish the product from its background and create a clean, sharp cutout. For many sellers, this alone can cut down their editing time by over 90%.
These tools are great at more than just backgrounds, too:
- Smart Enhancement: AI can instantly analyze your photo and apply the right adjustments to brightness, contrast, and sharpness, making your product really stand out.
- Color Correction: Most platforms have one-click color balancing features that make sure your product looks vibrant and accurate.
- Shadow Generation: To avoid that "floating in space" look, a subtle shadow can ground your product. AI can generate natural-looking shadows automatically, adding a professional touch of realism.
It really changes how you approach editing. Instead of performing technical surgery on a photo, you're more like a creative director. You upload the image, and the AI handles the heavy lifting, which means you can get back to actually running your business.
Comparing the Workflows: Traditional vs. AI
So, which approach makes the most sense for you? The answer really depends on your budget, how much time you have, and your comfort level with technology. Let’s look at how a traditional Photoshop workflow stacks up against a modern AI-driven one.
| Feature | Traditional Software (e.g., Photoshop) | AI-Powered Platform (e.g., ProdShot) |
|---|---|---|
| Speed | Slow and manual; can take several minutes per image. | Incredibly fast; images are often ready in just seconds. |
| Skill Level | High; requires a good amount of technical knowledge and practice. | Low; built with intuitive interfaces perfect for beginners. |
| Cost | Usually a recurring subscription fee (e.g., ~$20/month). | Flexible pricing, often with pay-per-image or affordable subscription tiers. |
| Consistency | Depends entirely on the user's skill to keep edits consistent. | Delivers perfectly consistent, uniform results with every edit. |
| Control | Gives you maximum, pixel-perfect control for complex jobs. | Less granular control, but excels at the core tasks e-commerce demands. |
If you're a seller with a large catalog, the time saved with an AI tool is a huge advantage. Editing 50 new product photos could take all afternoon with a manual workflow, but an AI platform can knock them out in minutes. On the other hand, if you're a professional photographer shooting a single, high-end product that needs artistic retouching, the deep control of Photoshop is probably the way to go.
Ultimately, both paths can get you to the same destination: stunning, compliant product photography for Amazon. The best tool is simply the one that fits most smoothly into your business.
Your Top Amazon Photography Questions, Answered
If you’re just getting into Amazon product photography, you've probably got a long list of questions. It can feel like a high-stakes puzzle where one wrong move gets your listing suppressed. Don’t worry. The answers are usually simpler than you think.
Let's walk through some of the most common things sellers get stuck on. I'll give you clear, straightforward advice so you can start shooting with confidence.
Can I Really Just Use My Smartphone for Amazon Photos?
Yes, you absolutely can. These days, the camera in your pocket is ridiculously powerful. Honestly, great product photography is much less about expensive gear and much more about how well you control light and stability.
A bright, crisp photo from an iPhone will outperform a dark, shaky shot from a pricey DSLR every single time. The trick is to use a simple tripod to kill any motion blur. Then, set up your product near a window for that beautiful, soft natural light, and use a plain white poster board for a clean background. You can even use mobile editing apps to nail that pure white background Amazon demands.
How Many Photos Do I Actually Need to Upload?
You should always, always use every single image slot Amazon gives you. That’s usually between seven and nine slots. Think of each one as a new opportunity to answer a customer's question before they even have to ask it. A full set of images builds serious trust and can make a huge difference in your conversion rates.
Here’s a simple blueprint for your image gallery:
- The Main Image: Your product, all by itself, on a pure white background. No exceptions.
- Different Angles: Give them the full tour—top, back, sides, and any important details.
- Infographics: Call out key features and benefits with simple text overlays.
- Scale Shots: Show the product next to a common object (like a coin or a coffee mug) or in someone’s hand so people can instantly grasp its size.
- Lifestyle Photos: Have at least two shots of your product being used in a real-world setting. Help shoppers imagine it in their own lives.
The biggest missed opportunity I see is empty image slots. A complete photo set tells a full story, erasing doubt from a shopper’s mind and giving them the confidence they need to click "Add to Cart."
What Are the Biggest Mistakes New Sellers Make?
The most common slip-ups almost always boil down to a few key things. Bad lighting is number one—photos come out too dark, too bright, or with a weird yellow cast. Right behind that are blurry, out-of-focus shots, which is usually a dead giveaway that someone skipped using a tripod.
Another classic mistake is breaking Amazon's rules for the main image. A lot of new sellers will add a logo or some text, and that’s a fast pass to getting your listing suppressed. Finally, getting the color wrong in your photos is a massive problem. It doesn't just look amateur; it sets up false expectations and leads directly to frustrated customers and more returns.
Is It Worth the Money to Hire a Professional Photographer?
For a lot of sellers, yes—it's a fantastic investment that pays for itself. If you’re selling a premium item, have a huge product catalog, or just don’t have the time or confidence to do it yourself, a pro can be a total game-changer. They already know all the lighting tricks, composition rules, and Amazon's picky technical specs.
It’s true there’s an upfront cost. But when professional images start lifting your conversion rates, that initial investment often gets covered by the increase in sales pretty quickly. Think of it as a strategic move to build a real brand on the platform.
Ready to create stunning, Amazon-compliant product photos in seconds without the hassle? ProdShot uses AI to turn your simple smartphone pictures into professional-grade images, handling background removal, color correction, and lighting enhancement automatically. Stop spending hours on editing and start boosting your sales. Try ProdShot for free today!