
Your Amazon product photos are your silent salesperson. They're the first—and sometimes only—thing a shopper sees, and they have to do a whole lot of heavy lifting in just a few seconds. This is your digital storefront, and it's your single best chance to convince someone to buy before they even glance at your bullet points.
Why Great Amazon Photos Drive Sales
On Amazon, a customer can't pick up your product, feel its weight, or test its features. They're relying entirely on the pixels on their screen to make a judgment call. Your images have to bridge that gap between the digital and physical worlds. They’re your packaging, your product demo, and your brand ambassador all rolled into one.
Imagine two listings for the exact same stainless steel water bottle. The first has a few dimly lit, slightly blurry photos snapped on a kitchen counter. The second showcases the bottle against a crisp white background, followed by shots of it being used at the gym, on a hiking trail, and sitting on a desk.
Which one feels more premium? Which brand do you trust more? Even if the products are identical, the professional images instantly signal higher quality and value. That's the power of good photography.
The Psychology Behind a Purchase
High-quality images aren't just about looking pretty; they tap directly into shopper psychology. They answer questions the customer hasn't even thought to ask yet and eliminate the hesitation that kills a sale.
A close-up shot showing the texture of a fabric or a graphic showing the exact dimensions of a gadget removes all the guesswork. Lifestyle photos help shoppers see the product in their own lives, forging an emotional connection that a sterile product-on-white shot just can't.
This is a strategic imperative. Your photos communicate:
- Perceived Value: Professional images make a product feel more valuable, which can justify a higher price tag.
- Brand Credibility: Polished, consistent visuals tell shoppers you’re a serious, trustworthy brand that cares about quality.
- Product Clarity: Detailed shots, infographics, and scale comparisons clarify features and benefits, giving customers the confidence to click “Add to Cart.”
Adhering to Amazon's Strict Rules
Before you get creative, you have to nail the basics. Amazon has a set of non-negotiable image requirements, and failing to meet them can get your listing suppressed—making it completely invisible to shoppers.
Getting this right is foundational. Buyers can't physically touch your products, and a staggering 75% of shoppers say they won't even consider products with poor-quality images. This elevates your photography from a simple marketing asset to a functional necessity. You can read more about how visuals influence buyer trust and its impact on Amazon sellers.
A great main image gets the click. The rest of your images close the sale. Each photo must have a specific job, whether it's showing scale, highlighting a feature, or demonstrating a use case.
The rules are straightforward but absolute. For example, your main image must be on a pure white background (RGB 255, 255, 255) and show only the product—no text, no logos, no props. Breaking this one rule is one of the fastest ways to lose visibility.
To make it simple, here’s a quick rundown of the absolute must-knows.
Amazon's Core Image Requirements At a Glance
Think of this table as your pre-flight checklist. Getting these details right ensures your listing stays active and visible. It’s the boring but critical first step to selling successfully.
| Requirement Type | Specification | Why It Matters |
|---|---|---|
| Main Image Background | Must be pure white (RGB 255, 255, 255). | This creates a clean, uniform look across Amazon's search results and is a non-negotiable rule. |
| Product Occupancy | The product must fill at least 85% of the image frame. | Maximizes visibility and ensures customers can clearly see what they are buying. |
| File Format | JPEG, TIFF, PNG, or GIF. JPEG is preferred. | These formats offer the best balance of quality and file size for fast loading times. |
| Image Size | Minimum 1000 pixels on the longest side. 1600 pixels or more recommended for zoom. | Larger images enable the zoom function, a key feature shoppers use to inspect product details. |
| Color Mode | Must be sRGB or CMYK. | Ensures color accuracy and consistency across different devices and browsers. |
| Main Image Content | Must show the product only. No text, logos, watermarks, or props. | Amazon's rules are strict on this to maintain a professional and uncluttered shopping experience. |
| Product Representation | Images must accurately represent the product being sold. | Builds trust and reduces returns. Misleading images can lead to negative reviews and account suspension. |
Mastering these technical rules isn't just about avoiding penalties; it's about building a solid foundation. Once you have this down, you can start creating a full suite of images that not only looks great but performs exceptionally well.
Planning Your Photoshoot to Outshine Competitors
A killer Amazon photoshoot starts long before you ever pick up a camera. If you think just snapping a few clear pictures is enough to own your category, you're leaving money on the table. The real wins come from smart, strategic planning—creating a visual story that walks a shopper from just browsing to hitting "Add to Cart."
That whole process kicks off with a little competitive recon.
Before you even think about your shot list, head over to Amazon and search for your product. Pull up the top five best-sellers. These guys have already figured out what works. Now, tear their image carousels apart. What story are they telling? What unspoken questions are they answering? And, most importantly, where are the gaps?
This analysis is where you'll find your competitive edge. Maybe every one of them shows their kitchen gadget on a pristine white countertop, but not a single one shows it being used by someone with smaller hands. Or perhaps they all have infographics, but the text is so tiny you can’t read it on a phone. These are your openings to create product photography for amazon that's a genuine step up.
Create Your Strategic Shot List
Your shot list isn't just a to-do list; it's the blueprint for your customer's buying journey. Every single image needs to have a purpose, pulling the shopper one step closer to making a decision. A truly effective shot list gets ahead of their questions and wipes out any doubt.
Make sure your list covers all the essential angles to build that confidence:
- The Hero Image: This is your scroll-stopper. It has to be a crisp, high-resolution photo on a pure white background. The lighting needs to be perfect, making your product look like a million bucks.
- Alternative Angles: Show them everything—the back, the sides, the top, even the bottom. Customers want to inspect it from every angle, just like they would if they were holding it in a store.
- In-Context Lifestyle Photos: This is how you make an emotional connection. Show your product in a real-life, aspirational setting that your target customer can see themselves in.
- Scale and Dimension Shots: "It was smaller than I expected" is a return waiting to happen. Put your product next to something familiar, like a phone or a coffee cup, or use a clean graphic overlay with the exact dimensions.
- Feature Callout Infographics: Don't just list specs. Use sharp text and arrows to spotlight 2-3 key benefits. Show them how a feature solves their problem.
- Detailed Close-Ups: Get right in there. Zoom in on the quality of the materials, the stitching, the texture, or any unique part. This is your visual proof that your product is high-quality.
Think of your image gallery as a silent salesperson. The main image grabs their attention, the lifestyle shots build an emotional connection, and the infographics and close-ups provide the logical reasons to complete the purchase.
Storyboarding the Customer Experience
Once you know what shots you need, you have to put them in the right order. Your image carousel should tell a story that makes sense and builds on itself.
A flow that consistently works well looks something like this:
- Main Image: Grabs their attention in the search results.
- Lifestyle Shot: Shows the product making someone's life better.
- Infographic: Highlights the #1 benefit, fast.
- Scale Shot: Manages size expectations right away.
- Detailed Close-Up: Proves the quality and craftsmanship you've been talking about.
- "What's in the Box" Shot: Shows them exactly what they’re getting. No surprises.
- Brand Story or Guarantee Image: A final touch to build trust and seal the deal.
This kind of structured approach turns a basic product page into a guided tour. You're answering questions before they're even asked, building desire, and creating the confidence that makes that "Add to Cart" click a no-brainer. For sellers with huge catalogs, this planning is absolutely essential; understanding the nuts and bolts of handling product photography for 1000 items in a batch can save you a world of time and headache.
By putting in the work upfront, you ensure every photo serves a purpose. You’re not just taking pictures—you're building a visual sales funnel designed to turn clicks into customers and make your product the obvious choice.
Your Essential Toolkit for DIY Product Photography
You don't need a Hollywood-sized budget to get great product photos for your Amazon listings. Honestly, a few smart choices in gear can get you professional-grade images without breaking the bank. The secret isn't about spending more; it's about spending smarter on the equipment that actually makes a difference.
Here, I’ll break down the essentials. We'll cover how to get stunning results whether you’re shooting with a smartphone or a dedicated camera, focusing on practical, cost-effective solutions that let you compete with the big guys.
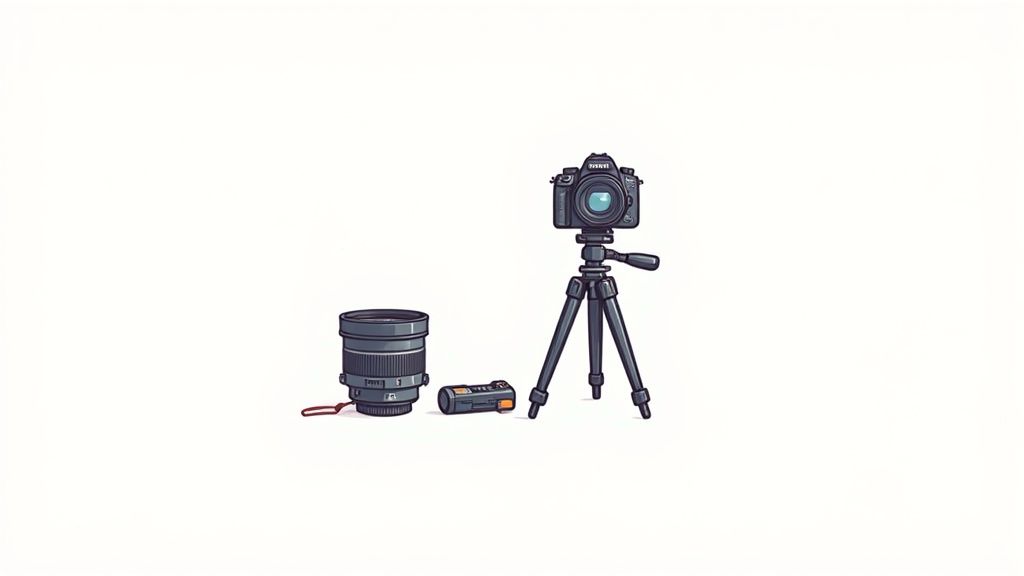
Choosing Your Camera
Let's start with a simple truth: the best camera to start with is probably the one you already have. Modern tech has really leveled the playing field, making high-quality photography accessible to just about everyone.
- Smartphones: Don’t sleep on the power in your pocket. Newer models from Apple, Google, and Samsung pack cameras with 12 megapixels or more, easily rivaling many point-and-shoot cameras. When you pair your phone with a good tripod and solid lighting, it’s more than capable of producing crisp, clear images that meet Amazon's strict requirements.
- DSLR or Mirrorless Cameras: If you happen to own a DSLR or mirrorless camera, you get the bonus of more manual control over settings like aperture and ISO. This opens up a lot of creative freedom, but it’s absolutely not a must-have for success. Even a budget-friendly DSLR with a basic kit lens is a fantastic long-term investment if you decide to go that route.
No matter which camera you use, the one non-negotiable piece of gear is a tripod. Even the steadiest hands can’t match a tripod for delivering consistent, sharp photos. A simple, affordable one starting around $25 will completely eliminate blur and ensure every shot is framed perfectly, every single time.
Mastering Your Lighting Setup
Lighting is everything. I mean it. It's the single biggest factor that separates amateur-looking shots from professional ones. Thankfully, you’ve got some excellent, low-cost options here.
Your goal is to create soft, diffused light that wraps around your product, minimizing harsh shadows and highlighting its best features. You can do this in two main ways.
- Natural Light: The sun is your best friend, and it’s free. Just place your product on a table next to a large window—ideally on a slightly overcast day—for beautiful, soft light. If you’re dealing with harsh, direct sunlight, just tape a thin white sheet or some parchment paper over the window to diffuse it. Problem solved.
- Artificial Light: If you need consistent results at any time of day (or night), an artificial lighting kit is a lifesaver. A pair of softboxes is an affordable and incredibly effective choice. They provide broad, even light that does a great job of mimicking natural daylight.
Pro Tip: A simple white foam board from a craft store is one of the most powerful and cheapest tools you can own. Position it opposite your main light source to bounce light back onto your product. This fills in shadows and creates a much more balanced, professional-looking image.
Creating the Perfect Background
For your main Amazon image, a pure white background (RGB 255, 255, 255) isn't just a suggestion—it's a hard requirement. Getting that clean, seamless "infinity" look is way easier than you might think.
- White Sweep: The best method is to use a "sweep." This is just a single, curved piece of material that gets rid of that hard corner where the wall and floor meet. You can buy a professional sweep, or you can just make one yourself by clipping a large sheet of white poster board or paper to a table and letting it curve down onto the floor.
- Lightbox (or Light Tent): For smaller products, a lightbox is a fantastic all-in-one solution. It’s basically a small, cube-like tent made of translucent white fabric that diffuses light from every direction, creating a nearly shadowless environment. You can buy one for under $50 or even build your own with a cardboard box and some white tissue paper.
If you're really focused on keeping costs down, exploring these affordable product photography tips can help you get amazing results on a shoestring budget. By combining a decent camera with smart lighting and a clean background, you’ve got everything you need to create product photos that actually sell.
Executing a Flawless Amazon Photoshoot
Alright, you've got your plan and your gear is ready to go. Now for the fun part: bringing it all to life. This is where your strategy meets the real world. The goal isn't just to snap some pictures; it’s to build a visual story that walks a customer from curiosity to confidence, answering their unasked questions with every image.
Don't let the technical side of things intimidate you. Camera settings like aperture and ISO sound complex, but the concepts are pretty straightforward.
Think of aperture as the pupil of your camera’s eye. A wider opening (a lower f-stop number like f/2.8) lets in more light and creates that blurry, artistic background. A smaller opening (a higher f-stop number like f/11) keeps more of the scene in sharp focus. For most product shots, you'll want a higher f-stop to make sure every detail of your product is crystal clear.
ISO is just your camera's sensitivity to light. A low ISO, like 100 or 200, gives you a clean, noise-free image. As you crank it up for darker situations, you start to see grainy "noise." The golden rule? Always use the lowest ISO possible. If your shot is too dark, add more light, don't just pump up the ISO.
Styling and Composing Your Shots
How you present your product speaks volumes. Let's imagine we're shooting a stainless steel water bottle. For that all-important main "hero" image, the bottle needs to be immaculate. We're talking zero dust, no fingerprints, no smudges. It should be perfectly centered and shot from an angle that clearly shows off its design and logo.
From there, every other image gets a specific job to do.
- Lifestyle Shot: Show someone actually using the water bottle at the gym or on a beautiful hiking trail. The scene needs to feel aspirational yet totally relatable for your ideal customer. Just make sure the product is the star of the show, not lost in a busy background.
- Scale Shot: This is a simple but powerful one. Place the bottle next to a laptop or slot it into a car's cup holder. This instantly answers the question, "Will this fit in my bag/car?" It’s a small detail that can dramatically cut down on returns from customers with mismatched expectations.
- Feature-Focused Image: If the bottle boasts a unique leak-proof cap, get in close and capture a detailed shot of the seal. You can even add a simple text overlay saying "100% Leak-Proof Design." This turns a feature into a benefit they can see.
A huge mistake I see people make is trying to cram everything into one photo. Give each image a single, clear purpose. The hero shot sells the look, the lifestyle shot sells the experience, and the infographic sells the nitty-gritty features.
The impact of professional-looking images is massive. High-quality visuals can increase conversion rates by up to 30% compared to listings with subpar photos. This isn't just about looking pretty; it's about earning a buyer's trust the second they land on your page. You can read more about how professional images directly impact Amazon sales and build that crucial customer confidence.
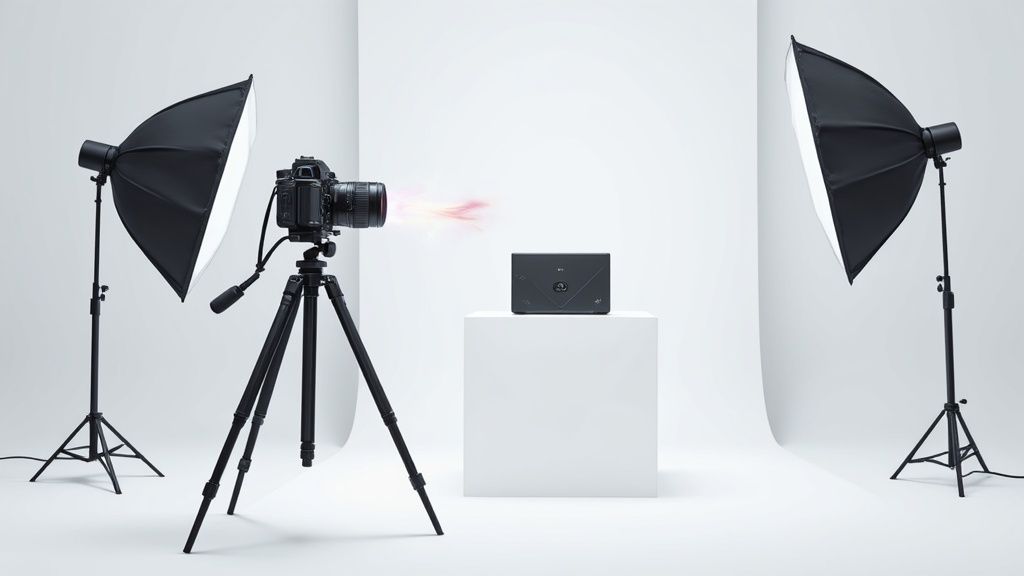
A Simple Lighting Setup That Works
You don't need a crazy-expensive, multi-light studio to get brilliant results. The classic three-point lighting setup is a classic for a reason—it just works. Honestly, even a modified version with just two lights can make your product look fantastic.
The diagram below shows a super effective two-light setup. It uses softboxes to create a soft, even light that wraps around the product.
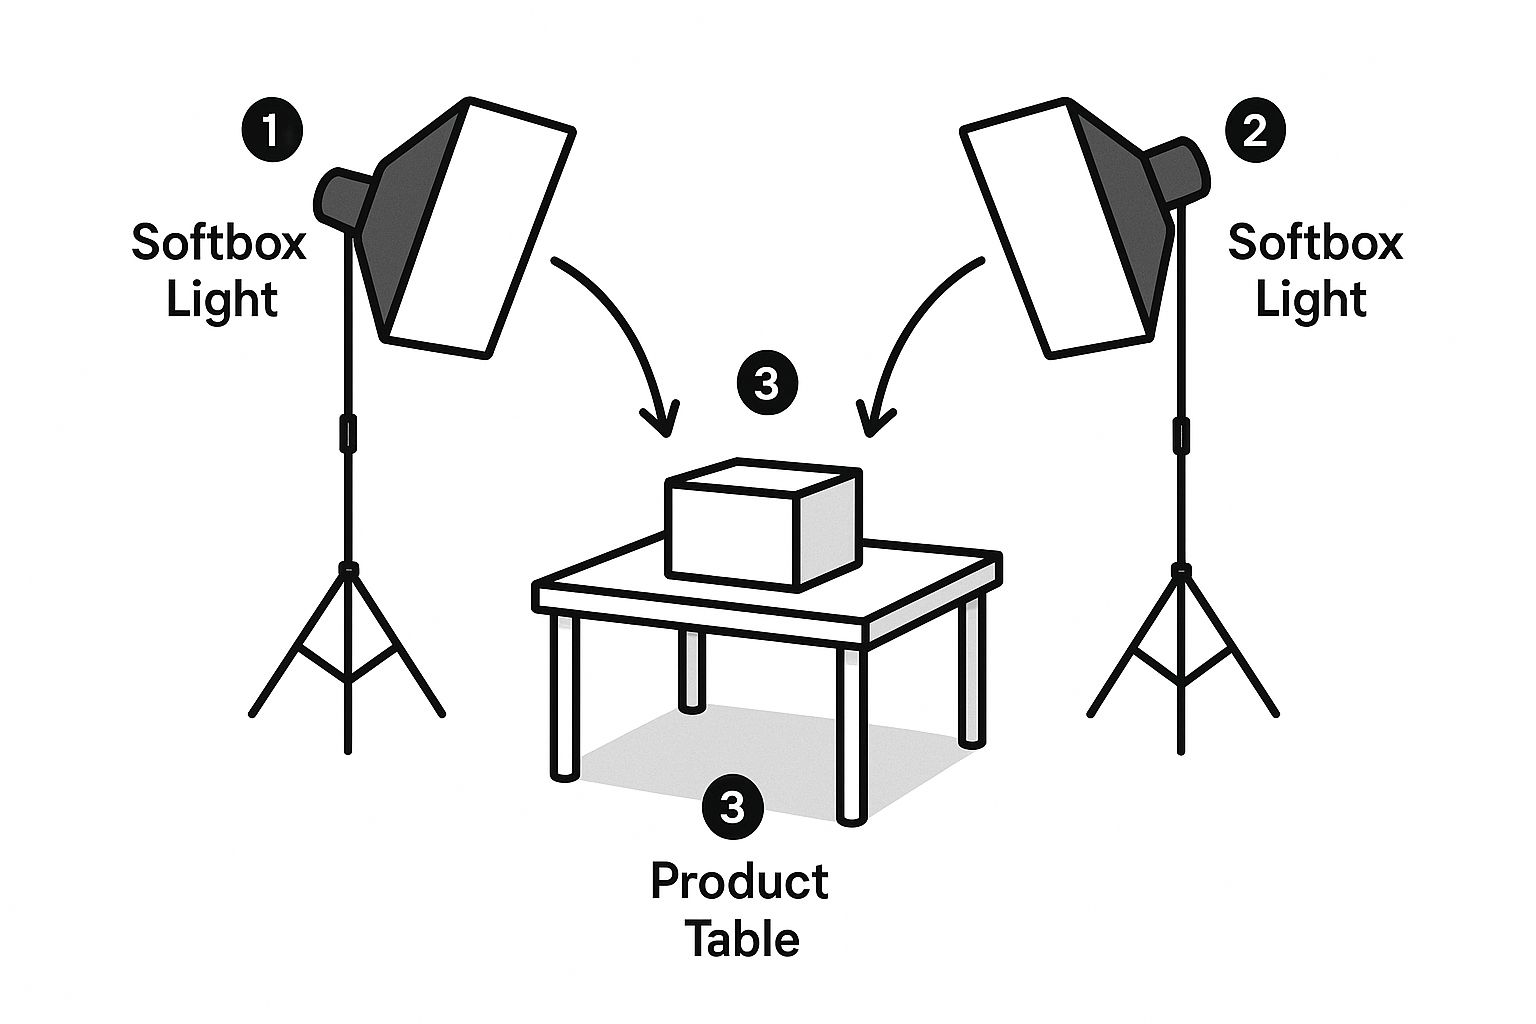
This setup has a main "key light" to provide the primary illumination and a "fill light" to soften any harsh shadows. The result? Flattering light that highlights all the important details without creating distracting dark spots.
By creating a repeatable system for your product photography for amazon, you build consistency across your entire product line. This doesn't just save you a ton of time; it also builds a strong, recognizable brand. Customers will start to associate your clean, professional style with quality and reliability, making them more likely to come back and buy from you again.
Using Post-Production and AI for a Competitive Edge
Getting the shot is only half the job. The real magic—the stuff that turns a good photo into a great one—happens in post-production. This is your chance to polish every image to perfection, making sure it not only meets Amazon's strict technical rules but also jumps off the page in a crowded marketplace. Your goal is simple: make the product look its absolute best without ever misrepresenting it.
Some edits are just non-negotiable. You'll need to do basic color correction so the product's color on screen is true to life. A little sharpening helps the details pop, and consistent cropping across your gallery creates a professional, cohesive look.
Most importantly, you have to nail that pure white background (RGB 255, 255, 255) for your main image. It's tedious, I know, but it's a critical part of playing by Amazon's rules.
The Rise of AI in Product Photography
Let's be real: manually editing every single photo is a massive time sink, especially if you have a large catalog. This is where modern tools have completely changed the game. Artificial intelligence isn't some far-off concept anymore; it's a practical, powerful tool for any Amazon seller looking to get ahead.
AI-powered platforms can automate the most grueling parts of post-production. Forget spending hours meticulously tracing a product to cut out the background. AI can do it flawlessly in seconds. It can also intelligently adjust lighting, get rid of weird reflections, and even add realistic shadows that give your product some much-needed depth.
The real power of AI isn't to replace your skills but to amplify them. It handles the repetitive, technical work, freeing you up to focus on the creative strategy that actually drives sales.
Think of it as having a pro photo editor on your team who works around the clock. This kind of efficiency means you can get your products listed faster and maintain a high standard of quality across your entire brand—something that used to require a serious budget. For a closer look, our guide on the AI product photo generator shows just how simple this process can be.
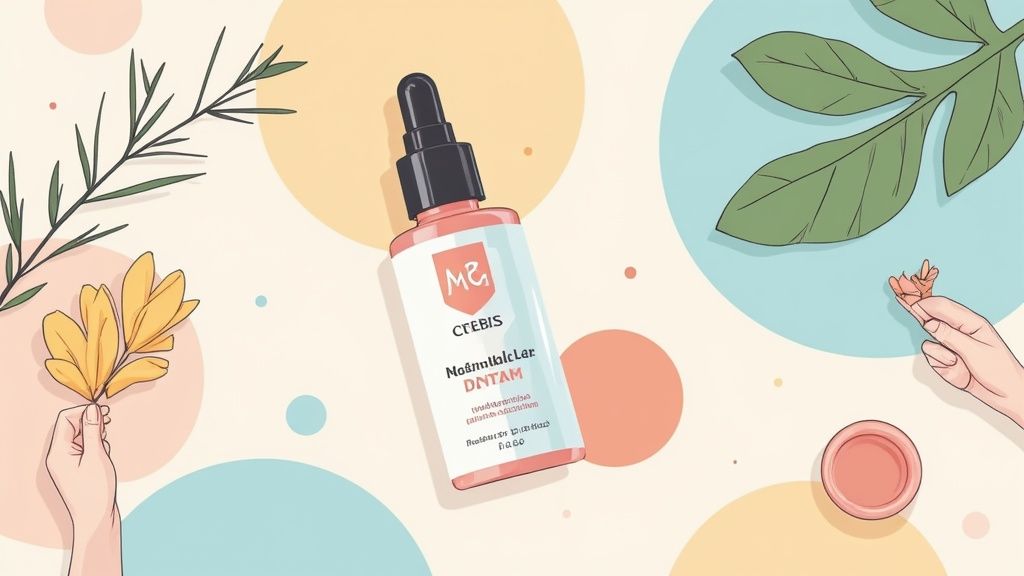
Generating High-Converting Lifestyle Imagery
One of the most powerful ways to use AI is for creating lifestyle photos. We all know the drill: sourcing models, scouting locations, and organizing a professional shoot is expensive and a logistical nightmare. AI just wipes those problems away.
With a tool like ProdShot, you can take a clean product photo on a white background and instantly drop it into countless realistic scenes.
Need to show your water bottle on a mountain trail, next to a yoga mat, or on a busy office desk? You can generate all three of those shots in a matter of minutes, not days. This lets you A/B test different concepts to see what your audience actually connects with, all without the traditional cost and hassle.
- Speed to Market: Create a full suite of lifestyle images the same day you shoot the product.
- Cost Efficiency: Dramatically lower your photography budget by getting rid of physical shoots.
- Creative Flexibility: Test dozens of scenes and concepts to find the perfect vibe for your brand's story.
These AI tools are quickly becoming a core part of successful product photography for amazon. They can even analyze buyer behavior to suggest visual tweaks, helping your images build trust with shoppers who are making split-second decisions.
And don't forget, making your images look good is only part of the equation. You also need to optimize your product images for SEO to ensure they get found in the first place.
Common Questions About Amazon Product Photography
Even with a solid plan, you're bound to hit a few specific questions once you get into the nitty-gritty of an Amazon photoshoot. Let's tackle some of the most common ones we hear from sellers.
Think of this as your quick-reference guide for those moments when you're wondering, "Am I doing this right?" We'll cover some key ideas and give you some direct advice you can use right away to get your listings looking sharp.
How Many Product Images Should I Use?
Amazon gives you nine image slots, but you don't always need to fill every single one. The real sweet spot is using at least six or seven. That gives you enough space to tell a compelling visual story without overwhelming your customer. Any fewer, and you’re probably leaving money on the table by not answering a potential buyer's question.
A winning image gallery almost always includes:
- A crisp, compliant main image on a pure white background. No exceptions.
- Multiple angles showing the product from every important side.
- A lifestyle image that puts the product into a real-world context.
- An infographic calling out the most important features and benefits.
- A scale shot to give a clear, immediate sense of the product's actual size.
Using these slots strategically is one of the fastest ways to build the kind of buyer confidence that leads directly to better conversion rates.
Can I Really Use My Smartphone for This?
Absolutely. That camera in your pocket is a powerhouse. Modern smartphones, especially those with 12-megapixel cameras or better, are more than capable of producing photos that meet all of Amazon’s technical specs.
The secret isn't a fancy camera body; it's the setup. To get great results with your phone, you need to nail three things: a tripod for stability, great lighting (natural light from a window works wonders), and proper editing to get that clean, professional finish.
Don't blame the camera for a shaky hand or a poorly lit room. A $25 tripod and a spot next to a bright window can easily outperform a $2,000 DSLR that's being used incorrectly.
With the right approach, your phone is a fantastic and incredibly cost-effective tool for creating killer product photography for amazon.
What Are the Most Common Photo Mistakes?
I see sellers make the same few mistakes over and over again—and they can seriously hurt sales or even get a listing suppressed. Avoiding these is non-negotiable.
Here are the biggest offenders:
- Violating Main Image Rules: Adding logos, text, or props to your main image is the #1 way to get it flagged. It has to be just the product on a pure white background.
- Poor or Inconsistent Lighting: Dark, shadowy photos look cheap and untrustworthy. Just as bad is inconsistent lighting across your images, which creates a jarring, unprofessional experience for the shopper.
- Ignoring Product Scale: A mismatch in size expectations is one of the top reasons for returns. An image that clearly shows the product's scale manages those expectations before the buy button is ever clicked.
- Low-Resolution Images: Blurry photos are a conversion killer. They disable Amazon's zoom feature, a tool that 73% of shoppers rely on to inspect product details. Always upload the highest resolution file you can.
Figuring out the financial side of things—whether DIY or hiring out—can also be tricky. Taking a moment to understand the cost of professional product photography will help you budget smart and make the right call for your business. If you just steer clear of these common pitfalls, you’ll already be miles ahead of most of your competition.
Ready to create stunning, conversion-driving product photos in seconds? Let ProdShot's AI do the heavy lifting. Turn simple snapshots into professional, marketplace-ready images without the cost or complexity of a traditional photoshoot. Try it for free and see how easy it is to elevate your brand at https://prodshot.net.