
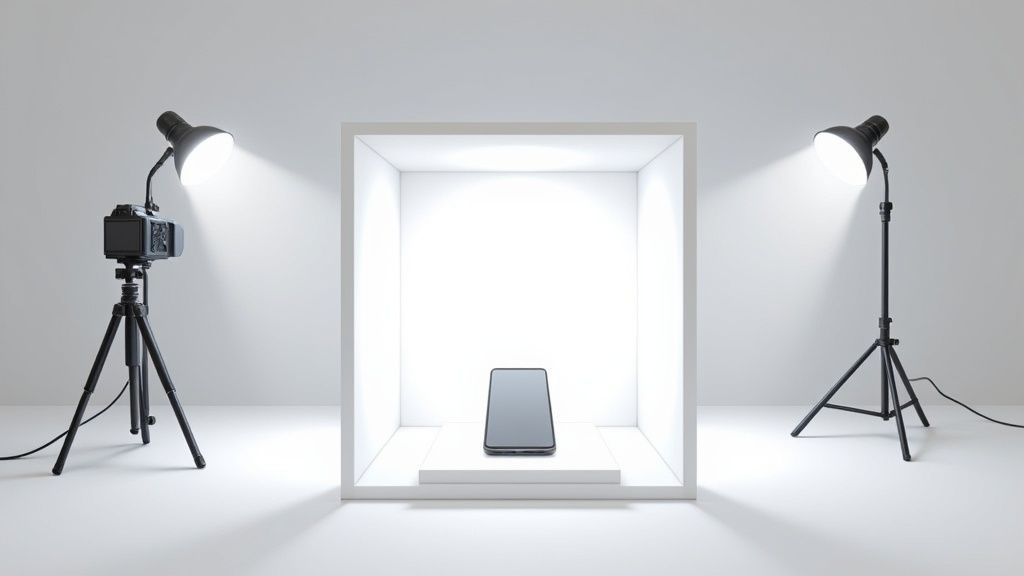
A product photography light box is your secret weapon for creating perfectly lit, shadowless images. Think of it as a portable mini-studio, complete with built-in LED lights and reflective walls. This setup bathes your product in soft, diffused light from every angle, killing harsh shadows and delivering clean, professional-looking photos every time.
Why a Light Box Is an E-commerce Essential
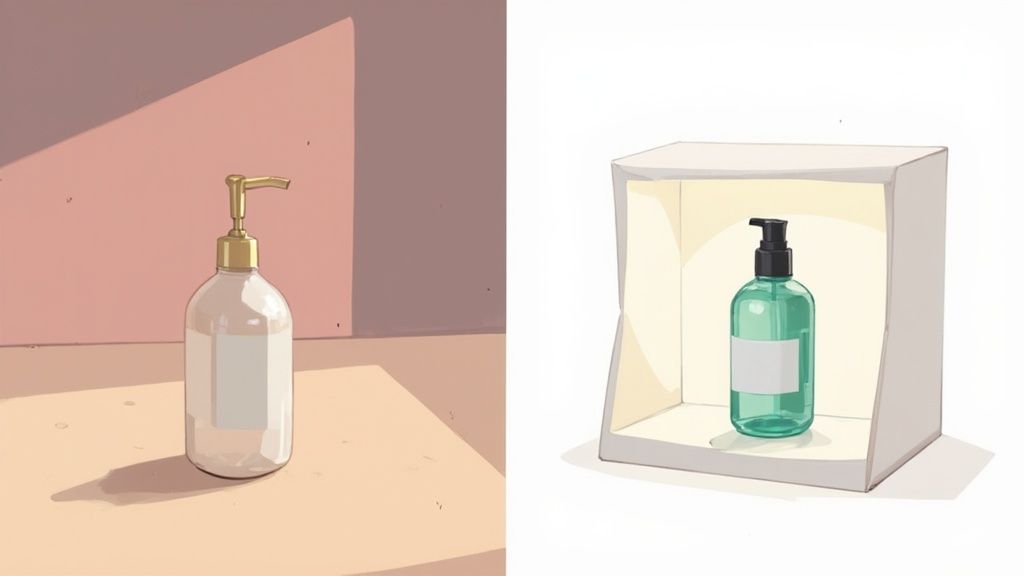
Ever tried shooting a product by a window? You end up fighting with shifting light, awkward shadows, and weird color tints bouncing off nearby furniture. A product photography light box gets rid of all that drama instantly. It creates a controlled, self-contained world for your products, so your images look consistent and polished, shot after shot.
This consistency isn't just nice to have—it's a must for e-commerce. Big players like Amazon and Shopify have strict rules, often requiring a pure white background. A light box makes hitting those standards a breeze and saves you from hours of tedious editing. It’s the tool that closes the gap between amateur snapshots and photos that actually sell.
The True Value of a Controlled Environment
Here’s the thing: without a light box, you’re completely at the mercy of your surroundings. A cloud passes overhead, and your lighting is ruined. That warm-toned lamp in the corner? It just threw off all your colors. A light box cuts out all those variables. It gives you a repeatable setup, ensuring the photo of your blue ceramic mug today looks exactly like the one you take six months from now.
That kind of quality and consistency builds trust with your customers and directly impacts sales. It's no wonder the global photography light box market is booming. Some reports show the market hit $526 million in 2024, a massive jump fueled by the growth of online shopping.
Key Takeaway: A product photography light box isn't just another gadget; it's an investment in your brand's consistency and your own efficiency. It replaces complicated multi-light setups and slashes your post-production time.
We've been talking about how a light box gives you an edge. But how does it stack up against a more traditional, pieced-together DIY setup? Let's break it down.
Light Box vs. Traditional Setup A Quick Comparison
For anyone starting out, the choice between a dedicated light box and a DIY approach can be tough. The table below gives you a quick side-by-side look to help you see where the real advantages lie.
| Feature | Product Photography Light Box | Traditional DIY Setup |
|---|---|---|
| Lighting | Integrated, diffused LED lighting | Requires separate lights, stands, diffusers |
| Consistency | Highly consistent results every time | Varies based on setup and ambient light |
| Setup Time | Fast and easy (often under 5 minutes) | Can be complex and time-consuming |
| Portability | Designed to be foldable and portable | Bulky and difficult to move or store |
| Cost | One-time investment, cost-effective | Can be cheaper initially but may need upgrades |
| Space | Compact and requires minimal space | Needs a larger, dedicated shooting area |
Ultimately, while a DIY setup can work in a pinch, a product photography light box is purpose-built for efficiency and consistency—two things every e-commerce seller needs.
At the end of the day, killer product photos are a core part of selling online. Digging into broader conversion rate optimization strategies will show you just how critical visuals are. And while a light box is an upfront investment, it pays for itself fast when you weigh it against the cost of professional product photography. For any serious seller, it’s a no-brainer.
How to Choose the Right Light Box
Picking the right product photography light box can feel like a huge commitment, but it really just boils down to matching the tool to the job. Not every box is a one-size-fits-all solution, and grabbing the wrong one can lead straight to frustrating reshoots.
The trick is to think about three things first: your products, your space, and your workflow.
So, what are you selling? If your inventory is full of small, detailed items like rings, earrings, or delicate charms, a compact light box around 12-16 inches will be your best friend. These smaller setups provide concentrated, even light that makes those fine details pop without washing out the subject. For a deeper dive, check out our guide on mastering the nuances of jewelry product photos.
On the flip side, if you're shooting larger products like handbags, shoes, or small home decor, you’ll need more breathing room. A bigger tent, usually in the 24-32 inch range (or even larger), gives your product space and allows the light to wrap around it smoothly for that clean, professional look.
Size, Lighting, and Portability
Beyond just the physical dimensions, the kind of lighting inside the box is a massive factor. The vast majority of modern light boxes come with built-in LED strips. This is great news for a few reasons: they're energy-efficient, they last forever, and they produce a consistent, daylight-balanced color temperature—typically around 5500K. This means the colors in your photos will look true-to-life right out of the camera. Some of the higher-end models even come with dimmable LEDs, giving you pinpoint control over brightness.
The final piece of the puzzle is portability. Are you a home-based business with a dedicated photo corner? Or are you an Etsy seller who shoots on the dining room table between meals? If space is tight, a foldable, pop-up style light box is an absolute lifesaver. These models collapse down into a small case, making setup and takedown a breeze.
This infographic breaks down the selection process into three simple steps to help you visualize the decision.

As you can see, just starting with your product's size immediately narrows down your options, making it much easier to focus on the other details like lighting features and how the whole setup will fit into your workspace.
The demand for these flexible solutions is climbing fast. In fact, the market for portable photo studio light boxes is on track to grow at a 6.8% CAGR through 2033. This trend shows a clear shift toward adaptable gear for online sellers who need pro-level results without a permanent studio. You can get more details on this growth in the full report on portable studio trends.
Pro Tip: Keep an eye out for a light box that comes with multiple backdrops. Most kits include black and white, but some throw in other useful colors like grey or tan. Having these on hand lets you experiment with contrast for different products without spending extra cash.
Perfecting Your Light Box Setup and Angles

Unboxing a new light box is always a bit exciting, but the real magic happens when you turn that flat-packed kit into your own personal mini-studio. The setup is more than just assembly; it's about creating a totally controlled space where your products can look their absolute best.
Most light boxes pop open and secure with simple tabs or magnets, so it’s usually tool-free. But take a second to make sure every wall is taut and the corners are flush. This little check prevents weird light leaks or annoying wrinkles in your backdrop down the line.
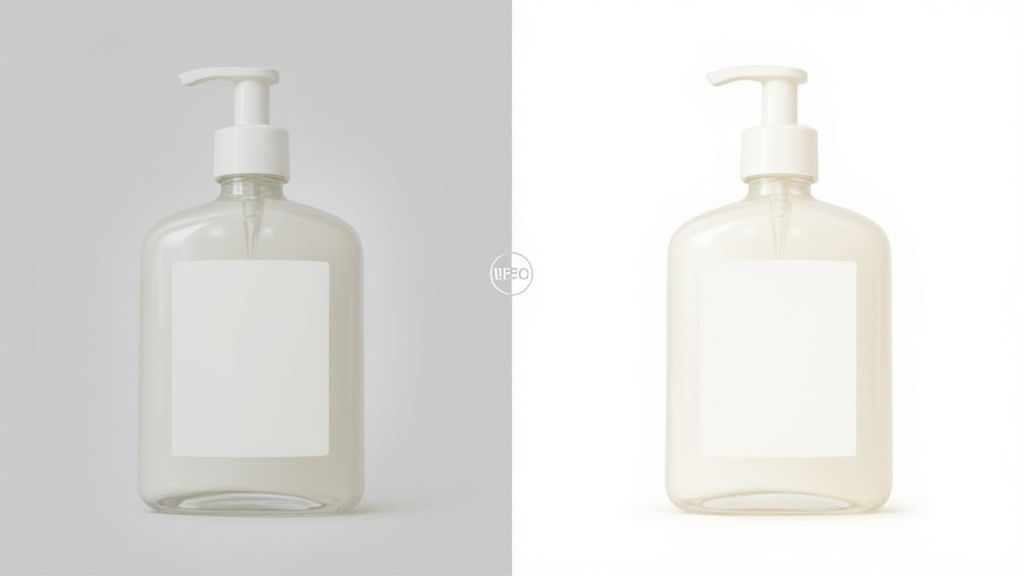
Next up, the backdrop. Most kits give you the basics, like black and white. For 90% of e-commerce needs, a crisp, seamless white background is the gold standard, especially if you're selling on a platform like Amazon. Smooth it out carefully, letting it curve from the back wall down to the floor. This "infinity sweep" is a classic trick that gets rid of harsh lines and makes your product look like it's floating in a clean, professional space.
Mastering Light Positioning and Angles
With the box ready, it's time to play with the most important part: the light. Your box diffuses the light, but where you place those lights is what creates the mood, texture, and depth in your final shot. Don't just turn on the lights and call it a day. Experimentation is your best friend here.
Think of light as a storytelling tool. A single light blasted straight at the product will probably make it look flat and boring. A much better starting point is to position your main light (your key light) at a 45-degree angle to the side and just a bit above your product. This classic setup creates soft shadows that instantly reveal the product's shape and dimension.
Key Takeaway: Angles are everything. A tiny shift in your light source can take a product from looking dull and two-dimensional to dynamic and tactile. The whole game is using light and shadow to guide the shopper's eye right to the most important features.
Getting this right is fundamental. If you really want to build a strong foundation, digging into the essentials of photography lighting will give you a huge leg up.
Advanced Lighting Scenarios
Once you're comfortable with a single light, you can start creating more sophisticated looks. Here are a few scenarios I turn to all the time:
- Highlighting Texture: Want to show off the grain on a leather wallet or the weave of a nice fabric? Use a strong side light, something photographers call "raking light." Just position the light low and to the side. This angle casts long shadows across the surface, making every little detail pop.
- Creating Dramatic Reflections: For anything metallic or glossy—like watches or chrome fixtures—a black backdrop is your secret weapon. The dark, non-reflective surface cuts down on distracting glare and creates those sleek, defined reflections that scream luxury.
- Perfecting the Flat Lay: When you're shooting top-down shots of things like cosmetics or stationery, place your main light directly overhead. You can then use a white foam board or a second, less powerful light on the side to gently fill in any harsh shadows, making sure everything is evenly lit.
Don't be afraid to move your lights around. Adjust their intensity if you can. See what every little change does. A few minutes of testing different angles can save you hours of headaches in Photoshop and will absolutely elevate your shots from "good enough" to genuinely great.
A great light box gives you the perfect stage, but your camera settings are what truly direct the show. Getting these right is the difference between a blurry, grainy shot and a crisp, professional image that actually drives sales. Don't worry, you don't need to be a technical wizard to get amazing results.
Whether you're using a DSLR or just your smartphone, the real goal is to get away from the "auto" setting. A light box provides a perfectly controlled environment, which means you can finally take the wheel and use manual settings. This is how you tell your camera exactly what to do, ensuring every single photo is sharp, bright, and true-to-life.
Getting the Exposure Triangle Right in a Light Box
The "exposure triangle" is just a fancy term for three settings that work together: ISO, aperture, and shutter speed. Inside a light box, where your light is bright and consistent, we can tweak these for maximum clarity.
-
ISO (Keep It Low): Set your ISO as low as it will go. For most cameras, that’s ISO 100 or 200. A low ISO minimizes digital noise—that ugly, grainy texture—giving you a much cleaner, smoother image. Since your light box is flooding the scene with light, there’s absolutely no reason to crank up the ISO.
-
Aperture (Go Higher for Full-Product Sharpness): Aperture, measured in f-stops (like f/8), controls your depth of field. In simple terms, it decides how much of your product is in focus. For most e-commerce shots, you want the entire product to be sharp from front to back. To make that happen, you'll need a higher f-stop, somewhere in the f/8 to f/11 range.
-
Shutter Speed (Adjust for Brightness): With your ISO and aperture locked in, shutter speed is the final piece of the puzzle. It controls how long the camera's sensor sees the light. Tweak your shutter speed until the image looks perfectly bright without being completely blown out. And since your camera should be on a tripod, you can use a slower shutter speed without worrying about a blurry mess.
Pro Tip: Never trust your camera's tiny screen to judge the brightness. Your secret weapon here is the histogram. For a clean white background shot, the graph should be pushed way over to the right side, but not completely cut off. This tells you the whites are bright without sacrificing important product details.
Fine-Tuning White Balance and Focus
Once your exposure is dialed in, a couple of final tweaks will take your shot from good to great. White balance, in particular, is absolutely critical for getting your product colors right.
Most cameras have a "White Balance" (WB) setting. "Auto" can work in a pinch, but it often gets confused by the bright, all-white interior of a light box. For consistent, true-to-life colors, you need to set it manually. You can use a preset like "Daylight" (which is often around 5500K and matches most modern LEDs) or get super precise by using a grey card to create a custom setting.
Finally, nail the focus. Switch over to your camera's manual focus or use single-point autofocus to tell it exactly what part of the product is most important. If you're on a smartphone, just tap the screen to set your focus point, then long-press to lock it in place. This is a game-changer because it stops the camera from randomly refocusing between shots. I also recommend turning on your screen's gridlines—it's a simple trick that helps you get the composition perfect every time.
Simple Edits to Make Your Product Images Pop
Getting a great shot straight out of the light box is a huge win, but the real magic happens in post-processing. A few simple, quick edits can transform a good photo into a scroll-stopping, professional image. The goal here isn’t to completely overhaul the photo, but to enhance what your camera already captured—making sure it's bright, sharp, and true to life.
Think of editing as your final quality check. Even with a perfect lighting setup, your camera might see a pure white background as slightly gray, or it might soften some of the finer details. These are tiny issues, but a few clicks in editing software can fix them instantly, creating a clean and consistent look across all your product listings.
Your Essential Editing Checklist
The key to avoiding an editing nightmare is to build a fast, repeatable workflow. For almost any product photo, you really only need to focus on four core adjustments.
- Crop and Straighten: First things first, make sure your product is centered and all the lines are straight. A slightly crooked photo just looks unprofessional, and it’s the easiest fix in the book. A 4:3 or square crop ratio tends to work best for most e-commerce platforms.
- Adjust Brightness and Contrast: Use the brightness or exposure slider to push that background to a clean, pure white. A little bump in contrast will make the product itself stand out more, defining its edges and giving it more of a presence on the screen.
- Correct White Balance: This is absolutely crucial for accurate colors. If your product has a weird yellow or blue tint, the white balance tool will neutralize those tones. Most editing software has an eyedropper tool that lets you click on a white or gray area to automatically set the correct balance.
- Add a Touch of Sharpening: A final, light pass of sharpening brings out all the fine textures and details in your product. Just be careful not to overdo it—too much sharpening creates a grainy, unnatural look.
This level of polish is more important than ever. Shoppers' expectations are rising, and hyper-realistic photography that captures every last texture is a huge trend. In fact, by 2025, it's predicted that 64% of consumers will prefer brands that use natural-looking visuals, a style that clean, crisp editing helps deliver.
Achieving a Pure White Background
For marketplaces like Amazon, a pure white background isn't just a nice-to-have; it's a hard requirement. If your background still looks a bit gray after tweaking the brightness, the "Levels" or "Curves" tool is your new best friend.
Quick Tip: In the Levels tool, you'll see a little graph called a histogram with three sliders below it. Grab the slider on the far right (the white point) and drag it just a little to the left. You'll see the background pop to pure white. This isolates the adjustment to only the brightest parts of the image, so your product itself stays untouched.
This one technique is a cornerstone of professional e-commerce photography. If you're processing tons of photos or need more advanced retouching, looking into dedicated product photo editing services can save a massive amount of time and guarantee flawless results every single time.
Got Questions? We’ve Got Answers.
Even with a killer setup, you're bound to run into a few tricky spots when you first start shooting in a product photography light box. It happens to everyone. Think of this as your quick-reference guide for troubleshooting the most common hiccups so you can get back to creating those crisp, clean images.
From wrestling with glare on shiny stuff to getting that perfect, pure white background, the fix is usually just a small tweak away.
How Do I Get Rid of Reflections on Shiny Products?
Ah, the classic photography puzzle. You're trying to shoot jewelry, glass, or anything with a chrome finish, and suddenly you see your lights—and maybe even your camera—staring back at you. While a light box is a huge help, those super-reflective surfaces are experts at finding things to mirror.
Your first move? Play with your lighting angles. Instead of blasting your product head-on, try shifting your LEDs further to the sides or even a bit behind the item. This little change can push the reflection off the most important part of your product, making it far less noticeable.
If that doesn't quite do it, it’s time to add more diffusion.
- Add Another Layer: Try draping a thin, white, semi-sheer piece of fabric (like a diffuser panel from a 5-in-1 reflector) over the top opening of your light box. This softens the light even more.
- Use Blocker Cards: Grab a few small pieces of black foam core and position them just outside the camera's frame. These are fantastic for blocking specific, stubborn reflections. On the flip side, you can use white cards to bounce a little soft light back into any dark shadows.
- Bring in the Big Guns: For the really tough jobs, a circular polarizing filter (CPL) that screws onto your camera lens is the ultimate weapon. It’s built specifically to slice through glare and can be a total game-changer.
Here's a tip from experience: It’s tempting to think more light is always the answer. With reflective products, it’s the opposite. Softer, more controlled light is your best friend for avoiding those distracting hotspots and glare.
Can I Really Get Professional Shots with My Smartphone?
Absolutely. Don’t let anyone tell you otherwise. The cameras in modern smartphones are seriously powerful, and a light box gives them the perfect, controlled environment they need to really perform. The even, bright lighting lets your phone's sensor capture incredible detail without struggling.
The key is to not hand-hold your phone. A small, cheap tripod is your best investment here. It completely eliminates camera shake, guaranteeing your shots are tack-sharp. It also makes it a breeze to keep your angle and composition exactly the same for every photo, which is crucial for consistency on your product pages.
Most importantly, you need to take manual control. Don't just point and shoot. Tap on your screen to tell the camera exactly where to focus, then press and hold to lock it in. Once it’s locked, you can usually slide your finger up or down to fine-tune the exposure. This gives you way more precision than letting the phone guess for you. If you want to go a step further, look into a third-party camera app that gives you full manual control over things like ISO and white balance.