
Gone are the days when getting professional-grade product photos meant booking an expensive studio and hoping for the best. The power to create stunning, conversion-driving images is already in your pocket.
This guide is all about a modern, accessible workflow that pairs your smartphone with smart AI tools to get the job done right.
The End of the Expensive Photo Studio
Let's be real: high-quality visuals are non-negotiable if you want to succeed on Shopify, Amazon, or Etsy. But for years, many sellers felt stuck, believing truly professional photos were out of reach without a massive budget.
The traditional path—hiring photographers, renting studios, waiting on edits—was a huge barrier for small businesses and solo entrepreneurs. (If you're curious about the numbers, we break down the typical cost of professional product photography in our other guide).
That old, clunky model is finally being replaced by something far more agile and affordable.
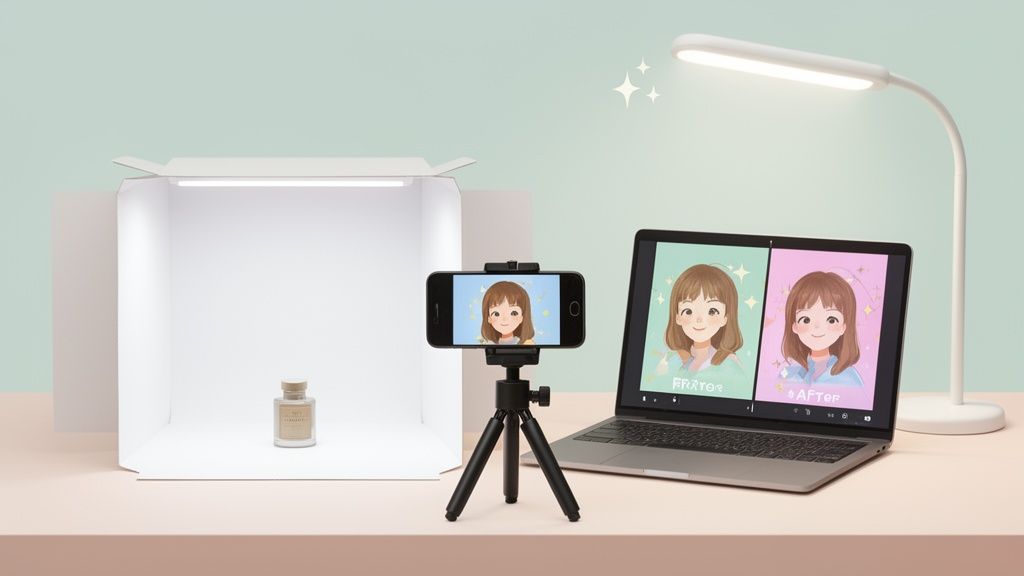
By combining the high-resolution camera you already own with AI-powered editing platforms like ProdShot, you can crank out market-ready images in minutes, not weeks. It’s a total shift from a complex, expensive process to a simple system that delivers consistent, on-brand photos every single time.
Why This Modern Workflow Wins
This new approach isn't just about saving a few bucks; it’s about gaining speed, control, and consistency. You're no longer tied to someone else's schedule or creative vision. This puts sellers of all sizes on a much more even playing field.
The benefits are immediate and impactful:
- Drastic Cost Reduction: Forget fees for photographers, studio rentals, and pricey equipment.
- Unmatched Speed: Go from a quick snapshot to a polished, marketplace-ready image in seconds.
- Total Creative Control: You’re in the driver's seat, ensuring your brand’s aesthetic is perfect from start to finish.
- Easy Scalability: Need to shoot hundreds of products? No problem. You can create consistent shots for your entire inventory without your budget spiraling out of control.
This approach completely changes the game for e-commerce visuals. It puts the power of a professional product photographer directly into the hands of the creator, allowing for rapid-fire testing and perfect brand alignment without the old-school overhead.
The commercial photography market is a beast, valued at US$5.1 billion in 2025 and projected to hit US$6.4 billion by 2035. E-commerce photography for online stores is a huge slice of that pie, expected to grow to US$275.4 million by 2030. To get your share, you have to document your work like a pro with photos and make every shot count.
Studio Shoots vs The Modern AI Workflow
Seeing the difference side-by-side makes the choice pretty clear. The old way had its place, but technology has opened up a much smarter path for today's e-commerce brands.
| Factor | Traditional Studio Photography | AI-Powered Smartphone Workflow |
|---|---|---|
| Cost | High (photographer, studio, equipment) | Extremely low (your phone + affordable AI) |
| Speed | Slow (days or weeks for scheduling & edits) | Instant (minutes from shoot to final image) |
| Control | Limited (reliant on photographer's vision) | Complete (you direct the entire creative process) |
| Consistency | Can vary between shoots and photographers | Guaranteed (AI ensures a uniform brand look) |
| Accessibility | Requires booking and travel | On-demand (shoot anytime, anywhere) |
Ultimately, the AI-powered workflow empowers you to move faster, stay on-brand, and keep more money in your business—all while producing images that are just as effective at driving sales.
Planning Your Shoot for Flawless Results
Amazing product photos don't just happen by accident. They’re born from a smart, simple plan. Before you even think about tapping that shutter button on your phone, a little bit of prep work can save you from a world of editing headaches down the line. This is what separates a quick snapshot from an image that truly sells—what a product photography professional creates.
The secret is to think like a photographer and map out a shot list. This isn't some complex document; it's a quick checklist to make sure you get every angle you need, consistently, for every single product. What shots are non-negotiable? Are you going for a main "hero" image, a detailed close-up, and maybe an in-context or lifestyle shot?
Define Your Visual Story
Your shot list is where you start telling your brand’s story. If you’re selling a skincare line, for instance, you might plan for a clean, minimalist shot on a white background. Then, another one showing the product's texture up close, and maybe a third styled with a fresh eucalyptus leaf. That simple sequence tells a story of natural ingredients and purity.
Now, imagine you're a handmade jewelry seller on Etsy. Your list might look a little different:
- Shot 1: The classic product-on-white. This is your workhorse for the main marketplace image.
- Shot 2: A macro shot. Get in close to highlight the clasp or a unique gemstone.
- Shot 3: A lifestyle photo. Show the necklace on a model to give customers a sense of scale.
- Shot 4: A styled flat lay. Pair it with complementary props, like a silk scarf or a small ring dish.
Following this kind of plan ensures you capture all the necessary assets in one session. The result is a cohesive gallery that answers customer questions before they even have to ask.
A well-planned shot list is your blueprint for an efficient photoshoot. It guarantees you won't forget a crucial angle and helps you maintain a consistent look across your entire product catalog, which is key to building a recognizable brand.
This modern workflow completely streamlines the path from a simple idea to a conversion-ready image.
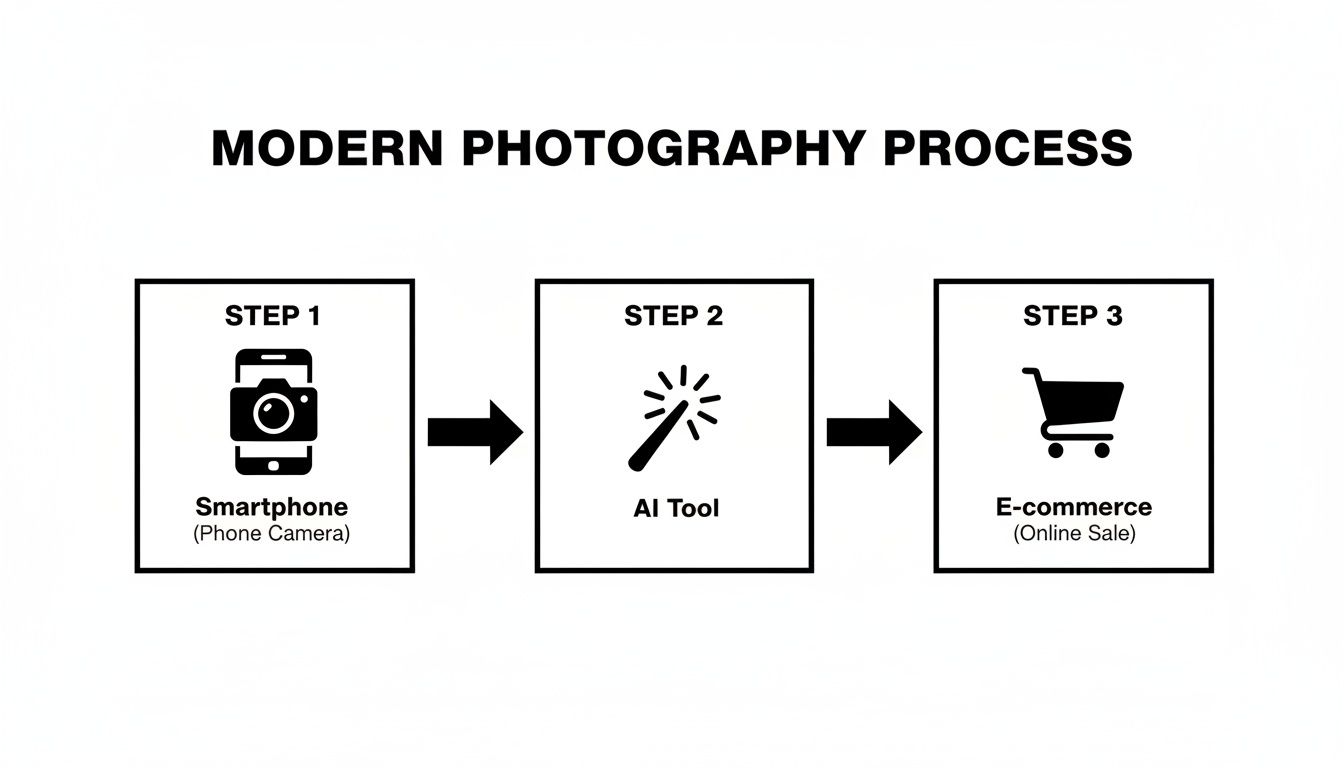
This process—capturing with your phone, enhancing with AI, and uploading to sell—strips away the old, time-consuming steps. It makes professional results something anyone can achieve.
Choose Your Props and Background Wisely
When it comes to props, remember this rule: they should always complement the product, not compete with it. I’ve seen so many sellers make the mistake of choosing props that are too loud or distracting. Stick to simple items that add a bit of context or texture without stealing the show. A few coffee beans scattered next to a bag of coffee grounds? Perfect. A full breakfast spread? Too much.
Your background choice is just as critical, especially if you plan on using AI editing tools later. A simple, uncluttered, solid-colored background makes it unbelievably easy for AI to pull off a flawless background removal. A cheap white or light gray poster board is your best friend here.
Once you’ve captured your stunning visuals, you’ll need to get them ready for the web. It's a crucial final step; you'll want to optimize images for the web to ensure fast load times and better SEO. By thinking through these small details upfront, you’re setting the stage for a fast, frustration-free editing process.
Building Your At-Home Lighting Setup
Let’s get one thing straight: you don’t need a four-figure lighting rig to get brilliant, professional-looking product photos. Honestly, mastering light is the single most important skill you can develop in product photography, and the good news is you can do it on a shoestring budget. You probably already have everything you need.
The most powerful and completely free light source is right outside: the sun. Find a large window that gets plenty of indirect sunlight. That’s your new best friend for creating soft, flattering, and natural-looking light.
You want to avoid direct sunlight at all costs, as it creates harsh, ugly shadows that will kill your shot. The goal is diffused light, which you can find on a slightly overcast day or by simply hanging a thin white sheet over the window to soften the incoming rays.
Set your product up on a table right next to the window. You want the light to hit it from the side, which creates gentle shadows that add depth and dimension, making your product look more three-dimensional. To really nail the look, you'll need to control those shadows with a simple reflector.
Harnessing Natural Light with Reflectors
A "reflector" sounds fancy, but it’s just any white surface you use to bounce light back onto your product. This little trick is what separates amateur shots from pro-level ones, as it softens shadows and brightens up important details.
You don't need to buy a thing. A piece of white foam board or even a standard sheet of white poster board from a craft store works perfectly.
Just place the reflector on the side of your product opposite the window. Now, play with it. Move it closer or angle it differently, and watch what happens to the shadows on your product—they'll get lighter or darker right before your eyes. This simple tool gives you an incredible amount of control, ensuring your product is evenly lit and all its best features pop.
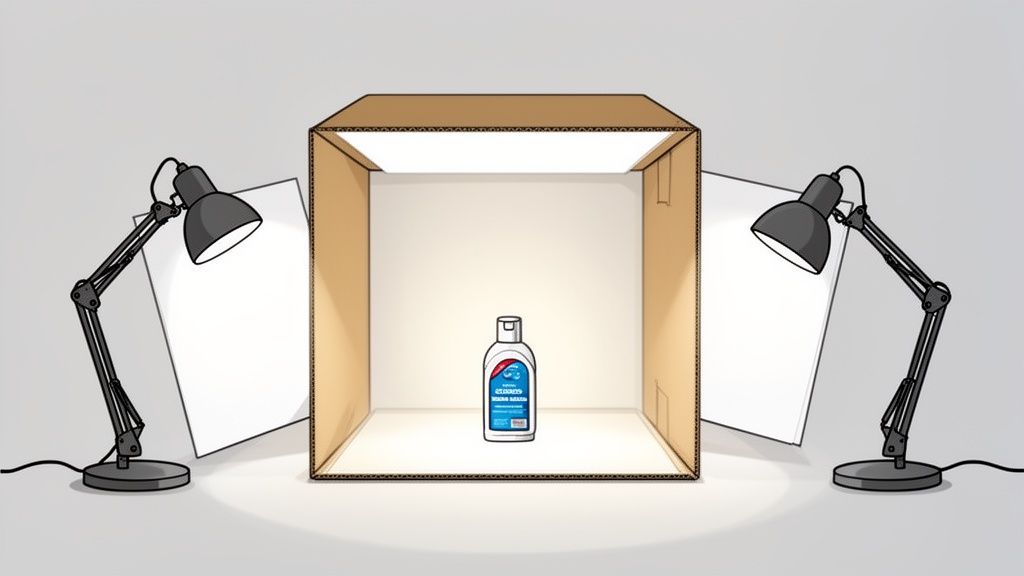
Creating a DIY Lightbox for Ultimate Consistency
If you need perfectly consistent, shadow-free shots every single time, building a DIY lightbox is a total game-changer. It’s the secret weapon for creating those clean, catalog-style images with pure white backgrounds that AI background removal tools absolutely love. You can build a great one for less than $20.
Grab a cardboard box, some white tissue paper, a white poster board, and tape. Cut big windows out of the top and two opposite sides of the box, but leave a sturdy frame. Then, tape the tissue paper over the windows to act as diffusers. For the final touch, curve a piece of white poster board inside the box to create a seamless, flowing backdrop.
A lightbox essentially gives you a miniature, controlled studio. When you place lamps outside the tissue paper windows, you create incredibly soft, even light that wraps around your product and completely eliminates harsh shadows.
This setup is ideal for smaller items like jewelry, cosmetics, or electronics.
Recreating the Three-Point Lighting Setup
Ready for more creative control? You can mimic a classic three-point lighting setup with a few lamps you already have. This technique uses three different light sources to sculpt your product and make it look amazing.
- Key Light: This is your main, brightest light. Pop it at a 45-degree angle to your product. It does most of the work.
- Fill Light: Place a second, less intense light on the opposite side. Its only job is to fill in the shadows from the key light, bringing out more detail. Use a dimmer lamp or just move it further away.
- Backlight: Put a third light behind and slightly above your product. This creates a subtle rim of light that separates your product from the background, really making it stand out.
With these practical, budget-friendly tricks, you can turn any corner of your home into a photo studio. You'll be amazed at how quickly your images go from looking amateur to absolutely awesome.
Let's be honest, that high-powered camera you carry around in your pocket is more than capable of capturing professional-grade product photos. The real secret isn't some expensive, magical piece of gear; it's knowing how to take control of the powerful tool you already own. Any seasoned product photographer will tell you the best camera is the one you know how to use, and your phone is absolutely no exception.
The first move, before you even think about framing a shot, is to dive into your camera's settings. You need to tell your phone you’re serious about quality.
This means shooting in the highest resolution possible. And if your phone offers it, capturing images in a RAW or Pro format is a game-changer. These uncompressed files hold a ton more data, giving you—and your AI editing tools—way more wiggle room to adjust colors and lighting later without trashing the image quality.
Get Your Settings Straight
To get the best possible raw images, you need to adjust a few key settings and actively avoid a few "helpful" features that can actually sabotage your final photos. These little tweaks make a massive difference in the quality of the shots you'll be feeding into the AI later.
Here's a quick rundown of what to look for in your phone's camera app.
| Setting | Recommended Action | Why It Matters |
|---|---|---|
| Image Quality | Set to Highest/Large. | Ensures you're capturing the maximum amount of detail your camera sensor can handle. |
| Format | Choose RAW, ProRAW, or DNG if available. | RAW files retain all image data, giving you far more flexibility in editing without quality loss. |
| Grid Lines | Turn ON (usually a 3×3 grid). | This is your secret weapon for better composition, making it easy to apply the rule of thirds. |
| Built-in Flash | Turn OFF. Always. | The on-camera flash is harsh and creates ugly shadows and glare. Natural light is your best friend. |
| HDR Mode | Set to 'Auto' or 'On'. | Helps balance the bright and dark areas of your photo, especially useful in tricky lighting. |
Taking a minute to lock in these settings ensures every photo you take is a high-quality asset, ready for the next step.
Stop Using Flash and Digital Zoom. Seriously.
Two of the biggest culprits that scream "amateur photo" are the built-in flash and the digital zoom.
Your phone's flash is harsh, direct, and creates the most unflattering reflections and deep, ugly shadows you can imagine. It’s the fastest way to make an expensive-looking product look cheap and flat. Instead, you'll want to rely on that soft, natural light or the DIY lighting setup we talked about for a much more appealing, high-end look.
Digital zoom is just as bad. It doesn't actually zoom in like a real lens; it just crops the image and blows up the pixels, which completely nukes the photo's quality. If you need a closer shot, physically move your phone closer to the product. This one simple action preserves every bit of detail and sharpness your camera worked so hard to capture.
Frame Your Shot for Maximum Impact
Composition is just a fancy word for how you arrange your product in the frame to guide your customer's eye. It’s the artistic side of photography, but you don't need a degree from a fancy art school to get the basics right. One of the most effective principles is the rule of thirds.
Just imagine your screen has a 3×3 grid overlaid on it. The rule of thirds suggests placing your product not in the dead center, but along one of those lines or at an intersection point. It just creates a more dynamic and visually interesting photo. Most phone cameras have a grid overlay you can turn on in the settings—do it. Use it as your guide.
Another powerful technique is leveraging negative space. This is simply the empty area around your product. Don't be afraid of it! Giving your product some breathing room makes it the undeniable hero of the shot, drawing the viewer's focus exactly where you want it.
Professional photos feel intentional. By using simple guides like the rule of thirds and embracing negative space, you move from taking a simple "picture" of a product to creating a composed "photograph" that feels balanced and deliberate.
Your Quick Pre-Shoot Camera Checklist
Before you start snapping away, run through this quick mental checklist. It'll ensure every photo you take is a solid foundation for the AI enhancement to come.
- Clean Your Lens: This is the most common mistake, hands down. A smudged lens from fingerprints or pocket lint will make your photos look hazy and soft. Give it a quick wipe with a microfiber cloth.
- Tap to Focus: Don’t let your phone guess what’s important. Tap right on your product on the screen to set the focus point. This guarantees it’s perfectly sharp.
- Adjust Exposure: After you tap to focus, most phones will let you slide your finger up or down to brighten or darken the shot. Tweak it until the lighting looks natural and the details are clear.
- Shoot Multiple Angles: Don't just take one shot. Capture your product from the front, back, side, a 45-degree angle, and a top-down view. Having more options to choose from later is always a good thing.
Once you've mastered the shot, you can use handy tools to make batch adjustments. If you need to prep your photos for different platforms, you can learn more about using an online image resizer to get the job done quickly.
Letting AI Perfect Your Product Photos
This is where all that prep work really starts to shine. You’ve planned the shoot, nailed the lighting, and captured some crisp, well-composed shots on your phone. Now it’s time to hand off the tedious stuff to technology and turn those good photos into genuinely great ones—all in just a few clicks. The whole idea is to get results that look like you hired a product photography professional, but without spending days wrestling with complicated software.
Think of an AI tool like ProdShot as your personal photo assistant, the kind that automates all the technical tasks that used to take years to master. The biggest win? Instant background removal. What was once a mind-numbing process of tracing product edges by hand now happens in seconds, and with scary-good accuracy. You’re left with a perfectly clean, isolated product ready for any background you can dream up.
This isn’t just a nice-to-have feature; it fundamentally changes how e-commerce visuals get made. The market for this stuff is exploding—it's expected to jump from USD 0.85 billion in 2025 to a massive USD 2.38 billion by 2034. AI is a huge driver of that growth, knocking down the cost and time barriers that kept smaller sellers from having killer product shots. You can get the full scoop in this in-depth market report.
From Raw Shot to Ready-to-Sell
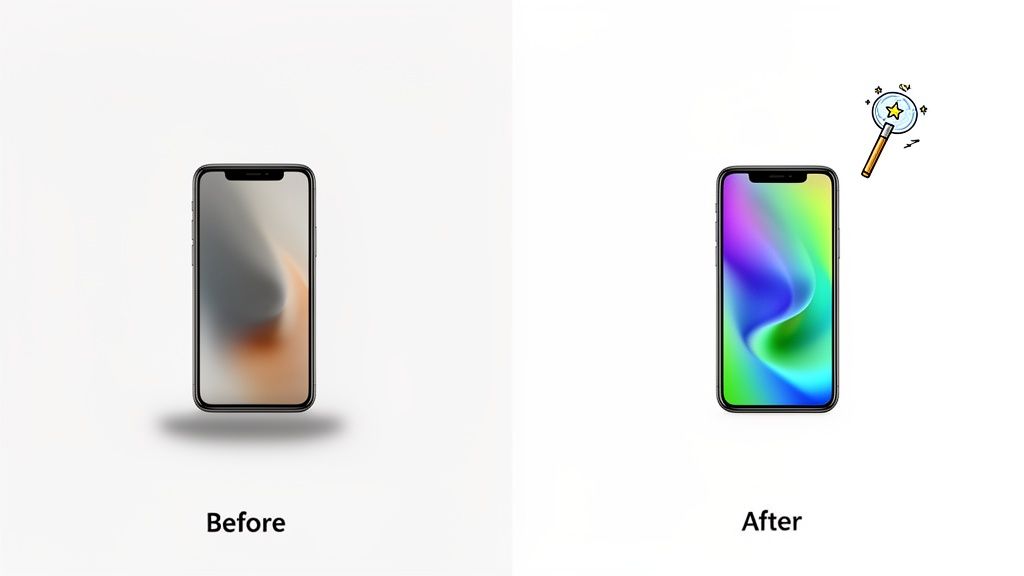
Modern AI tools do more than just chop out the background. They intelligently analyze your image and make smart enhancements on the fly, just like an expert retoucher would. It’s a fast, automated process that usually includes a few key tweaks.
- Intelligent Lighting Correction: The AI finds and brightens up any dark, underexposed spots while gently toning down harsh highlights. The result is balanced, even lighting that lets your product be the star.
- Color Accuracy and Vibrancy: It automatically fixes any weird color casts from your home lighting and gives the saturation a little boost to make the colors pop, making sure the photo looks true to life.
- Automated Sharpening: The software applies just the right touch of sharpening to bring out all the little details and textures without ever looking fake or over-processed.
These automatic adjustments are all about creating that clean, commercial look that works perfectly on marketplaces like Amazon, Shopify, or Etsy.
The real magic here is the combination of speed and consistency. You can upload a whole batch of photos and get a full gallery of polished, on-brand images back in the time it used to take to manually edit a single picture.
Generating Your Final On-Brand Scenes
The last piece of the puzzle is placing your perfected product into a scene that actually fits your brand. This is your chance to move way beyond the boring white background. AI-powered platforms let you instantly generate custom scenes, drop your product onto a colored backdrop, or add realistic shadows that make the item feel grounded and professional.
For instance, a skincare brand could generate a shot of its product on a clean marble surface. A shop selling rustic home goods might create a scene with a warm, weathered wood background. With the right tools, you can play around with dozens of ideas in just a few minutes. If you want to see this in action, check out how an AI product photo generator can create these kinds of visuals without breaking a sweat.
The entire workflow—from uploading a raw photo from your phone to downloading a marketplace-ready image—can take less than a minute. By pairing your creative eye during the shoot with the technical muscle of AI, you can build an impressive product gallery that drives sales, all without the old-school costs and headaches.
Got Questions About AI Product Photography? We’ve Got Answers.
Jumping into AI-powered photography is a new way of working, and it's totally normal to have a few questions. For most e-commerce sellers, this feels like a big shift. Let's break down some of the most common concerns to help you get comfortable with this modern approach.
The whole point is to pull back the curtain on the technology. We want you to see how it can deliver the kind of reliable, professional shots that actually drive sales, but without all the traditional costs and headaches.
Can AI Really Do the Job of a Professional Photographer?
This is the big one, and the honest answer is: it depends on the job. No, an AI isn't going to replace the eye of a creative director on a complex, artistic lifestyle shoot. But that’s not what we’re talking about here.
For the clean, consistent, catalog-style shots you need for places like Amazon and Shopify—the ones with perfect white backgrounds, true-to-life colors, and crisp focus—AI is an absolute beast. It’s often faster, way more affordable, and frankly, more consistent than doing it all by hand. It automates the tedious technical work, giving every single seller access to the kind of polished look a product photography professional would deliver.
How Do I Stop My Photos from Looking So… Generic?
This is a great question, and the answer is simple: your brand’s personality comes from you, not the software. It all starts with the creative choices you make when you first snap the picture on your phone.
The way you style your product, the props you bring in, the angles you shoot from—that's your unique vision. The AI tool is just your digital assistant, coming in after the fact to perfect the technical stuff like clipping out the background and fixing the lighting. You can then take it a step further by using custom-generated backgrounds, specific shadow styles, and other consistent brand elements right inside the tool. It's the perfect marriage of your creative direction and technical precision.
Your brand's soul is in the setup and styling. AI is the tool that polishes the final image to a professional standard, ensuring it looks clean and consistent across your entire store. It enhances your vision, it doesn't replace it.
What Kind of Products Work Best for This?
This smartphone-to-AI workflow is a lifesaver for a massive range of e-commerce products. It's especially good for items that have clear, well-defined edges, which covers a ton of popular categories.
- Cosmetics and Skincare: Bottles, jars, and tubes are a breeze to isolate and look incredible on clean, simple backgrounds.
- Jewelry: AI has gotten surprisingly good at handling the tiny, intricate details of necklaces, rings, and earrings.
- Packaged Goods: Got boxes, bags, or other containers? This method is perfect for getting fast, consistent shots.
- Small Electronics: Gadgets and accessories with clean silhouettes are handled flawlessly.
- Fashion Accessories: Think wallets, belts, hats, and shoes—all great candidates.
Sure, super reflective or transparent things like certain types of glassware can be tricky for any kind of photography, not just AI. But the technology is constantly getting better at handling these complex surfaces with impressive accuracy. This approach truly makes a professional look more accessible than ever.
Ready to see what your smartphone shots can really do? With ProdShot, you can turn them into scroll-stopping product photos in just a few seconds. Get professional, on-brand images without booking a studio. Try it for free and see how easy it is to elevate your e-commerce store today.