
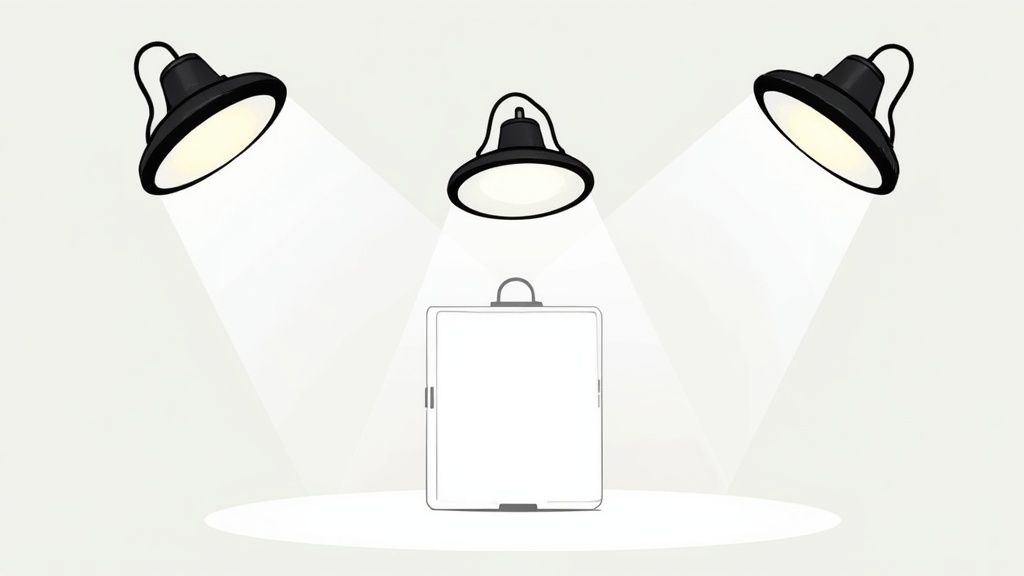
When you hear “product photography studio,” you probably picture a huge room with intimidating lights, expensive cameras, and a team of professionals. That’s the traditional image, but it’s an outdated one. The truth is, you no longer need to shell out big bucks to get stunning, sales-driving product shots.
Why You Can Skip the Expensive Studio
Let's get one thing straight: you don't need a massive budget to create incredible product photos. This entire guide is built on a simple, powerful idea: your smartphone, combined with a few everyday items, can become a surprisingly effective product photography studio.
The camera sitting in your pocket is more powerful than you think. Paired with some clever lighting and a clean backdrop, modern smartphone cameras can produce images that genuinely rival those from a professional setup.
My goal here is to empower you—the small business owner, the Etsy seller, the e-commerce entrepreneur—to take complete control of your visual brand without breaking the bank. The demand for high-quality product images is exploding, and with it, the cost of professional services.
The global product photography services market is on track to hit $15 billion by 2025. That’s a staggering figure, growing at a compound rate of about 12% through 2033, which just shows how critical great visuals have become in the world of e-commerce.
This growth proves how much value the market places on top-notch photos, but it absolutely doesn't mean you have to pay premium prices to get them.
Pro Studio vs DIY Smartphone Studio Cost Breakdown
To really put things in perspective, let's look at a side-by-side comparison of what it costs to go the traditional route versus building your own simple, effective setup.
| Expense Item | Professional Studio (Estimated Cost) | DIY Smartphone Studio (Estimated Cost) |
|---|---|---|
| Camera Body & Lenses | $2,000 – $5,000+ | $0 (Use your existing smartphone) |
| Professional Lighting Kit | $500 – $2,000 | $20 – $50 (DIY or affordable ring light) |
| Tripod & Mount | $100 – $300 | $15 – $30 |
| Backdrops & Surfaces | $100 – $400 | $5 – $20 (Poster board, fabric scraps) |
| Editing Software Subscription | $240/year (Adobe Creative Cloud) | $0 – $10/month (AI tools like ProdShot) |
| Total Estimated Cost | $2,940 – $7,940+ | $40 – $110 |
The difference is pretty stark, isn't it? The DIY approach puts professional-quality results within reach for a tiny fraction of the traditional cost.
The Power of a DIY Approach
Building your own setup isn't just about saving money; it’s about gaining freedom. You get total creative control and the flexibility to shoot whenever inspiration strikes, not just when a studio is available. Most importantly, it slashes your overhead. If you want a deeper dive into the numbers, you can learn more about the cost of professional product photography and see just how much you can save.
This guide will walk you through just how easy it is to get started. We'll cover:
- The Essential Gear: We’ll pull together a toolkit using items you probably already have lying around the house.
- Smartphone Settings: I'll show you how to unlock the hidden features in your phone's camera to get the best possible shots.
- Lighting and Composition: We'll master the two things that make or break a photo, no matter what camera you're using.
Finally, we'll talk about the secret weapon that brings it all together: AI tools like ProdShot. Think of it as your digital darkroom, giving your photos that polished, commercial-ready finish. This isn't about cutting corners—it’s about working smarter to create exceptional images that boost sales and build a killer brand, all from your own home.
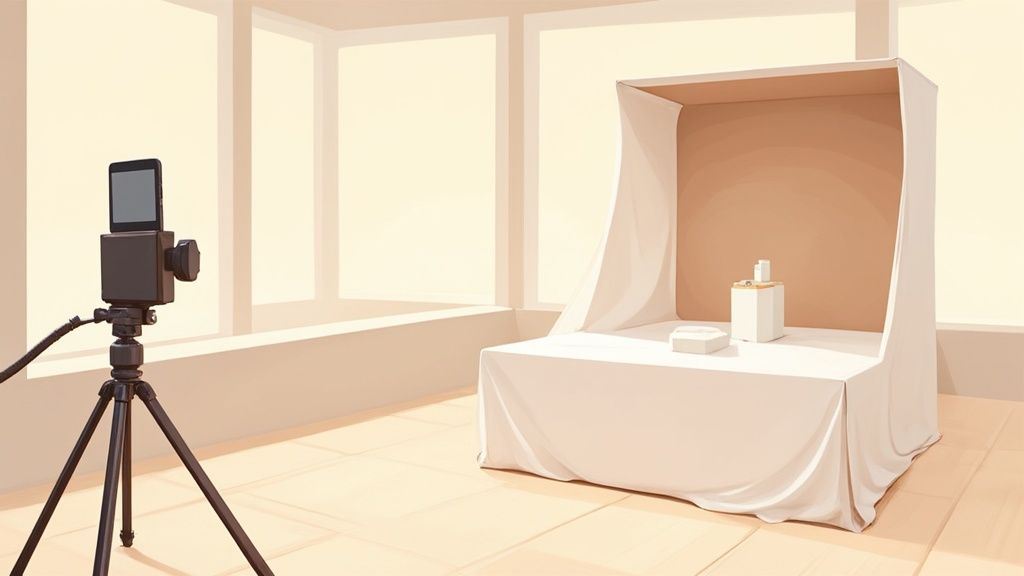
Assembling Your DIY Studio Gear
You really don't need a huge shopping list or fancy equipment to build your own product photography studio. In fact, you can pull together a high-quality setup using things you probably already have or can grab for next to nothing. The secret isn't how much you spend on gear, but how you use it.
Your smartphone is the real star of the show here. Modern phone cameras are incredibly powerful, so don't sweat the brand. The key is having manual control over focus and exposure, a feature that’s standard on just about every recent model. Before you spend a dime, just start with the camera in your pocket.
Next up, let's find your most valuable lighting tool: a window. Natural light is hands-down your best friend for getting that soft, professional look. Take a walk around your home during the day and just watch how the light falls in different rooms. You're on the hunt for a spot with bright, but indirect, light.
Finding and Shaping Your Light Source
The gold standard for product photography lighting is a north-facing window. Why? Because it delivers soft, diffused light all day long without the harsh shadows you get from direct sun. If you don't have one, an east-facing window is a fantastic choice for morning shoots.
Once you’ve staked out your spot, you only need a few simple tools to start controlling that light:
- White Poster Board: This is your secret weapon. A single sheet of white poster board makes a perfect seamless, non-distracting backdrop. Just curve it from your table up against the wall to create an "infinity sweep," which gets rid of those hard lines where the table and wall meet. It makes your product look like it's floating.
- Foam Core Boards: Pop over to any craft store and grab a couple of white foam core boards. These are your reflectors. You'll use them to bounce light back onto your product, filling in any dark shadows. It's an incredibly cheap and effective trick.
- A Simple Table: Any sturdy folding table will do the job. Try to find one that’s around 24-27 inches wide, which gives you plenty of room to work without feeling cramped.
This simple infographic gives you a great visual of how it all comes together.
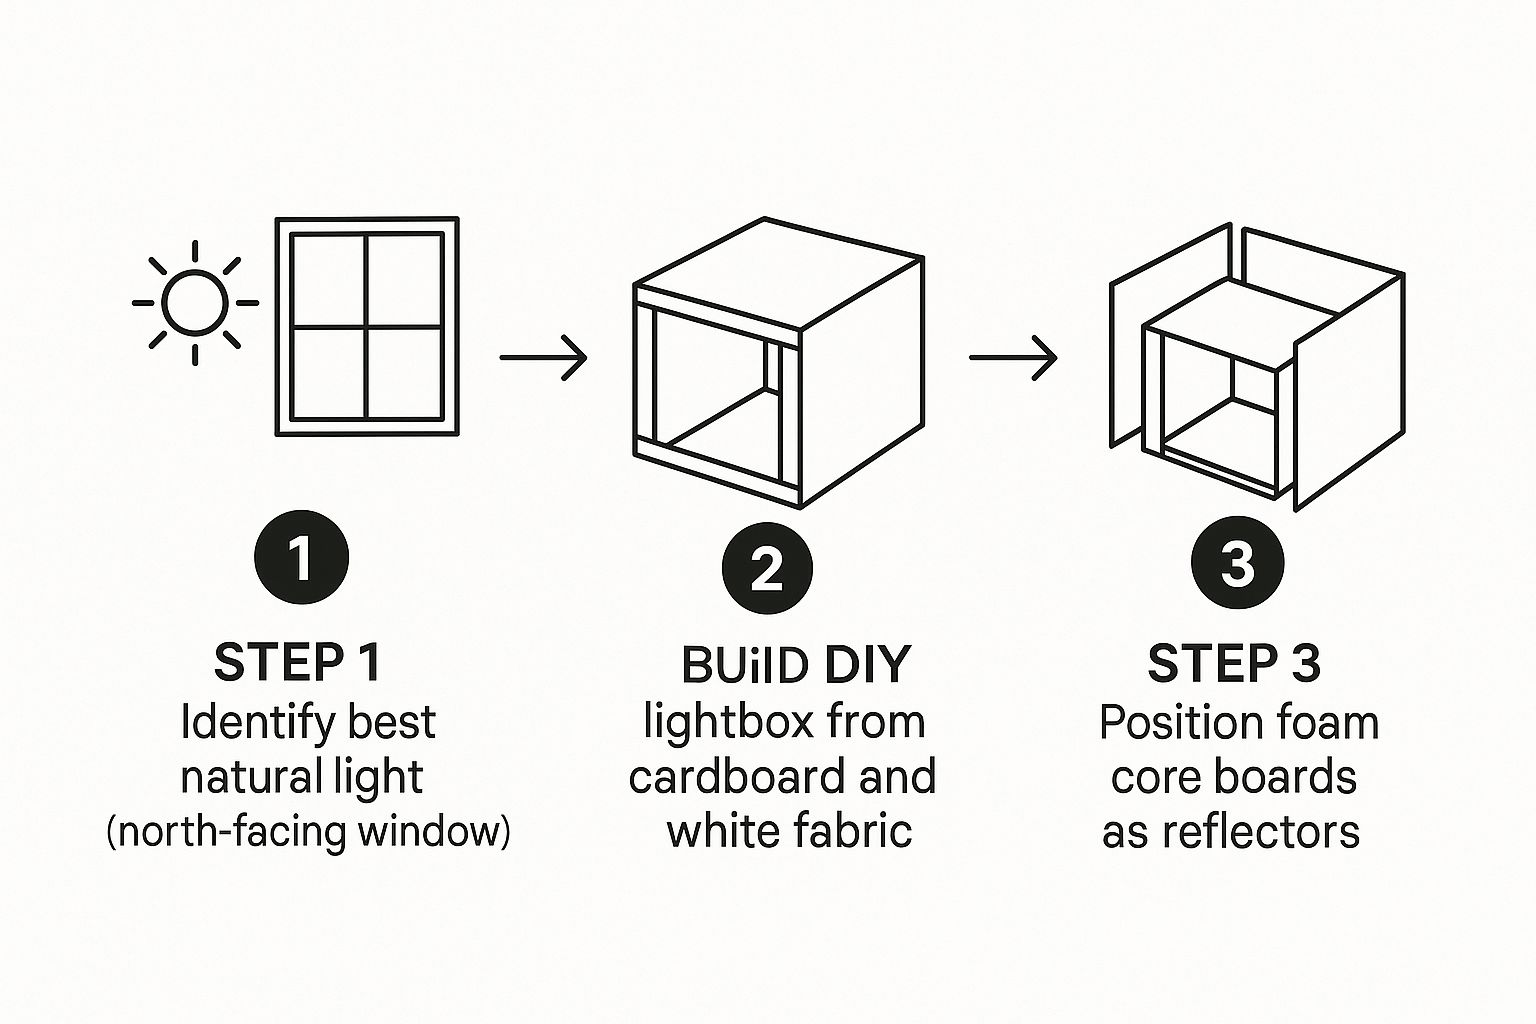
As you can see, it’s just these three simple components working in harmony to create a controlled environment for your photos.
Constructing a DIY Lightbox
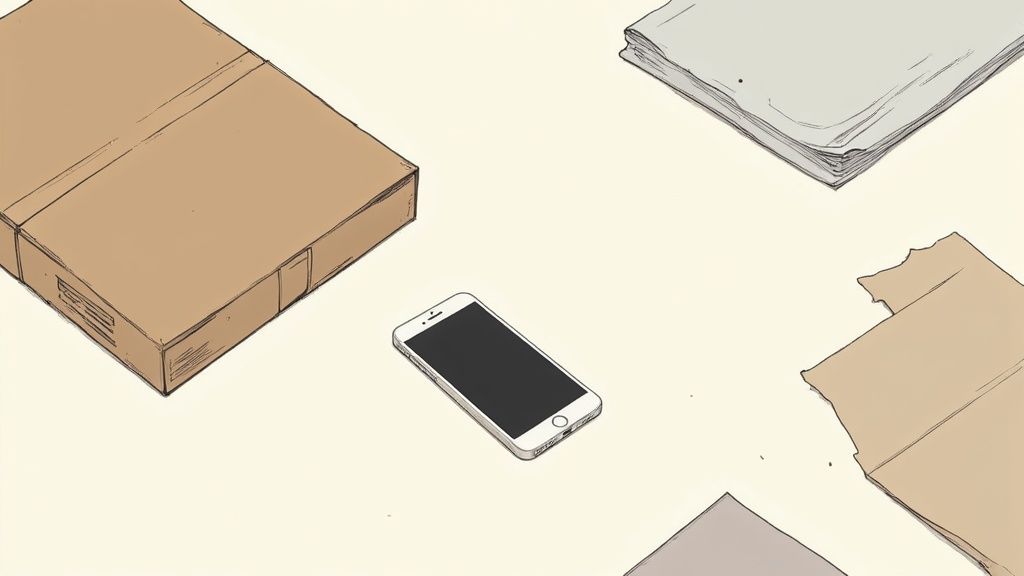
If you're shooting smaller products, putting together a simple lightbox can give you even more consistent lighting. It might sound technical, but trust me, it's dead simple. All you need is a cardboard box, some white fabric or tissue paper, and tape.
Start by cutting out large windows on three sides of the box, but leave the bottom intact. Then, just tape your white fabric over these openings. This diffuses the light coming from your window, wrapping your product in soft, even illumination and pretty much eliminating harsh shadows.
Key Takeaway: Your main goal is to create a controlled space where light is soft and shadows are minimal. A north-facing window is your ideal light source, while poster board and foam core give you the power to shape that light for a flawless shot.
With these basic items, you have everything you need to assemble a totally functional and effective product photography studio. It’s not about having expensive gear; it’s about understanding how to work with light using simple, affordable tools. You now have a solid foundation for capturing clean, professional images that will make your products shine.
Dialing In Your Smartphone for Perfect Shots
Now that your DIY product photography studio is all set up, it's time to get your smartphone's camera settings dialed in. Most people just point and shoot, but a few simple tweaks hiding in your camera app can take your images from basic snapshots to genuinely professional-looking product photos. Best of all, these changes are free and take just a few seconds.
The first, and maybe most important, trick is locking your focus and exposure. Open your camera app and just tap and hold on your product for a moment. You should see a box or circle appear, often with an "AE/AF LOCK" message popping up. This tells your phone to lock the Auto Exposure (how bright the shot is) and Auto Focus right on that spot.
Why does this matter? It stops the camera from constantly trying to readjust every time you breathe or shift your position. This one small action is a game-changer for getting sharp, consistently lit photos, especially when you're taking multiple shots of the same item.
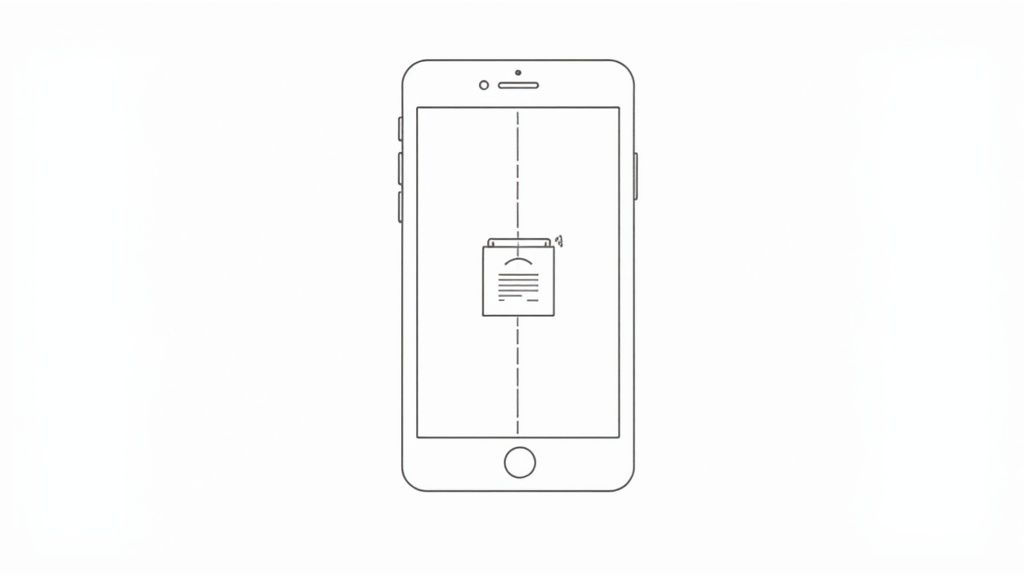
Turn On Your Grid Lines for Better Shots
Next up, jump into your phone’s camera settings and find the option to turn on grid lines. This overlays a simple three-by-three grid on your screen, which is your secret weapon for applying the rule of thirds—a core concept in photography. Instead of plopping your product smack in the center of every photo, try lining it up with one of the vertical lines or at a point where two lines intersect.
This subtle shift makes your photos feel more dynamic and professional. It helps guide the viewer's eye through the image, creating a much more balanced and visually interesting composition. For anyone selling on a competitive platform like eBay, small details like this really do make a difference. If you want more tips for that specific marketplace, check out our guide on creating great product photos for eBay sellers.
Whatever You Do, Don't Use Digital Zoom
Here’s a hard and fast rule I tell everyone: never, ever use the pinch-to-zoom feature on your phone. That’s digital zoom, and it’s a photo-killer. All it’s doing is cropping the image in real-time and blowing up the pixels, which absolutely tanks the quality. The result is always a grainy, blurry mess.
The only zoom you should ever use is your feet. If you need a closer shot, physically move the phone closer to the product. This preserves every bit of detail and sharpness your camera's sensor can capture.
This commitment to quality is more important than you might think. The e-commerce product photography market is expected to explode from USD 0.85 billion in 2025 to USD 2.38 billion by 2034, all because shoppers demand crystal-clear images. By avoiding digital zoom and using these simple settings, you're making sure your photos can compete.
With your smartphone settings dialed in, it's time to tackle the two things that really make or break a photo: lighting and composition. Honestly, getting these right is far more important than any fancy camera or expensive lens.
Great lighting can turn a mundane object into a must-have product, while smart composition leads your customer's eye exactly where you want it to go. This is where your simple home product photography studio starts to shine. You don’t need a complex, multi-light rig for a professional look. In fact, the best light is often the free, natural light streaming through a window.
Playing with Natural and Artificial Light
First, place your product on your shooting table near a window. Just take a moment to see how the light hits it. Is one side cloaked in shadow? That's where your white foam boards come in—they're your secret weapon.
Position a board on the side opposite the window to act as a reflector. It will bounce that soft window light right back onto your product, filling in those distracting shadows almost like magic. You’ll be shocked at how this one simple trick adds depth and clarity.
And once you have a well-lit photo, AI tools can take it to the next level by placing it in a perfect, studio-quality scene.
This shows you the real power of combining good, simple lighting with smart tech to create an endless supply of high-end backdrops.
If natural light just isn’t working for you—maybe it's a gloomy day or you're shooting at night—you can easily create a three-point lighting setup with a few affordable LED lamps. To really elevate your e-commerce photos, a solid understanding of lighting is non-negotiable. If you want to go deeper, you can learn how to master your product photography lighting setup with some more advanced techniques.
Thinking About Composition and Angles
Composition is really just the art of arranging things in your frame to create a balanced, interesting image. The biggest mistake people make is just sticking the product dead-center and snapping a picture. Instead, play around with different angles to find what best shows off your product's features.
Try starting with these common angles:
- Eye-Level Shot: This is your standard, straight-on view. It’s perfect for showing products just as a customer would see them on a shelf, like a bottle or a box.
- High-Angle (45-Degree) Shot: Shooting from slightly above gives the photo a great sense of depth and context. This angle works wonders for showing the top and front of a product at the same time, like a pair of sneakers or a decorative bowl.
- Bird’s-Eye View (Top-Down): This shot, taken directly from above, is the go-to for "flat lay" photos where you arrange items on a flat surface.
The goal of composition is to tell a story. A low angle can make a product feel powerful and heroic, while a high angle can make it feel more accessible. Small shifts in your camera's position can have a massive impact on how a customer perceives your product.
Always, always take more shots than you think you need. Get the front, the back, and the sides. Zoom in on important details—the texture of the fabric, a logo, or a unique piece of hardware. The more visual information you give a potential buyer, the more confident they'll feel about their purchase. This thoroughness, combined with great lighting, is what separates amateur snapshots from pro-level product photography that actually drives sales.
Alright, you’ve nailed the shots in your new DIY product photography setup. The lighting is looking good, the composition is solid, and your smartphone did its part. Now it's time for the final touch—the one that transforms a pretty good DIY photo into a polished, commercial-grade image that actually sells.
This is the point where you could spend hours getting lost in complex software like Photoshop, or you can take a much smarter, faster route with AI-powered editing tools.
AI photo editors are built for one thing: getting the job done fast without a steep learning curve. Forget about painstakingly tracing your product to get rid of the background. You just upload your picture, and the AI does the heavy lifting, giving you a perfectly clean cutout in seconds.
From Raw Photo to Perfect Scene in Minutes
Once your product is cleanly separated from its original background, the real fun starts. AI tools do way more than just background removal. They let you drop your product into an endless variety of stunning, high-quality scenes. This is an absolute game-changer for building a consistent, professional look across your entire product line.
Let's say you sell handmade candles. Instead of settling for a plain white background, you can instantly generate a scene showing your candle on a rustic wooden table, sitting next to a book and a steaming mug of tea. This is what contextual storytelling is all about—it helps customers actually see the product in their own lives, which is a massive driver for sales.
Investing in high-quality imagery pays off big time. Brands that prioritize professional product photography can see up to a 27% higher conversion rate. It’s all about building that crucial brand credibility and consumer trust. The rise of AI and automation is finally making this level of quality accessible to everyone.
This whole process lets you create an entire library of on-brand images in minutes, not days. The consistency you gain is key to building an online store that feels trustworthy and memorable.
The Practical Benefits of AI Editing
Using an AI photo generator isn't just about making your pictures look good; it's a strategic move that saves you a ton of time and money. Think about the old way of doing things: hiring a photographer, booking a studio, and then paying for post-production on every single image. Now, you can get that same polished look right from your kitchen table.
Here’s how it helps your workflow directly:
- Unmatched Speed: You can generate dozens of unique, ready-to-use product shots in the time it would take to manually edit just one.
- Creative Freedom: Go wild and experiment with countless styles, backdrops, and scenes. No design skills or expensive props needed.
- Brand Consistency: Easily apply the same aesthetic across all your product photos, creating a cohesive and professional look for your entire store.
For entrepreneurs and small businesses, this kind of efficiency is priceless. You can learn more about how to generate perfect AI product photos and see for yourself how quickly you can turn those raw smartphone snaps into compelling marketing assets.
By jumping on these tools, you're not just editing a photo—you're building a stronger, more visually appealing brand that can go head-to-head with the biggest names out there.
Got Questions About Your DIY Setup? Let's Clear Things Up.
Getting started with your first DIY product photography studio is exciting, but it's totally normal to hit a few roadblocks. Even the most detailed guide can leave you with questions about your specific products or setup. Let's tackle some of the most common issues people run into, so you can get back to creating amazing shots.
A big one I hear all the time is whether natural light is really better than artificial light. For anyone just starting out, the answer is a resounding yes. Window light is a single, powerful source that gives you a soft, flattering look, and it’s easy to control with a simple reflector. It saves you the headache of trying to balance multiple lamps, which can create weird color casts and harsh shadows if you don't know what you're doing.
Of course, relying on the sun has its downsides. What happens on a cloudy day, or if you're a night owl who gets creative after dark?
Can I Use an Artificial Light Source Instead?
You absolutely can, but you have to be smart about it. The secret is to use a "daylight balanced" LED bulb, which you'll see rated at 5000K-5500K. This specific color temperature perfectly mimics natural daylight, which is crucial for avoiding that nasty yellow or blue tint that can ruin a photo.
You don't need to break the bank on a fancy lighting kit, either. Here are a couple of my favorite budget-friendly options:
- A Ring Light: These are fantastic for small products. They wrap your item in even, shadowless light, making them look crisp and clean.
- Clamp Lights: You can grab a pair of these from any hardware store for cheap. Pop in some daylight bulbs, position one on each side of your product at a 45-degree angle, and you've got a surprisingly versatile two-point lighting setup.
The biggest mistake I see people make with artificial lights is mixing them with other light sources. If you're using lamps, kill the overhead room lights and block any bright window light. This prevents conflicting color temperatures from messing up your shot.
How Do I Shoot Reflective or Shiny Products?
Ah, the classic challenge: shooting jewelry, glass, or anything with a glossy finish. These items are basically tiny mirrors, reflecting you, your phone, and the entire room. The trick isn't to get rid of the reflections, but to control what they reflect.
This is where your white foam boards become your best friend. Build a little "box" or tent around your product, leaving just a small opening for your camera lens to peek through. This simple trick ensures the item only reflects clean, white surfaces, which helps define its shape without showing a distracting reflection of your ceiling fan.
What If I Don’t Have Space for a Dedicated Setup?
Don't sweat it. Most small business owners I know build their product photography studio on the kitchen table and pack it all away when they're done. The whole setup we've talked about—a poster board, two foam boards, and a tripod—can be stored flat in a closet or under a bed.
Consistency in your lighting and setup is far more important than having a permanent, dedicated space.
Once you’ve nailed your product shots, the next challenge is getting them in front of the right people. This excellent guide covers some powerful SEO strategies for photographers to get booked, helping you turn your new photography skills into paying clients.
Ready to take your smartphone photos and give them a professional, studio-quality finish in just a few seconds? ProdShot uses AI to instantly remove backgrounds and drop your product into stunning scenes. You can create a polished, sales-driving product gallery without any of the hassle. Try ProdShot for free and see what a difference it makes.