

Ever wonder how creators get those impossibly clean product shots? The secret isn't some complex, time-consuming Photoshop wizardry. It's often AI-powered object removal.
This is a complete shift from the clunky, old-school methods of manual cloning and painstaking edits. We're now in an era where fast, accessible tools make removing unwanted objects from photos a genuinely simple task.
The Secret to Flawless Photos Is AI
The power to just erase distractions from an image is no longer a niche skill for pro photo editors. For anyone in marketing, e-commerce, or content creation, it's become a must-have. A clean, focused image can completely change an audience's engagement and how they perceive a product's value. This is your starting point for getting that professional polish, fast.
Why AI Object Removal Matters Now More Than Ever
The demand for high-quality visuals has absolutely exploded, and with it, the need for editing solutions that don't require a design degree. AI tools like ProdShot empower you to fix imperfect shots without a steep learning curve.
Think about it: effortlessly deleting a stray power cord from a lifestyle product shot, or removing a photobomber from an otherwise perfect travel picture. This capability is key to maintaining a polished, professional look across all your content. You can even use an AI product photo generator to create stunning visuals from scratch.
This isn't just a hunch; the market trends back it up. The photo editing software market in North America alone shot up from roughly USD 266.48 million in 2021 to USD 377.44 million in 2024, largely thanks to the demands of social media and e-commerce.
AI's Impact on Visual Commerce
For anyone selling online, the impact is direct and easy to measure. A pristine product image, free of clutter, helps customers focus on what actually matters—the item they’re thinking about buying. Getting this level of control used to be expensive and slow, but AI has opened the door for everyone.
By automating the removal of distracting elements, AI tools enable brands to produce high-volume, high-quality imagery that builds trust and drives conversions. It’s a fundamental change in content production workflows.
Understanding the broader landscape of how AI is revolutionizing ecommerce helps put this tool in perspective. Whether you're a small Etsy shop owner or a large marketing agency, the goal is the same: present your products in the best possible light. The next few sections will walk you through exactly how to do that.
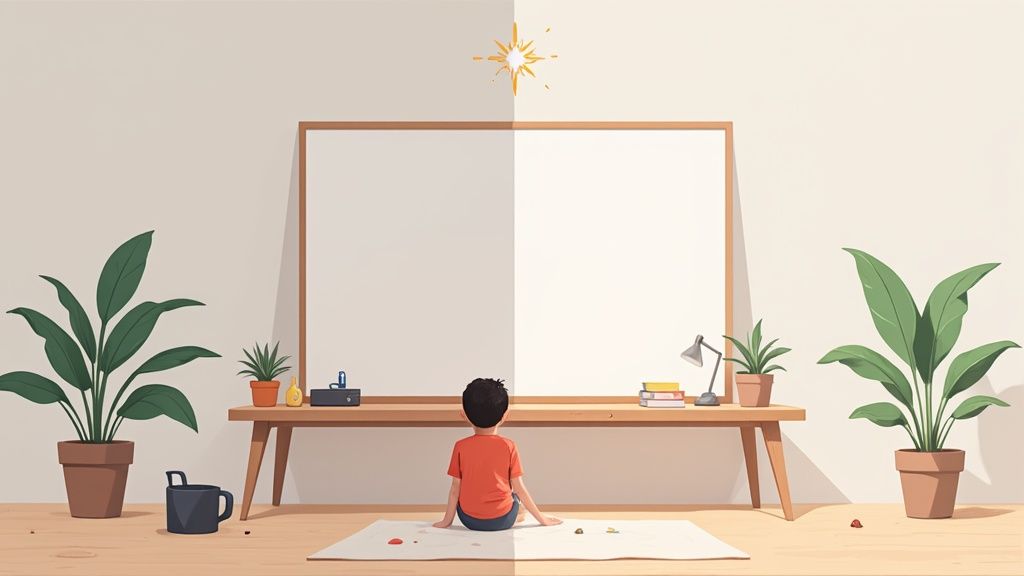
Before you even think about firing up an AI tool to erase something from a photo, a little prep work can make a world of difference. It’s a lot like a chef doing their mise en place—getting everything ready ensures the final dish is perfect. If you rush this part, you'll likely end up with a frustrating, unnatural-looking edit.
The most important thing? Start with a high-resolution image. When an AI has to generate new pixels to fill in a gap, it looks at the surrounding area for clues. A blurry, low-res photo just doesn't give it enough information to work with, which is how you get those weird, smudgy patches or mismatched textures. Always, always use the biggest, original file you have.
Choosing the Right Photo for Surgery
Let’s be real: not all objects are created equal when it comes to AI removal. Your success really depends on what’s going on in the background and how the scene is lit.
An object sitting on a simple, predictable background—think a brick wall, a patch of grass, or a clear blue sky—is the perfect candidate. The AI can easily sample that consistent pattern and create a fill that blends right in.
But if that unwanted element is in front of something busy and chaotic, like a crazy floral wallpaper or a packed crowd, the AI's job gets a lot tougher. It has to guess what’s supposed to be behind the object, and that’s when you see strange artifacts and smudges.
Pro Tip: Take a close look at the object's edges. Something with a clean, sharp border is way easier to remove than something that kind of blurs into the background or has wispy details like stray hairs.
Don't Forget About Lighting and Shadows
Lighting is the secret ingredient most people forget. An object casts a shadow, and if you just delete the object but leave the shadow behind, the edit will scream "fake!" from a mile away. Before you start, really look at how the light is hitting everything in the scene.
A good AI tool can sometimes figure out the shadow if you select it along with the object. But in scenes with really complex lighting from multiple sources or super dark, harsh shadows, the final image can look flat and weird. The best photos for object removal have soft, even lighting because it keeps those hard shadows to a minimum and makes blending a breeze.
For anyone selling products online, this prep stage is non-negotiable. A clean, professional edit builds trust with your customers, while a sloppy one can make them question everything. It's the same idea we talk about in our guide for background removal on Shopify—a clean starting image is half the battle. Think of this prep as the first step toward getting a final shot that looks like it was perfect from the start.
Your Practical Guide to Removing Distractions
Alright, let's get to the good stuff—actually erasing those pesky distractions to make your photos pop. This isn't just a matter of clicking a button; it's about developing an editor's eye to get a result that looks completely natural. We'll use ProdShot as our guide to walk through the process, focusing on real-world situations you'll almost certainly run into.
Think about it. Maybe you're an e-commerce manager getting a new handbag ready for launch, but there's a tiny, distracting price tag string hanging off the handle. Or perhaps you're a real estate agent trying to remove a car that’s ruining the curb appeal of a new property listing. These are the exact scenarios where a good AI object removal tool becomes your best friend.
The Core Workflow in Action
The first move is simple: get your image into the tool. Once it's loaded, you'll usually be greeted with a brush or a lasso tool. Your job is to "paint" over the unwanted element, telling the AI precisely what needs to disappear.
This is where a little strategy goes a long way. For something thin, like a wire or that price tag string, you'll want to zoom right in. Use a smaller brush to cover it accurately without grabbing too much of the background. For a bigger object, like the car in the driveway, a larger brush gets the job done much faster.
This infographic breaks down the mental checklist you should run through before you even start painting.
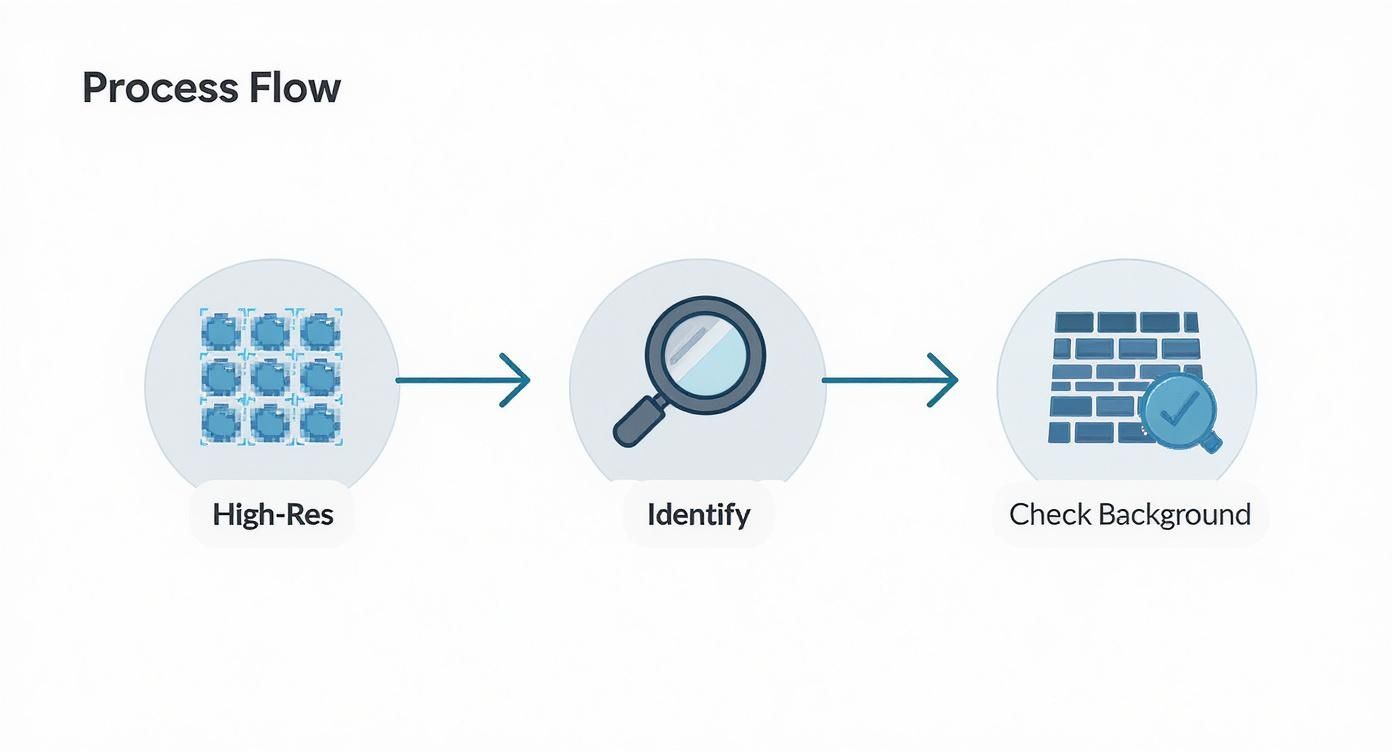
As you can see, the prep work is what sets you up for success. Starting with a high-res image, clearly identifying your target, and checking the background complexity are crucial first steps. After you’ve highlighted your selection and hit "apply," the AI works its magic. It analyzes all the pixels surrounding your selection and generates a new patch to fill in the space, hopefully without a trace.
Mastering the Details for a Perfect Blend
The first result from the AI is often shockingly good, but sometimes it needs a little finessing. This is where your critical eye comes into play to take it from good to perfect.
- Mind the Shadows: If the object you're removing casts a shadow, you absolutely have to select the shadow along with it. A floating shadow with no object is a dead giveaway of an edit.
- Take It in Chunks: Don't be afraid to undo and try again. Sometimes, removing a large object in smaller, overlapping sections gives you a much cleaner result than trying to get it all in one go.
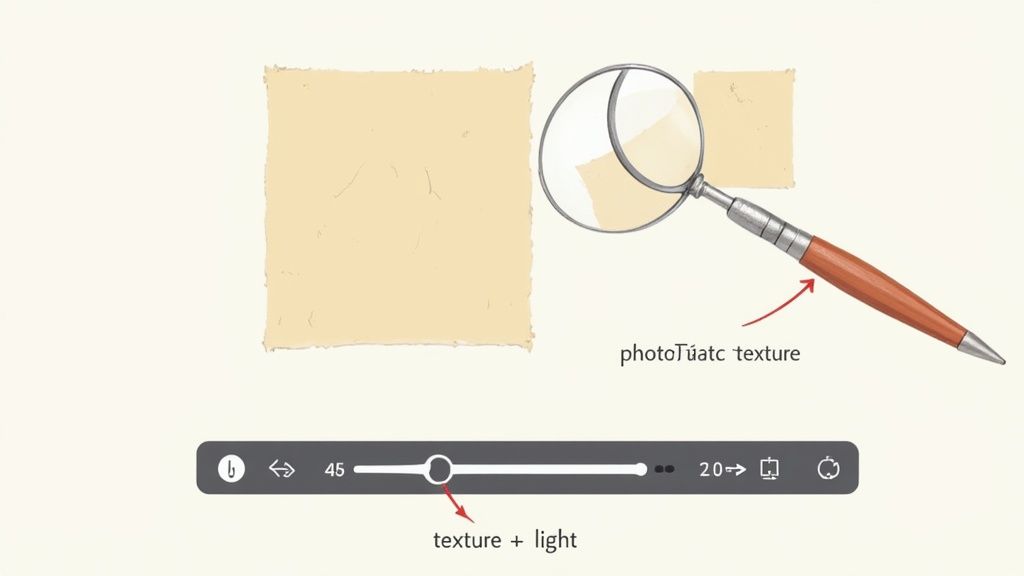
- Match the Texture: Look closely at the filled area. Does the texture feel right? If you removed something from a wooden table, the new fill should have a wood grain, not a blurry smudge.
The growth in this space is staggering. The market for tools that specialize in removing unwanted objects from photos was valued at around USD 0.6 billion in 2023 and is projected to hit USD 1.5 billion by 2032. That massive jump is fueled by its immense value in e-commerce, advertising, and social media, where a flawless visual is everything. You can find more data on this growing market over on businessresearchinsights.com.
The real power of modern AI editors is that they make this sophisticated process feel intuitive. What once required hours of manual work in complex software can now be done in seconds, empowering anyone to create professional-quality images.
Ultimately, mastering object removal is about pairing the AI's raw power with your own judgment. Pay attention to the details—shadows, textures, and brush size—and you can guide the tool to produce a final image that isn't just clean, but truly convincing.
Troubleshooting Common AI Editing Issues
Even the most advanced AI isn't a mind reader. While tools like ProdShot deliver amazing results most of the time, you'll occasionally run into an edit that just doesn't look quite right. This is where a little troubleshooting know-how separates a decent result from an undetectable one.
Don't worry—most common hiccups are easy to fix with the right approach.
The most frequent problem you'll see is a blurry or smudged patch where the object used to be. This usually happens when the AI doesn't have enough clean background to work with, especially on tricky surfaces like patterned fabrics or detailed wood grain. It's basically the AI making its best guess, but the guess is a bit soft.
Another classic issue is texture mismatch. Imagine removing a sticker from a brick wall. If the filled-in area looks smooth instead of textured like the surrounding bricks, the edit will stick out like a sore thumb. This happens when the AI struggles to replicate a complex or non-uniform pattern accurately.
You might also notice strange lighting inconsistencies, where the new patch looks either too bright or too dark. This is common when the removed object was casting a subtle shadow that you didn't include in your initial selection.
Refining Your AI Edits
When you hit one of these snags, your first instinct might be to start over. Hold that thought. Instead, think iteratively. Often, the best fix is to undo the last action and try a slightly different technique. Precision is your best friend here.
For example, when removing unwanted objects from photos, especially larger ones, avoid selecting the entire thing at once. A much better strategy is to remove it in smaller, overlapping chunks. This gives the AI a more manageable area to analyze and rebuild, often resulting in a much cleaner and more natural-looking fill.
It's helpful to have a quick reference for these moments. I've put together a table to help you diagnose and fix the most common problems you'll encounter.
Troubleshooting Common Object Removal Issues
| Issue | What It Looks Like | How to Fix It |
|---|---|---|
| Blurry/Smudged Area | The spot where the object was removed looks out of focus or like a soft smudge. | Redo the selection, working in smaller pieces. Ensure you select a tiny bit of the clean background around the object to give the AI more context. |
| Texture Mismatch | The filled-in patch is smooth when the surrounding area has a distinct texture (e.g., wood grain, fabric, asphalt). | Use the clone or stamp tool if available, or try removing the object in sections that follow the pattern's direction. |
| Lighting Inconsistency | The filled area is noticeably brighter or darker than its surroundings. | Undo and expand your selection to include any faint shadows or highlights cast by the object. This helps the AI match the lighting. |
| Weird Repeating Patterns | The AI generates a repetitive, unnatural-looking pattern to fill the space. | This is an AI hallucination. Undo and try a different angle of selection, or break the area into multiple, smaller removals. |
| Hard or Jagged Edges | The edge of the filled area is too sharp and doesn't blend seamlessly with the rest of the image. | Zoom in and use a smaller brush. If your tool has a "feather" option for selections, add a tiny bit to soften the edges before generating. |
Think of these fixes as your go-to toolkit. With a little practice, spotting and correcting these issues becomes second nature.
The key is to treat the AI as a powerful assistant, not an infallible magician. Your input and careful adjustments guide it toward the perfect outcome. By refining your selections and working in stages, you can overcome nearly any initial imperfection.
Advanced Fixes for Tricky Situations
Sooner or later, you'll face a real challenge. What if the unwanted object is partially overlapping a person or another critical element in your photo? In these cases, a delicate touch is non-negotiable.
- Zoom In Aggressively: Get as close as you can to the edge where the object meets the element you want to keep. Seriously, zoom until you can see the pixels.
- Use a Small Brush: Select a brush size that allows you to carefully trace the border of the object you're removing without "painting" over the part you want to preserve.
- Feather Your Edges: If your tool allows for it, make your selection slightly softer around the edges. This helps the AI create a more seamless blend between the generated patch and the existing image.
Let’s imagine a stray strap from a bag crossing over someone's patterned shirt. Instead of trying to remove the whole strap in one go, you would zoom in and carefully paint over only the section on the shirt, leaving the part on their skin for a separate edit.
This targeted approach prevents the AI from getting confused and ensures both background fills are contextually accurate. By mastering these small adjustments, you gain the confidence to tackle even the most challenging edits.
Advanced Techniques for a Professional Finish
Moving past basic object removal is where the real magic happens. This is how you create truly professional, undetectable edits that make people wonder if the blemish was ever there in the first place.
The secret isn’t just about having a powerful tool—it’s about the subtle details. It’s those finishing touches that transform a decent AI-generated patch into a seamless, believable part of the original image.
One of the biggest giveaways of an amateur edit is mismatched lighting. When you erase something, the AI fills the empty space based on the surrounding pixels, but it doesn't always nail the subtle gradients or the direction of the light source. The new area can end up looking flat, too bright, or just plain off.
Here’s a simple trick I use: once you think you're done, zoom out and squint at the image. This little habit helps you spot areas where the light just doesn't feel right.
Preserving Natural Textures and Details
Another classic mistake is the dreaded "smudge effect." This happens when the AI smooths over a textured surface—think wood grain, fabric weaves, or rough concrete—and leaves behind a blurry, unnatural-looking patch. It’s a dead giveaway that the photo has been manipulated.
To get around this, you have to work with the texture, not against it. If you’re removing unwanted objects from photos with complex surfaces, a little patience goes a long way.
- Work in Small Pieces: Instead of trying to remove a large object in one go, erase it bit by bit. This gives the AI smaller, more manageable areas to analyze, which dramatically increases the odds of a clean texture match.
- Zoom In and Inspect: Get right up close to your edit. I always check the filled-in area at 200% zoom to make sure the new texture blends perfectly with what’s around it. Flaws that are invisible from a distance can become glaringly obvious on larger screens.
- Follow the Grain: When you're working with a surface that has a clear directional pattern, like wood floorboards or brushed metal, try making your selections parallel to that direction. It helps the AI understand the flow of the texture.
There's a reason why tools like Adobe Photoshop remain so dominant, capturing about one-third of the global photo editing market. Their popularity is built on giving users the precise control needed to nail these exact details.
The professional mindset is iterative. Your first attempt is rarely your last. The goal is to make small, careful adjustments, constantly checking your work from different perspectives until the edit is truly invisible.
Developing an Eye for Flawless Edits
Ultimately, mastering advanced object removal is about training your eye to see what others miss. It's about recognizing the subtle interplay of light, shadow, and texture that makes an image feel real.
For anyone in e-commerce, getting these details right is non-negotiable for creating high-quality visuals. It's a topic we dive deep into in our guide to professional product photo retouching.
And if you’re looking to go beyond simple fixes and completely transform an image, a virtual staging AI guide can show you how to creatively alter entire environments. This process of refining and perfecting is what separates a quick fix from a truly professional result.
Common Questions About AI Object Removal
As you start getting the hang of removing unwanted objects from photos, you'll probably run into a few common questions. The tech can feel like pure magic, but knowing its strengths and weaknesses is the key to getting great results every time. Let's dig into some of the things people wonder about most.
Can AI Handle Any Photo?
One of the first things everyone asks is whether these AI tools can clean up any photo you throw at them. The short answer is: almost. These tools are at their best when the thing you want to erase is sitting on a simple or predictable background. Think clear blue skies, a patch of grass, or a plain wall. The AI can easily read the surrounding texture and replicate it for a perfect, seamless fill.
Where they can sometimes get tripped up is with super busy or complex backgrounds—like a dense floral wallpaper or a packed crowd of people. The AI has to make a very educated guess about what's hiding behind the object you're removing. The more chaotic the scene, the harder that guess becomes.
Will It Ruin My Image Quality?
This is a totally fair question. Thankfully, with a good, modern tool, the answer is a firm no. Today's AI editors are built to protect your photo's integrity. They aren't just smudging pixels around; they're generating a brand-new patch that matches the original lighting, texture, and resolution of the area around it.
The secret to keeping your quality high is twofold: always start with a high-resolution image to give the AI more data to work with, and save your final edit in a lossless format like PNG or a maximum-quality JPG. This stops file compression from accidentally undoing all your careful work.
What's The Difference Between Object Removal and Background Removal?
It's easy to get these two mixed up since they sound so similar, but they do completely different jobs.
-
Object Removal: Think of this as your precision tool. You’re targeting one specific element inside the image—a stray person, an ugly sign, a piece of trash—and the AI intelligently fills in just that spot, leaving everything else untouched.
-
Background Removal: This is a much broader move. It isolates the main subject of your photo and gets rid of everything else, usually replacing the background with a transparent layer or a solid color.
It's like the difference between using a tiny scalpel for detailed surgery and a wide paintbrush to cover a whole wall. Both are useful, but you have to pick the right one for the task. Learning to master object removal gives you the power to perfect the scene you've already captured, creating a much cleaner and more focused final image.
Ready to create flawless product images in just a few seconds? Give ProdShot a try and see for yourself how easy it is to remove distractions and make your photos pop. Get started for free at ProdShot.net.