
Knowing how to rotate an image in Photoshop goes way beyond a simple fix. It's a core skill that separates amateur work from professional-quality visuals. Sure, the quickest way is using the Image > Image Rotation menu for a fast 90 or 180-degree flip, which is great for correcting a photo you took with your phone held sideways.
But what about the subtle stuff?
Why Mastering Image Rotation in Photoshop Matters
Think about it: a slightly crooked horizon or a product shot that's just a little off-kilter can make an entire design look sloppy. For anyone running an e-commerce store on Shopify or Amazon, that small detail can be the difference between a customer trusting your brand or clicking away. A polished, perfectly aligned photo feels professional; a crooked one looks like it was uploaded in a hurry.
This guide breaks down all the essential techniques, from the instant, canvas-wide fixes to the more precise, non-destructive tricks the pros use every day. This flowchart can help you quickly decide which tool is right for your specific situation.

As you can see, the first question is always whether you're adjusting the entire image or just one small part of it. That single choice points you to the best tool for the job.
The Impact on E-commerce and Design
A wonky image has been a silent conversion killer since online shopping first began. In fact, some studies suggest that as many as 68% of shoppers might ditch their cart if product photos look tilted or unprofessional. That's a huge number, and it highlights a simple truth.
For an online store, every product photo is a digital handshake with a potential customer. A crooked image is like a weak handshake—it undermines confidence before you even start talking about the product.
This fundamental skill feeds into so many other design tasks, like creating engaging social media graphics. Whether you're making a quick adjustment or carefully aligning elements in a complex collage, using the right rotation method will save you headaches and elevate your final result.
An Overview of Photoshop Rotation Techniques
To help you choose the right tool at a glance, here’s a quick breakdown of the main rotation methods in Photoshop. Each has its own strengths, depending on whether you need speed, precision, or to protect your original image data.
Photoshop Rotation Methods at a Glance
| Method | Best For | Speed | Precision | Destructive? |
|---|---|---|---|---|
| Image Rotation | Quick 90/180° flips of the whole canvas. | Fastest | Low | Yes |
| Free Transform | Rotating individual layers or selections. | Fast | High | Can be (unless using Smart Objects) |
| Crop/Straighten | Fixing crooked horizons or photos. | Fast | Medium | Yes |
| Ruler Tool | Precise straightening based on an edge in the image. | Medium | Highest | Yes |
| Camera Raw Filter | Non-destructive straightening with tons of control. | Medium | High | No |
| Batch/Actions | Applying the same rotation to many images at once. | Varies | Varies | Depends on the Action |
This table should give you a solid starting point. Now, let’s dive into the specifics of how and when to use each one. We’ll cover everything you’ll need, including:
- Quick Canvas Rotation: For those instant, whole-image orientation fixes.
- Free Transform and Rulers: Giving you pinpoint control over individual layers without touching the rest of your project.
- Crop and Straighten: A brilliant two-in-one tool that levels your image and trims it at the same time. It’s a lifesaver for wonky landscapes.
- Batch Processing: A massive time-saver that lets you automate rotations across hundreds of images with Photoshop Actions. Perfect for big e-commerce catalogs.
Quick Fixes for Full Canvas Rotation
We’ve all been there. You import a photo from your camera or phone, and it’s lying on its side. For those moments, you need a fast, no-fuss fix. This is where Photoshop’s Image > Image Rotation menu comes in.
This is your go-to for rotating the entire canvas, not just a single layer. It's a big, blunt tool designed for speed. When you use it, you're making a permanent, or 'destructive,' change to the actual pixels of your image file.
The options couldn't be simpler:
- 180°: Flips your image completely upside down.
- 90° Clockwise: Gives the canvas a quarter-turn to the right.
- 90° Counter Clockwise: Gives it a quarter-turn to the left.
Think of it like physically turning a printed photograph on your desk. Everything gets turned. This has been a fundamental part of Photoshop for decades, saving countless hours of manual work. It's the most straightforward way to get your images facing the right way up before you even start editing.
Flipping the Canvas for Quick Corrections
Tucked away in the same Image > Image Rotation menu are two incredibly useful commands: Flip Canvas Horizontal and Flip Canvas Vertical. They might seem basic, but they solve some very common problems.
Flipping the canvas horizontally is the absolute fastest way to fix that annoying "mirrored selfie" effect. You know, when a t-shirt logo or a sign in the background is backward. One click, and it’s fixed.
This is also a fantastic creative trick. If you've been staring at a design for hours, flip it horizontally. This little trick gives you a fresh perspective, instantly revealing compositional flaws or imbalances you’d otherwise miss.
For e-commerce sellers, consistency is everything. Making sure all your products are oriented the same way is crucial for a professional storefront. Our guide on using a Shopify photo editor offers more tips on maintaining that polished look across your listings.
When to Use Full Canvas Rotation
Because these commands are destructive, timing is everything. You want to use them right at the beginning of your workflow before you get into any detailed edits.
Here are the perfect times to use it:
- Initial Photo Prep: You've just dumped a folder of new photos onto your computer, and a bunch of them are sideways. Before you touch anything else—cropping, color, retouching—use
Image Rotationto get them all upright. - Correcting Mirrored Images: That front-facing camera strikes again. A quick horizontal flip is all you need to make reversed text or logos readable.
- Creative Symmetry: Artists and designers use flipping all the time. It’s perfect for creating symmetrical patterns or characters. You can perfect one half of your design and simply mirror it to complete the piece.
Once you’ve made these big-picture adjustments, it’s best to switch to non-destructive methods for any finer rotations you need to make on individual layers.
Precision Control with Free Transform and Rulers

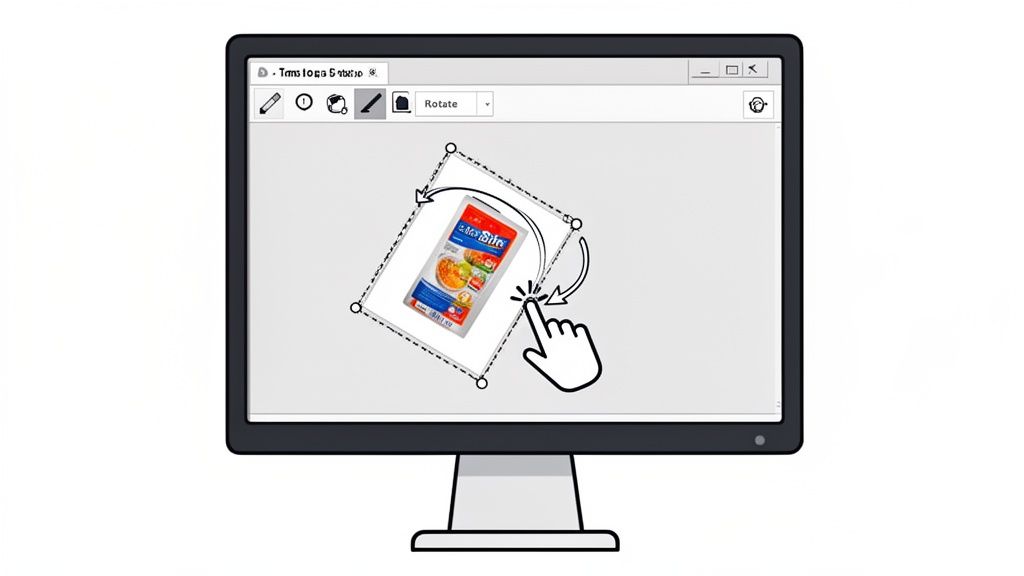
Sometimes, rotating the entire canvas is overkill. You just need to tweak one specific element—a logo, a product, or a person—without messing up the rest of the image. This is where Free Transform becomes your best friend.
To bring it up, just select the layer you want to work on and hit Cmd+T on a Mac or Ctrl+T on Windows. A bounding box will pop up around your object, ready for action.
Hover your cursor just outside one of the corners until you see a curved, double-sided arrow. Now, you can click and drag to rotate the layer by eye. It’s perfect for those quick, intuitive adjustments, like fixing a slightly tilted logo on a product or giving an element in a collage a more dynamic feel.
Fine-Tuning Your Rotations
When "looks about right" isn't good enough, you need precision. Look at the options bar at the top of the screen while in Free Transform. You'll see a field for the rotation angle.
If you know a product needs a tiny 1.5-degree counter-clockwise turn to be perfect, you can just type -1.5 into the angle box and hit Enter. This kind of numerical control is a lifesaver for keeping a whole series of product shots perfectly consistent.
You can even change the pivot point. By default, everything rotates around its center. But see that little circular icon in the middle of the bounding box? That's the reference point. You can drag it anywhere you want.
Think about animating a clock hand. You’d drag the reference point to the base of the hand so it pivots realistically instead of just spinning in the middle.
The E-commerce Game Changer: The Ruler Tool
For anyone selling products online, getting the alignment just right isn't just a detail—it's a necessity. The Ruler Tool gives you an amazing workflow for straightening items with incredible accuracy.
First, find the Ruler Tool. It's tucked away under the Eyedropper Tool in the main toolbar; just click and hold the Eyedropper to see it.
Now, find an edge on your product that should be perfectly straight, like the bottom of a bottle or the lid of a box. Click and drag the Ruler Tool along that crooked edge.
With that line drawn, look up at the options bar and click Straighten Layer.
Instantly, Photoshop rotates only that layer to make the line you drew perfectly horizontal. Your product snaps into perfect alignment. It's way more accurate than trying to eyeball it.
Pro Tip: Before you do any of this, convert your layer to a Smart Object. Just right-click the layer and choose 'Convert to Smart Object.' This makes your transforms non-destructive. You can rotate, resize, and rotate it again without any loss of image quality. It's a professional's habit that gives you total editing freedom.
By combining the hands-on feel of Free Transform with the pinpoint accuracy of the Ruler Tool—all while protected by Smart Objects—you have complete control to rotate an image in Photoshop. This is the exact workflow pros use to get polished, consistent results, especially when building a trustworthy storefront on platforms like Shopify or Amazon.
Ever find yourself trying to fix a slightly crooked product shot? We’ve all been there. You get back from a shoot, and the horizon is tilted just enough to be annoying. The classic fix is a two-step process: rotate the layer, then grab the Crop Tool to trim the mess.
But what if you could do both at the same time?
There's a much more elegant way to handle this, and it’s built right into Photoshop's Crop Tool. It's a feature I use constantly to straighten and crop an image in one single, fluid motion. It’s perfect for leveling out product photos on a table or fixing those slightly skewed landscape shots. This method is all about combining speed and precision.

The Magic of the Straighten Tool
First, bring up the Crop Tool by hitting C on your keyboard. Take a look at the options bar that appears at the top of your screen. See that little icon that looks like a spirit level? That's the Straighten tool, and it's about to become your best friend.
Click it, and your cursor will change. Now, find a line in your photo that's supposed to be perfectly straight—like the edge of a tabletop or a building. Click and drag your cursor along that crooked line.
The moment you let go of the mouse button, Photoshop instantly rotates the entire canvas to make that line perfectly horizontal. At the same time, it draws a crop box that neatly trims away the empty, tilted corners. Just hit Enter to apply the crop, and you're done.
This one-two punch of straightening and cropping is a massive time-saver. It turns a clunky, multi-step process into a simple, two-second fix. I use it all the time when I have a batch of photos suffering from the same camera tilt.
Let Content-Aware Fill the Gaps
Rotating an image often leaves you with empty, transparent triangles in the corners. You could meticulously fill them in with the Clone Stamp tool, but who has time for that?
Here’s where another bit of Photoshop magic comes in. While the Crop Tool is still active, look back at that top options bar. You’ll see a checkbox for Content-Aware.
Check this box before you finalize the crop. When you hit Enter, Photoshop's AI gets to work, intelligently analyzing the surrounding pixels to fill in those empty corners for you. It’s unbelievably good at extending backgrounds like skies, grass, or simple studio backdrops, saving you from a ton of tedious manual editing.
Once your photos are perfectly straight, the next step is making sure they're sized correctly for every platform. It's always a good idea to brush up on the ideal aspect ratio for social media to make sure your work looks its best everywhere.
Advanced Rotation and Batch Processing Workflows
Fixing one crooked photo is easy. But what about a hundred? If you’ve ever stared down a folder full of product shots from a slightly tilted camera, you know that rotating them one by one is a soul-crushing task. This is where moving beyond single-image fixes and into high-volume workflows isn't just a "nice to have"—it's a necessity.
One of the most powerful, and often overlooked, tools for this is the Lens Correction filter inside Adobe Camera Raw (ACR). If you shoot in RAW, this should be your first stop. You can fix perspective issues and straighten horizons before the image even opens in Photoshop, all non-destructively.

Think of it as a preemptive strike. It saves you from dozens of individual rotations later and keeps your image quality at its absolute peak. It’s the clean, professional approach.
Automating Rotations with Photoshop Actions
Now for the real magic: batch processing with Actions. Let’s say you have a batch of product photos all suffering from the same slight 1.2-degree camera tilt. This is a perfect scenario for an Action.
An Action is just a recorded sequence of steps that you can "play back" on any other image. It’s like creating your own one-click tool.
Here’s how you’d build one for that pesky 1.2-degree rotation:
- First, open one of the images you need to fix.
- Bring up the Actions panel by going to
Window > Actions. - Click the "Create new action" icon (it looks like a little plus sign). Give it a memorable name, like "Rotate 1.2 Degrees CW."
- Hit Record. From now on, Photoshop is recording every click you make.
- Use the shortcut Ctrl+T (or Cmd+T on Mac) to bring up Free Transform. In the angle box up in the options bar, type in 1.2 and hit Enter.
- Finally, click the square "Stop" icon in the Actions panel to stop recording.
That's it. You've just created a custom command to perform that exact rotation instantly.
Applying Your Action to an Entire Folder
With your shiny new Action ready to go, you can unleash it on a whole folder of images using the Batch command. Navigate to File > Automate > Batch.
In the pop-up window, just select the Action you just made, choose the source folder with all your crooked images, and pick a destination for the corrected files.
Click "OK," and watch Photoshop do all the heavy lifting. It will open, rotate, and save every single image for you.
This process is an absolute lifesaver for e-commerce. Photoshop's tools have evolved massively for this kind of work—basic 90° rotations were once clumsy, but Free Transform changed the game for professional workflows. With the rise of mobile commerce, it’s no surprise that 82% of Amazon sellers have called image editing their biggest time sink. Many spend hours on rotations alone for large catalogs.
This automated approach guarantees every product photo is perfectly and consistently aligned, which is critical for building a trustworthy online store. Once you've batch-rotated your images, you can use our image resizer to get them perfectly sized for your storefront.
Common Questions About Rotating Images in Photoshop
As you get more comfortable in Photoshop, you’ll inevitably run into a few common rotation roadblocks. It happens to everyone. Let's clear up some of the most frequent sticking points and get you rotating your images like a pro, minus the usual frustration.
How Do I Rotate an Image in Photoshop Without Losing Quality?
This is easily the most important question, especially when you care about professional results. The secret lies in using a Smart Object.
Before you do anything else, find your layer in the Layers panel, right-click on it, and select "Convert to Smart Object." Think of this as putting your image inside a protective container.
Now, when you use Free Transform (Ctrl+T or Cmd+T) to rotate it, Photoshop applies the change non-destructively. The original pixels are perfectly preserved inside the Smart Object. You can rotate, resize, and rotate again as many times as you need without your image turning into a blurry mess. It's the standard workflow for any serious editing.
Why Does My Whole Picture Rotate When I Only Want to Rotate One Part?
I see this one all the time. This happens when you go to the top menu and use Image > Image Rotation. That command is built to rotate the entire canvas—the whole project, background and all.
To rotate just a single object, you need to get it onto its own layer first. Grab a selection tool (the Object Selection Tool is fantastic for this) and draw a quick outline around the element you want to adjust.
With the selection active, just press Ctrl+J (or Cmd+J on a Mac). This handy shortcut "jumps" your selected object onto a brand-new layer. Now, you can click on that new layer, hit Ctrl+T for Free Transform, and rotate it independently without disturbing anything else. For more advanced workflows, especially for e-commerce, checking out professional product photo editing services can show you how the pros handle complex compositions.
Can I Rotate Multiple Layers at the Same Time?
Absolutely, and it's a massive time-saver. Head over to your Layers panel. Hold down the Ctrl key (Cmd on a Mac) and simply click on every layer you want to rotate together.
Once they're all highlighted, hit Ctrl+T for Free Transform. You'll see a single bounding box wrap around all of your selected layers. Now you can rotate or resize them as one unified group, and they’ll maintain their exact positions relative to each other. It’s perfect for adjusting complex groups, like a logo made of several parts.
Imagine trying to adjust a logo made of several text and shape layers. Rotating each one individually would be a nightmare for alignment. Selecting them all and transforming them together ensures the entire design stays perfectly intact.
What Is the Quickest Way to Straighten a Crooked Photo?
For a fast, dead-on-accurate fix, the Straighten Tool is your best friend. It’s actually hidden inside the Crop Tool, so press C to get started.
With the Crop Tool active, look at the options bar at the top of your screen. You’ll see an icon that looks like a tiny spirit level—that's the Straighten Tool. Click it.
Now, find a line in your photo that should be perfectly straight, either vertically or horizontally. Think horizons, building edges, or tabletops. Click and drag your mouse along that crooked line. As soon as you let go, Photoshop instantly rotates the image to make that line perfectly level and even suggests a crop to trim away the tilted corners. Just hit Enter, and you're done. It's the most intuitive way to fix a wonky shot.
At ProdShot, we believe creating stunning product images shouldn't be a chore. Our AI-powered tool takes your simple smartphone pictures and automatically transforms them into professional, studio-quality photos ready for any marketplace. Get started for free at https://prodshot.net.