
You finish a shoot on your iPhone, scroll through the camera roll, and think the hard part is done. The fit is right. The styling works. The model looks confident. Then you upload the photos to your store and the problems start.
One image loads slowly. Another gets cropped at the knees in the collection grid. A third looks softer than it did on your phone. That gap between a good photo and a usable product image is where a lot of plus size fashion model photography falls apart.
For small apparel stores, this problem gets worse because smartphone shooting is common. An underserved angle in plus size fashion model photography is adapting professional techniques for small retailers using phones, and one report says plus size fashion listings on Amazon and Etsy see 25% lower conversion rates when poor mobile images distort body proportions (Angel Heart Boutique). If you're also trying to improve ecommerce conversion rate, image prep is one of the first places to tighten up.
If you just need a fast utility before you upload, an iPhone image resizer can save time. But resizing only works well when you know why you're resizing in the first place.
Your iPhone Photos Are Great But Are They E-Commerce Ready
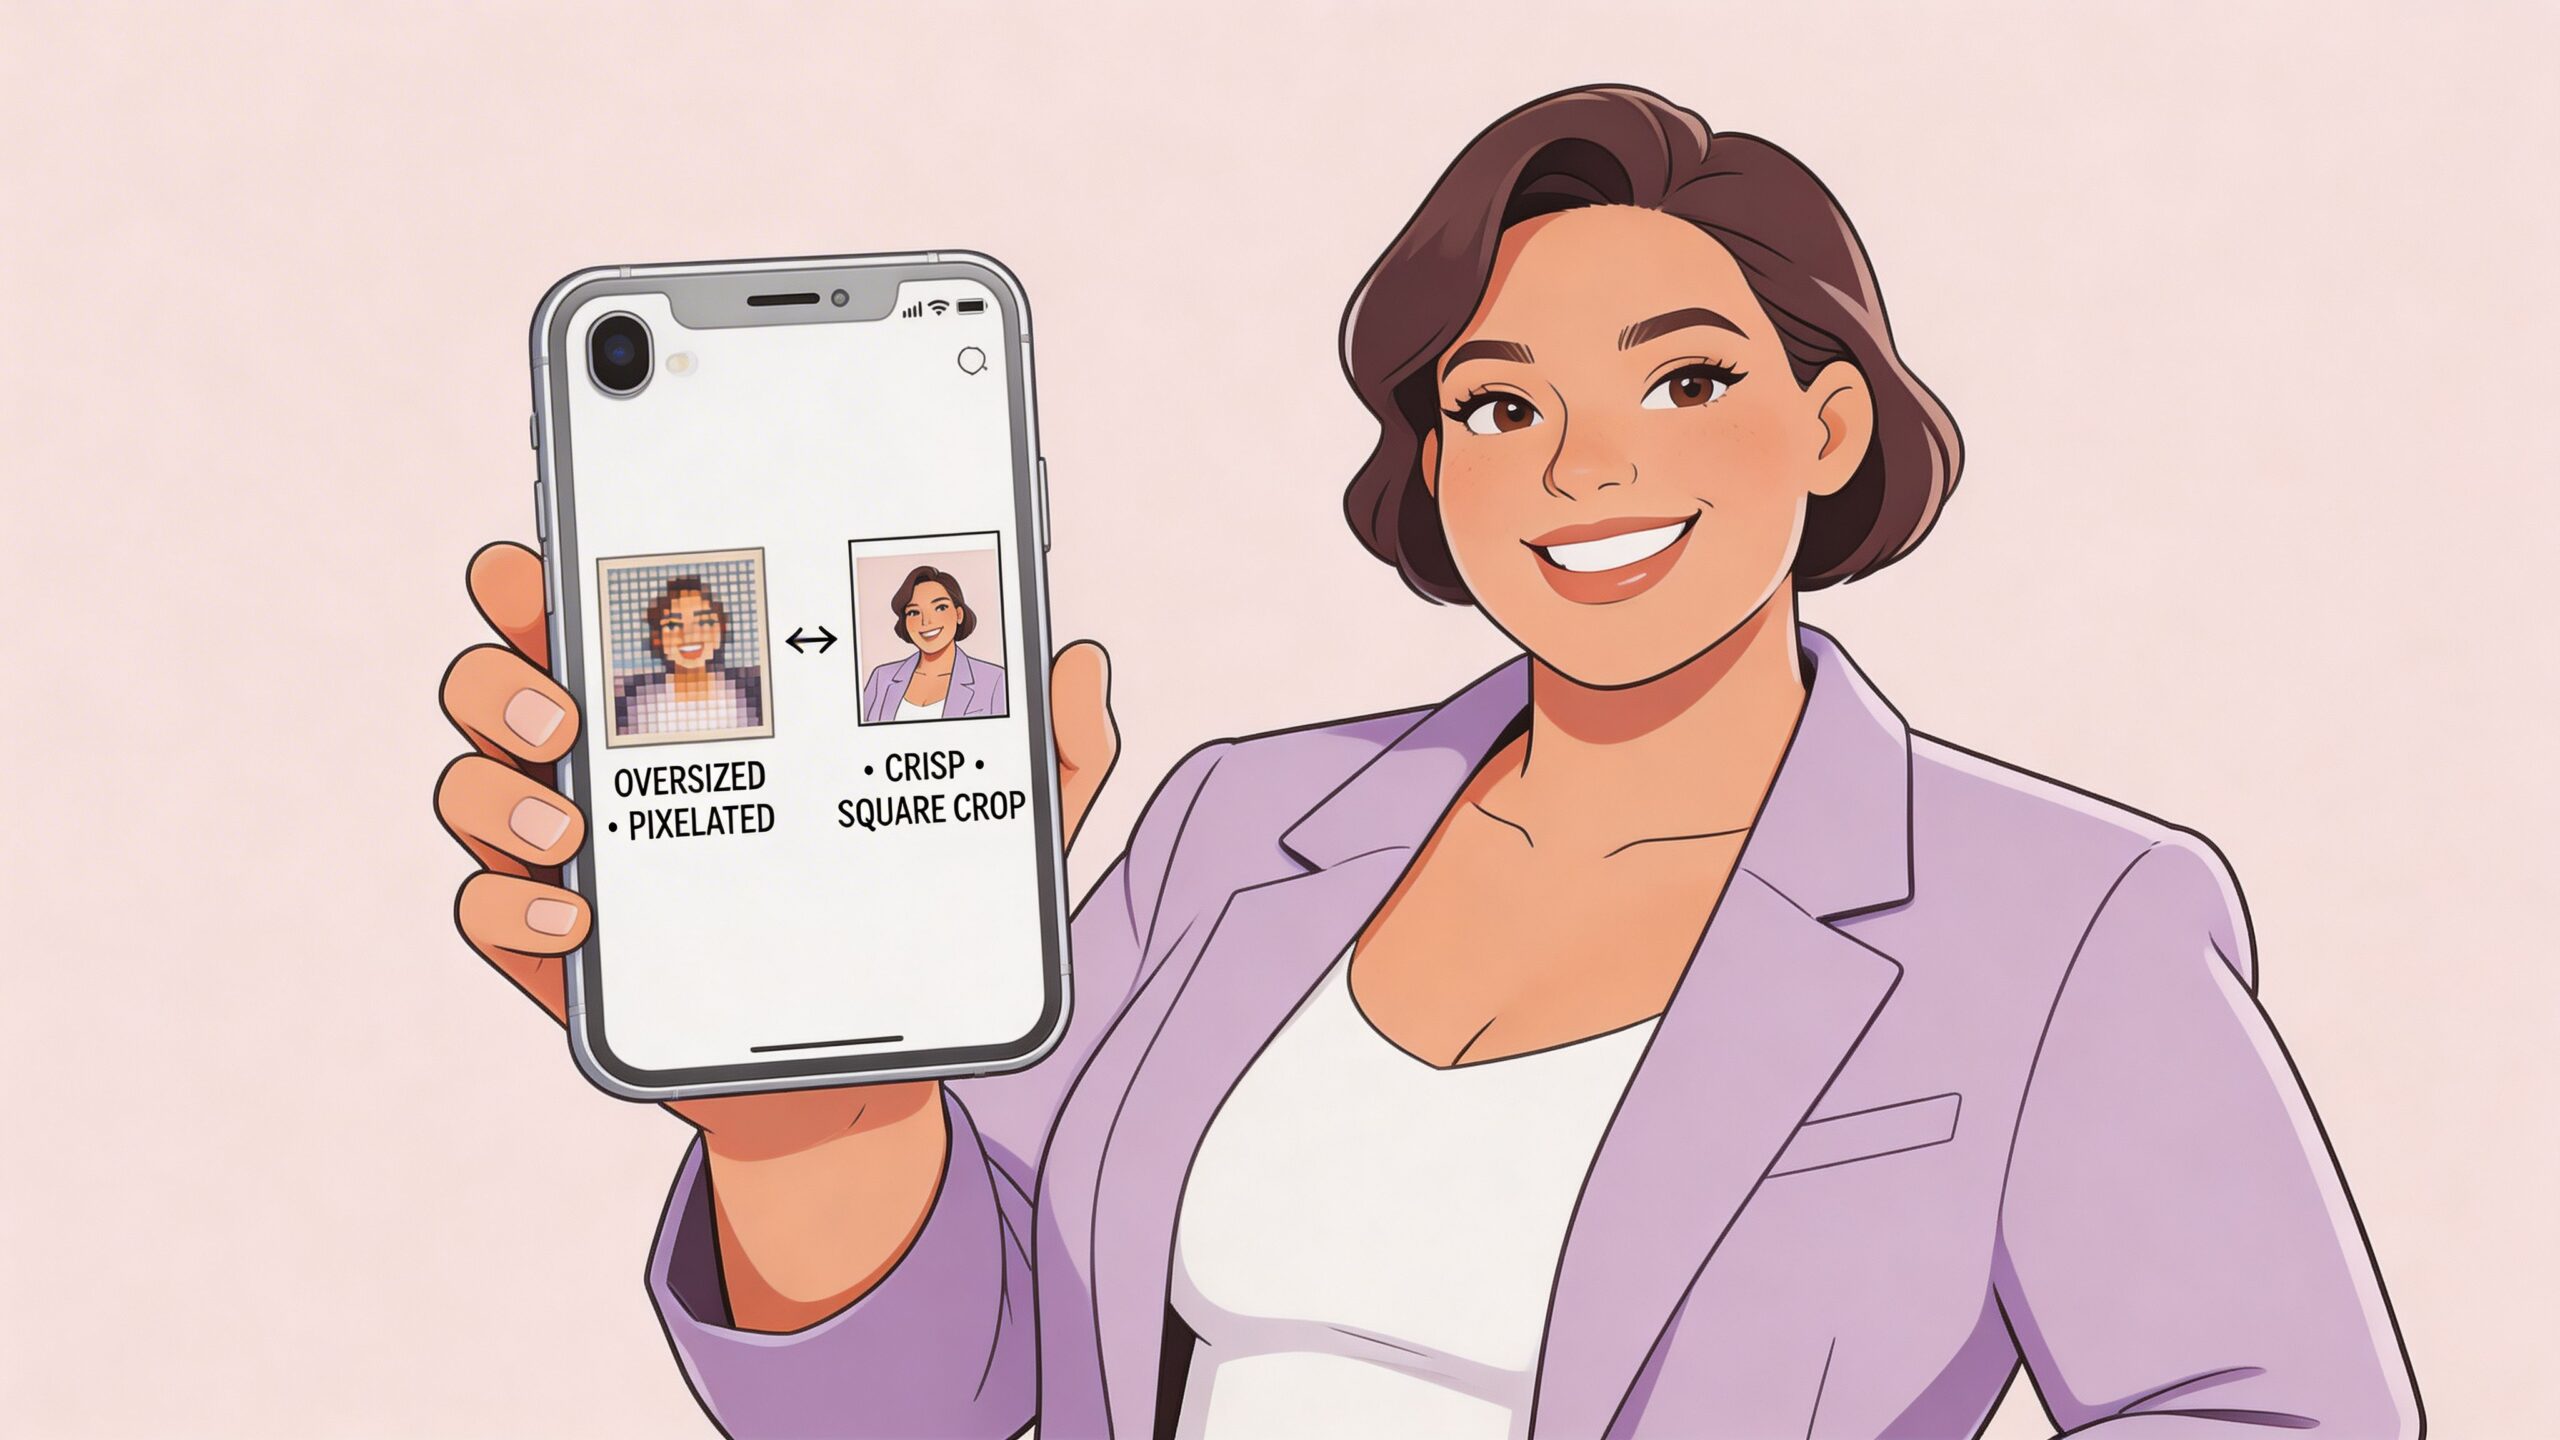
A phone photo can look excellent in the Photos app and still fail on a product page.
That usually happens for three reasons. The crop doesn't match the platform. The file is bigger than it needs to be. Or the framing flatters the outfit in-camera but breaks when the storefront turns it into a square thumbnail.

In plus size fashion model photography, resizing matters even more because proportion is part of the selling job. A bad crop can make a wide-leg pant look bulky for the wrong reason. A stretched image can throw off how a blazer sits through the waist and hip. A compressed file can wipe out fabric texture, which matters when the customer can't touch the garment.
What sellers usually get wrong
Most stores don't have a photography team. They have a phone, good daylight, and a rush to get new arrivals live.
The common mistake isn't taking bad pictures. It's uploading originals without making platform-specific versions. The same image usually shouldn't serve as your Shopify hero image, your Instagram story asset, and your marketplace listing photo.
A strong clothing photo isn't automatically a strong store photo. Store photos need the right crop, weight, and framing for the page where they appear.
What ready for e-commerce actually means
For apparel, an e-commerce-ready image usually does four jobs at once:
- Shows fit clearly so the customer can read shape and drape.
- Loads cleanly without bloated file size slowing the page.
- Crops consistently across collection pages and product grids.
- Stays sharp after upload instead of turning muddy on zoom or mobile.
That sounds technical, but on iPhone it's mostly workflow. Once you choose the right resizing method for the use case, the rest gets easier.
Comparing iPhone Image Resizing Methods
Some iPhone methods are good for one fast edit. Others are built for volume. The best choice depends on whether you're fixing one cover image or processing a full apparel drop.

For plus size fashion model photography, I separate resizing tools by control. If I only need to change framing, the built-in Photos app is enough. If I need repeatable output for many images, I use Shortcuts. If I need compression control, I use a dedicated editor.
Professional portfolio standards also matter on the capture side. Agency-style submissions often require high-resolution images at 300 dpi, and commercial benchmarks often reference US size 18 with proportions such as 45-34-48 inches, which is why precision matters when resizing and exporting for castings or commercial use (FixThePhoto).
iPhone Photo Resizing Method Comparison
| Method | Best For | Speed | Batch Processing |
|---|---|---|---|
| Photos App | Cropping one product or model photo for square or vertical layouts | Fast | No |
| Mail or Messages trick | Quick one-off file shrinking before sending to a teammate or client | Very fast | No |
| Third-party photo editors | Compression control, file export options, more exact output | Medium | Sometimes |
| Shortcuts App | Full shoot resizing for store uploads and repeated workflows | Fast after setup | Yes |
Which one works best in practice
- Photos App works when the image is already good and only the framing is wrong.
- Mail or Messages is a shortcut, not a workflow. It's fine for a quick handoff, weak for store prep.
- Third-party editors help when file size is the actual issue, not just aspect ratio.
- Shortcuts is the best time-saver for a seller who uploads new apparel regularly.
Practical rule: If you're touching more than a handful of images from one shoot, build a repeatable process instead of editing manually.
Simple Resizing with the Photos App
The Photos app doesn't give you deep export controls, but it's still the fastest fix for many product-image problems.
For apparel, the key benefit is aspect ratio control. That's what keeps a product grid from cutting off hems, sleeves, or headroom in inconsistent ways.
Best use case
Use Photos when you need to prepare a single image for:
- Shopify collection grids that look cleaner with square framing
- A homepage banner crop where you want extra negative space
- Instagram feed posts where composition matters more than strict file control
How to do it cleanly
- Open the image in Photos and tap Edit.
- Tap the crop icon.
- Choose an aspect ratio like Square or a vertical format that fits your destination.
- Reframe with the garment in mind, not just the face. Keep the hem, sleeve shape, and waistline readable.
- Save, then check the result in a grid view before uploading.
The reason this works for plus size fashion model photography is simple. You can protect proportion by controlling what stays in frame. If a dress is meant to show line through the hip and leg, don't crop it just because the face is centered nicely.
What it doesn't do well
Photos is weak when you need exact export dimensions or when your problem is file weight rather than framing. It also gets tedious fast if you have a whole drop to prep.
Crop for the garment first. A flattering model image that hides key fit details won't help the customer choose confidently.
Batch Resize Multiple Images with Shortcuts
When you're working through a full shoot, manual editing is a time sink. Shortcuts is the only built-in iPhone tool that feels close to a production workflow.

Plus size fashion imagery has expanded beyond product pages. A 2022 Boston University study found that 144 plus-size models collectively amassed 51 million followers and 190,000 posts, which shows how much visual content brands and creators are handling across channels (Boston University).
A simple shortcut setup
Build one shortcut that does the same thing every time:
- Select Photos and allow multiple selection.
- Add Resize Image.
- Set a fixed width for your store workflow.
- Add Save to Photo Album so resized images land in a separate album.
- Name it something obvious like “Shop Upload Resize.”
The main win is consistency. If every front-facing product shot gets processed the same way, your storefront feels tighter.
How I’d use it by image type
- Main product images get one consistent width so zoom and grid display stay even.
- Social crops usually need a separate shortcut because story and feed layouts behave differently.
- Marketplace batches deserve their own album so you don't upload the wrong version by accident.
A quick visual walkthrough helps if you haven't built a shortcut before:
Trade-offs you should expect
Shortcuts is efficient, but it isn't smart about composition. It resizes. It doesn't decide whether a wrap dress needs more space at the sides or whether a cropped jacket should sit higher in frame.
That's why I treat it as a finishing system, not a replacement for good selection. Pick the right source images first. Then batch process the keepers.
The E-Commerce Pro Move AI Model Photography
Resizing fixes output. It doesn't solve the hardest part of plus size fashion model photography, which is often getting the right images in the first place.
For many stores, the bottleneck isn't editing. It's finding suitable models, scheduling a shoot, and turning products around fast enough when inventory changes. That's a real issue in plus-size apparel because representation is still thin in high fashion. After a high point in 2022, plus-size runway representation dropped to 0.8% of looks for Spring/Summer 2025, while plus-size apparel accounts for about 20% of the global women's clothing market (Fashion Dive).

That gap leaves online sellers doing more visual work themselves. In practice, AI model photography is useful because it reduces two separate headaches at once:
- Model sourcing gets easier
- Output can be generated in store-ready formats faster
If you want to see what that looks like for apparel, this AI fashion model photo shoot for clothing apparel approach is a practical example of why many sellers are moving away from a fully manual workflow.
The biggest time saver isn't shaving a few seconds off export. It's removing the need to rebuild a whole shoot every time a product changes.
Sizing Your Photos for Shopify Amazon and Etsy
Every platform has a different sweet spot, so the right resize depends on where the image will live.
For Shopify, I usually think in terms of a clean square main image and consistency across the catalog. If you want a sharper workflow for that platform, a dedicated Shopify photo editor helps keep product pages visually uniform.
Amazon is stricter about clarity. Etsy is more flexible, but loose standards can create a messy storefront if you don't impose your own rules.
The practical checklist
- Shopify: Aim for 2048 x 2048 pixels for square product images when you want strong zoom and a clean catalog layout.
- Amazon: Use at least 1000 pixels on the longest side, with 1600 pixels recommended.
- Etsy: Images around 2000 pixels wide usually work well for listing quality and flexibility.
For flattering plus size portraits, photographers recommend a focal length of 50mm or longer, and on iPhone the closest workaround is to avoid the ultra-wide lens, step back slightly, and crop in later (Zoner). That's one of the few times cropping improves both composition and proportion.
Troubleshooting Common Resizing Problems
Most resizing issues come down to starting with the wrong source image.
Blurry after resizing
You probably enlarged a file that was already too small, or you cropped too aggressively before export. Start from the highest-quality original in your camera roll.
File is still too large
Changing dimensions doesn't always cut enough weight. Export format matters too. If the image still feels heavy, use an editor with stronger compression controls and compare the result before uploading.
Colors look flat
This usually shows up after multiple saves or app handoffs. Check the image on your actual product page, not just in Photos, because storefront rendering can expose dullness you won't notice on the phone.
The model looks wider than in real life
That often starts at capture, not export. Ultra-wide shooting exaggerates shape in ways that are unhelpful for apparel fit. Crop from a more neutral perspective instead of trying to rescue a distorted frame later.
If you're tired of juggling raw phone photos, manual crops, and delayed model shoots, ProdShot is a practical shortcut. It’s especially useful for plus size apparel stores that need consistent fashion model photography but don't want the hassle of finding the right models and scheduling them on a tight timeline. You can start with simple product images, generate polished model visuals, and get marketplace-ready results much faster.